
How to add a signature in Outlook? [Top Outlook Integrations with Appy Pie Connect]

Table of Content
- What is Microsoft Outlook?
- How to add a signature in Microsoft Outlook?
- How to edit or delete your signature in Outlook
- Top 10 Microsoft Outlook integrations with Appy Pie Connect
- Microsoft Outlook to Gmail Integration
- Microsoft Outlook to Salesforce Integration
- Microsoft Outlook to Trello Integration
- Microsoft Outlook to Slack Integration
- Microsoft Outlook to Asana Integration
- Microsoft Outlook to Google Sheets Integration
- Microsoft Outlook to HubSpot Integration
- Microsoft Outlook to Dropbox Integration
- Microsoft Outlook to Zoom Integration
- Microsoft Outlook to QuickBooks Integration
- Conclusion
What is Microsoft Outlook?
Microsoft Outlook is a popular email client and personal information manager developed by Microsoft. It is a part of the Microsoft Office suite and can be used for managing emails, calendars, contacts, and tasks. With Microsoft Outlook, users can send and receive emails, schedule meetings and appointments, create to-do lists, and organize their contacts.
It also offers a range of features such as spam filtering, search functionality, and integration with other Microsoft Office applications. Microsoft Outlook is available for desktop and mobile devices and is widely used by individuals and organizations of all sizes.
How to add a signature in Microsoft Outlook?
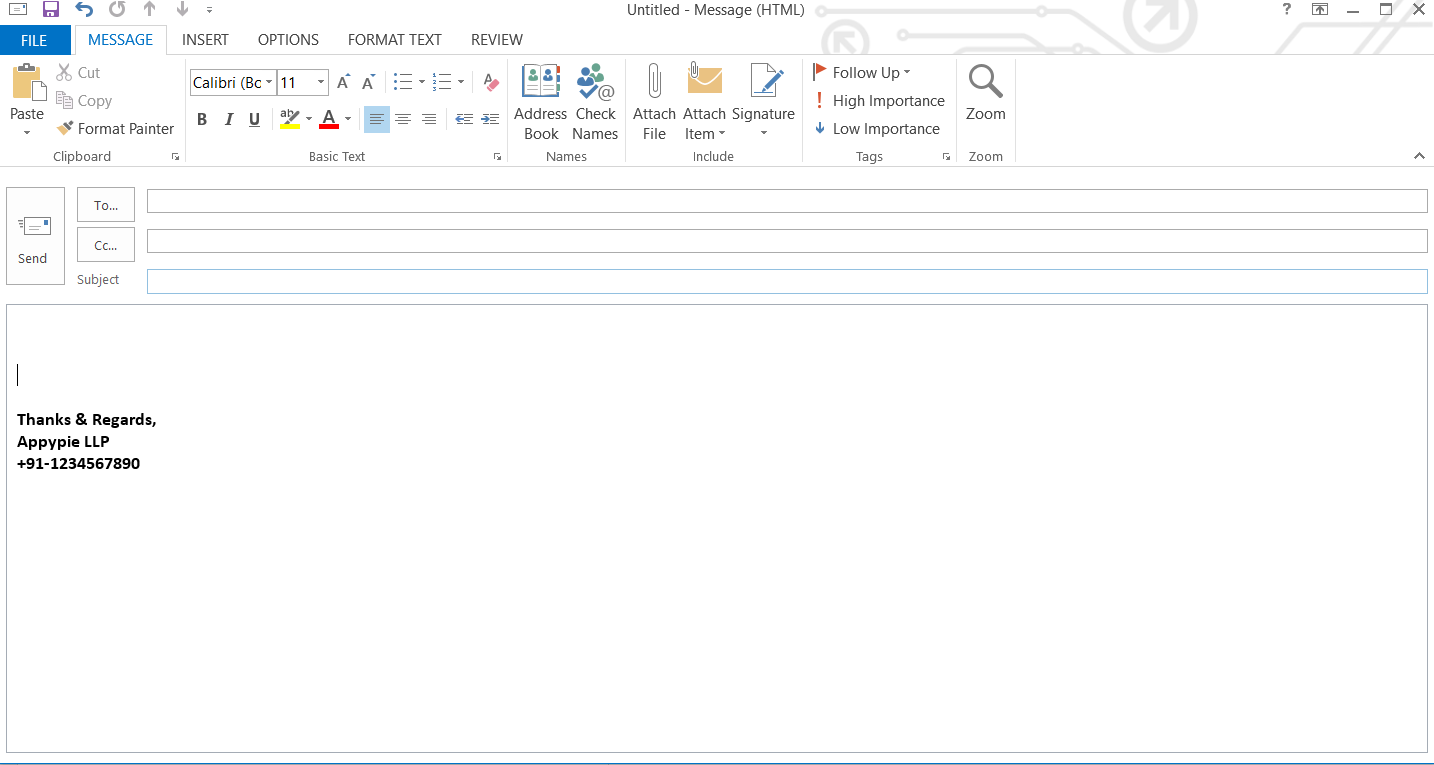
In the modern world, electronic communication has become a staple of everyday life. And when it comes to professional communication, having a signature is important to provide a professional touch to your emails.
An email signature for Outlook not only makes your emails look more professional, but it also provides an easy way for your recipients to get in touch with you. If you use Microsoft Outlook for your email communication, adding a signature is an easy process that only takes a few simple steps.
In this article, we will guide you through how to add a signature in Outlook, step-by-step.- Step 1: Firstly, open the Microsoft Outlook application on your computer. Once you have opened the application, click on the "File" tab in the top left corner of the screen.
- Step 2: Once you click on the "File" tab, a drop-down menu will appear. From this menu, select the "Options" tab. You will find this option at the bottom of the drop-down menu.
- Step 3: On the left-hand side of the screen, you will see a list of options. Click on the "Mail" option, which is typically the third option from the top. This will take you to the mail settings.
- Step 4: Within the Mail settings section, you will find an option labeled "Signatures." Click on this option to access the signature settings.
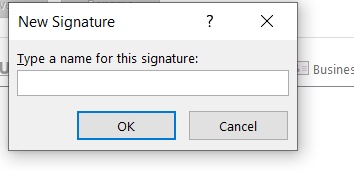
- Step 5: If you do not already have a signature, click on the "New" button to create a new one. Once you have clicked the "New" button, you will be prompted to give your signature a name. This can be anything that you choose, but it is helpful to name it something descriptive that will help you remember its contents.
- Step 6: Next, you will need to add content to your signature. This can include your name, job title, company name, phone number, email address, website, and any other information that you think is relevant. You can add your information by typing it into the text box, or you can copy and paste it from another source.
- Step 7: Once you have added the content to your signature, you can format it to make it more visually appealing. You can change the font, font size, font color, and add bold or italicized text. Additionally, you can add images or logos to your signature by clicking the "Picture" icon and selecting an image from your computer.
- Step 8: Once you have created your signature and are happy with the way it looks, you will need to set it as your default signature. To do this, select your signature from the "Choose default signature" drop-down menu under "New messages" and "Replies/forwards." This will set your new signature as the default for all future emails.
- Step 9: Finally, it's important to test your new signature to ensure that it looks the way you intended. You can do this by sending a test email to yourself or a colleague and checking the signature in the recipient's inbox.


By following these nine simple steps, you can add a professional-looking signature to your Microsoft Outlook emails. Adding a signature is a great way to add a personal touch to your messages and make it easy for people to get in touch with you. It only takes a few minutes to set up and can make a big difference in how your emails are received.
How to edit or delete your signature in Outlook
To edit or delete your signature in Outlook, you can follow these steps:
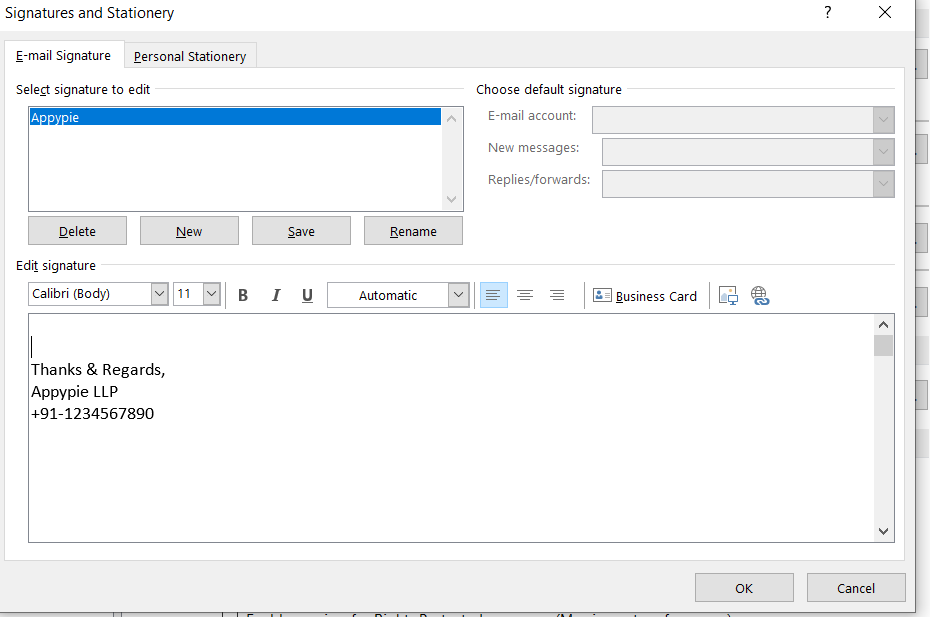
- Open the Signatures and Stationery window: You can do this by clicking on File > Options > Mail and then clicking on the Signatures button. Alternatively, you can press and hold the CTRL key on your keyboard while clicking on the Signatures button to open the folder where Outlook stores all the signature files.
- Select the signature you want to edit or delete: In the Signatures and Stationery window, you can see a list of your existing signatures. You can select the one you want to edit or delete from the drop-down menu under Select signature to edit.
- Edit or delete your signature: If you want to edit your signature, you can make your changes in the Edit signature box. You can change the font, color, size, alignment, and formatting of your signature. You can also add images, links, or logos to your signature. If you want to delete your signature, you can click on the Delete button next to the Select signature to edit drop-down menu. You will need to confirm your action by clicking Yes in the pop-up window.
- Save your changes: After editing or deleting your signature, you need to click on the Save button at the bottom of the Signatures and Stationery window. Then, click OK to close the window and apply your changes.
Top 10 Microsoft Outlook integrations with Appy Pie Connect
Microsoft Outlook is a widely used email client and personal information manager that can be used for managing emails, calendars, and contacts. However, it can be time-consuming to manage all of these tasks manually. This is where Appy Pie Connect comes in - it’s an integration platform that connects different applications and automates workflows. In this blog post, we’ll explore the top 10 Microsoft Outlook integrations with Appy Pie Connect that can help you save time and streamline your work.
Microsoft Outlook to Gmail Integration
Microsoft Outlook to Salesforce Integration
Microsoft Outlook to Trello Integration
Microsoft Outlook to Slack Integration
Microsoft Outlook to Asana Integration
Microsoft Outlook to Google Sheets Integration
Microsoft Outlook to HubSpot Integration
Microsoft Outlook to Dropbox Integration
Microsoft Outlook to Zoom Integration
Microsoft Outlook to QuickBooks Integration
Gmail is one of the most popular email clients in the world. With Appy Pie Connect, you can automatically create a new email in Gmail when a new email is received in Microsoft Outlook. This integration can save you a lot of time if you use both email clients.
Salesforce is a popular customer relationship management (CRM) tool that helps businesses manage their customer interactions. With Appy Pie Connect, you can automatically create a new Salesforce lead or contact when a new email is received in Microsoft Outlook. This integration can help you keep your customer information up to date without manual data entry.
Trello is a popular project management tool that helps teams manage their projects and tasks. With Appy Pie Connect, you can automatically create a new Trello card when a new email is received in Microsoft Outlook. This integration can help you keep your tasks organized without manual data entry.
Slack is a popular team communication tool that helps teams collaborate and communicate more efficiently. With Appy Pie Connect, you can automatically send a Slack message when a new email is received in Microsoft Outlook. This integration can help you keep your team informed without having to switch between different apps.
Asana is a popular project management tool that helps teams manage their projects and tasks. With Appy Pie Connect, you can automatically create a new Asana task when a new email is received in Microsoft Outlook. This integration can help you keep your tasks organized without manual data entry.
Google Sheets is a popular spreadsheet tool that helps teams collaborate and analyze data. With Appy Pie Connect, you can automatically create a new row in Google Sheets when a new email is received in Microsoft Outlook. This integration can help you keep your data up to date without manual data entry.
HubSpot is a popular CRM and marketing automation tool that helps businesses manage their customer interactions and marketing campaigns. With Appy Pie Connect, you can automatically create a new contact or deal in HubSpot when a new email is received in Microsoft Outlook. This integration can help you keep your customer information up to date without manual data entry.
Dropbox is a popular file storage and sharing tool that helps teams collaborate and share files. With Appy Pie Connect, you can automatically save email attachments to Dropbox when a new email is received in Microsoft Outlook. This integration can help you keep your files organized without manual data entry.
Zoom is a popular video conferencing tool that helps teams collaborate and communicate remotely. With Appy Pie Connect, you can automatically create a Zoom meeting when a new event is added to the Microsoft Outlook calendar. This integration can help you save time and streamline your virtual meetings.
QuickBooks is a popular accounting tool that helps businesses manage their finances. With Appy Pie Connect, you can automatically create a new invoice or receipt in QuickBooks when a new email is received in Microsoft Outlook. This integration can help you keep your finances organized without manual data entry.
Conclusion?
Appy Pie Connect offers a wide range of Microsoft Outlook integrations that can help you streamline your work and save time. By automating your workflows, you can focus on more important tasks and be more productive.
Related Articles
- How to make money on TikTok?
- 11 Best Creative Poster Ideas in 2024
- Easy Screenshot Tricks for iPhone, iPad & MacBook Users
- Why your Small Business needs a website?
- How to Create Your Own App & Website like Omegle
- What is Image Inpainting? A Comprehensive Guide to Reviving Your Photos
- Top 10 Web Design Certifications to Elevate Your Career
- Personalizing for Perfection: A Guide to Handling 20 Types of Customers
- 13 Most Common Graphic Design Mistakes to Avoid
- What is A Smart Contract in NFTs?