
Super Easy Ways to Enhance the Image Quality

Just imagine it’s a Friday night. After office, you went out with your friends to enjoy the evening. You clicked a lot of photos to further upload on your Insta profile. But guess what! When you started uploading them, you found that the best photos are either blurred or highly darken.
Table of Contents
You can easily enhance photo quality of every image you clicked. All you need is image enhancement software and a few easy editing tricks to turn every photo into a perfect click. Every photo is worth a thousand words. So, next time before deleting photos from your gallery, think to retouch them.
What does it mean to Enhance the Image Quality?

Do you notice the difference between these two images? The left one is a little unclear and pixelated while the right one is crisp and clear. The image on the left is our original photo. We used some of the editing tools of our free online photo editor to enhance the quality of image. And finally, we got the image on right side. Perfect to upload on social media platforms! To enhance the image quality, you need to balance color exposure, remove unwanted elements, adjust white balance, and experiment with every other editing tool to beautify the image. Enhancing the quality lets your photo to express the true emotions and feelings behind it. Nowadays, the quality of professional cameras and smartphones is good enough to click amazing photos. Then also, from beginners to professionals, everyone relies on photo editing software to give their photos a final retouch. Editing software, these days offer innumerable opportunities to experiment with new aesthetics and beautify every photo.
Why to Enhance Quality of Image?
Suppose one fine evening you are sitting with your family. Rather than going through your phone gallery, you are flipping the pages of that thick scrapbook of your childhood photos. While looking at every photo, you realized either the photos were clicked in too dark or they are losing their original colors. Auch! I know those blurred photos hurt. We are living in an era where you can actually enhance quality of old photo. Adjusting the contrast and applying various filters can certainly improve photo quality. And this is possible with the numerous editing tools offered by photo editing software. Photo editing software are not only meant for personal use. Every business has understood the importance of editing photos. Let us take an example of the homepage of Zomato’s website. In this image, we primarily notice the blurred background and the white bold text. The blurred background contains an image of some delicious dish. The text over it is purposely kept white (for clear visibility). “Zomato” is particularly written in bold. This whole combination is just perfect for the homepage of Zomato’s website. People would hardly take a few seconds to identify that Zomato is related to mouth-watering food.
The combination of blurred background and white bold text in this image has become possible after the photo editing tools did their magic.
From retouching the product photographs to resizing the images for social posts, businesses are taking help of various photo editing software. Thus, editing or retouching the image to enhance quality has certainly become necessity for every business.
In this image, we primarily notice the blurred background and the white bold text. The blurred background contains an image of some delicious dish. The text over it is purposely kept white (for clear visibility). “Zomato” is particularly written in bold. This whole combination is just perfect for the homepage of Zomato’s website. People would hardly take a few seconds to identify that Zomato is related to mouth-watering food.
The combination of blurred background and white bold text in this image has become possible after the photo editing tools did their magic.
From retouching the product photographs to resizing the images for social posts, businesses are taking help of various photo editing software. Thus, editing or retouching the image to enhance quality has certainly become necessity for every business. Super Easy Ways to Enhance the Image Quality
Science suggests that the human brain responds to and processes images faster than any other type of data. And if the images are beautiful and attractive, it is like the cherry on the cake. To help you edit and enhance the images as per your requirements, let us take you through some super easy tips and tricks.
Before adding any effect to your image, make sure to zoom in for more precision and accuracy. Zoom out the image to the original position when you are done with editing.
Correct the exposure of the whole image or selected key areas if the visibility of your image is affected. You can either darken or lighten the image to adjust lighting effects.
Adjust the brightness of the image if you think some of the elements in the image are not visible properly. To avoid making areas overly bright, you can balance the results by adjusting contrast at the same time.
Auto enhance photos and correct light and colors if adjusting the light manually is a difficult task for you. AI-based photo editing software can auto-detect the lighting issues and fix them accordingly.
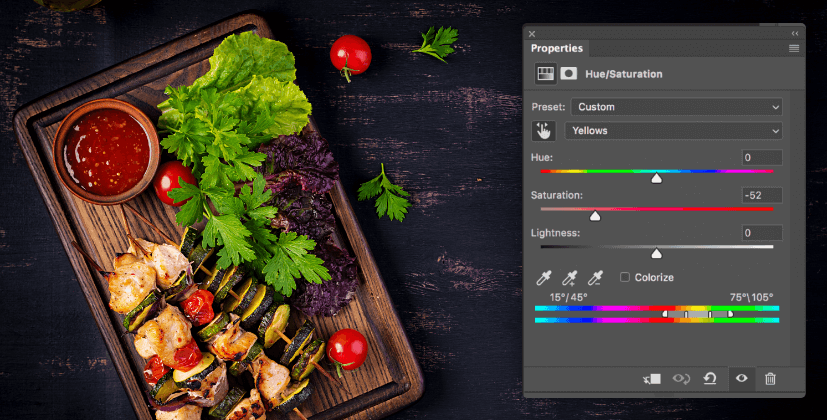
Balance the overall tone of the average-looking shot, if you want to make it unique with a pop of the right colors. Adjust the hue (actual colors), saturation (amount of grey), and luminance (ratio of black and white) of a photo.
Alter the white balance, if removing unrealistic colors casts from your image make it more beautiful. You can correct the white balance either by decreasing or increasing it.
Modify contrast, if you are thinking to add a dramatic touch to your photo. Enhance the image by adjusting the light and dark colors with the help of a contrast slider.
To learn more about correcting the colors to enhance the image, you must watch this video:(Above video is a part of a more elaborate course on Academy by Appy Pie. To access the complete course, please Click Here, or continue reading below.)Adjust contrast only if you can maintain the highlights and dimension in an image. Too much contrast can result in blowing out impressive details of your image.
Retouch the images if you are willing to enhance the minute details in your image. By using the brush tool, get rid of blemishes, highlights, and unwanted shadows. You can easily enhance details in your image in this way.
Fix the colors in your photograph, if you consider them too fainted or dull. Adjust the saturation (color intensity) and vibrance level to make the dull colors pop up and make the image vibrant.
Balance saturation only if you are sure that you won’t mess it up. Too much-saturated colors are bolder while too less give a faded effect. Make sure you correctly balance saturation levels, otherwise you end up with an almost neon-colored image.
Apply vignette effect, if your image needs a stylish look. Adjusting the vignette effect in your image lets you highlight the main element of image. You can accompany the vignette with roundness and feather settings to soften or harden the edges.
Revise sharpness if you want to create the illusion of detail in your image. Tweak and edit the sharpness to achieve the specific level of sharpness without turning it into a hazy image. To make the effect more natural, you can tune the radius and threshold along with sharpness.
Add clarity to your photos if you want to bring life to your dull photos. By adjusting the clarity and dehaze sliders, you can enhance the image by bringing out the hidden details and colors.
Rectify the noise setting if your image is affected by the low light or high ISO setting of your camera. By balancing the ISO, you can minimalize the effect of digital noise in your image and enhance it.
Remove the unwanted areas if you want to enhance your photo to the fullest. To wipe off the extra elements, crop the image carefully.
Adjust the crooked horizon (in landscape photo) or straighten the photo, if you know how to use crop tool with precision. You can start with as large an image as possible, to get pro with the crop tool. Take care of image quality and resolution while cropping the image.
To lean more about crop tool, you can take help of this video:
(Above video is a part of a more elaborate course on Academy by Appy Pie. To access the complete course, please Click Here, or continue reading below.)Borrow pixels to remove unwanted elements from your image if the crop tool fails to erase them off. You can copy a certain area of your image and paste it to the unwanted element you want to hide. This will help in deleting and replacing the element in a natural way.
Enhance the resolution of an image if the size or scale of the image is affected while using the cropping tool. By increasing the number of pixels, you can scale up the image. Thereby, the image will look clearer.
Utilize a lens correction tool if your image needs the removal of chromatic aberration. Chromatic aberration or the colored fringes that sometimes appear at the edges of any element of an image can distort your complete image.
Auto tune your image by applying filters if you wanted to give a particular feel like warmth, coolness, etc. to your photo. Enhance photos online by applying pre-defined filters offered by image editor software. Filters can certainly add a special and artistic effect to your photos.
Decrease the size of your photo if it is slightly blurred or not of good quality. Resizing the image would certainly increase the sharpness and remove the blurriness from your image. This trick can be used to enhance the pixelated image also. To get more clarity of how to reduce size of image, watch this video.
(Above video is a part of a more elaborate course on Academy by Appy Pie. To access the complete course, please Click Here, or continue reading below.)Conceal the image post-production if your image particularly includes the humans in it. Wrinkles, dark circles, skin dark spots, etc. be removed from the image by concealing them with editing tools.
Remove the red eye from an image if the flash of the camera is reflected in the eye. You just need to zoom in and color the pixels with black or dark and grey to remove red-eye. Or you can use the red-eye reduction tool to automatically remove the defect.
Pick up a correct aspect ratio if you are going to upload the photo online. Every screen size has a different aspect ratio, and you need to set it up accordingly otherwise your image will not be clearly visible. You might either loose edges or header or footer if you choose the wrong aspect ratio.
Frame the image if you want to embellish your image a little more. You can choose simple or decorative, single line, colored, etc. depending on the style and mood you want to set up for your image.
Add a watermark to your image if you want to avoid your image being copied without receiving the credit. You can either add a text, image, brand logo, or any other thing to one of the corners of your image and turn it into the watermark.

Summing
To enhance the image quality, you don’t have to hire any professional designers. You can do it on your own by choosing the online photo editor software offered by Appy Pie. It provides a number of tools to enhance the quality of your image. It is jam-packed software with a user-friendly interface and easy-to-use editing tools.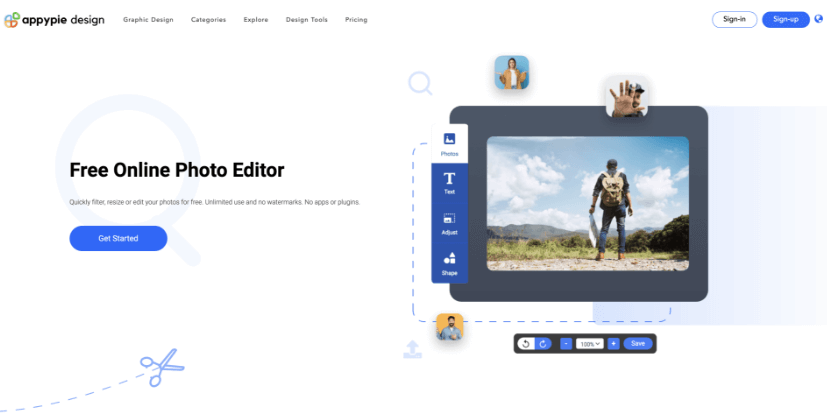 Start experimenting with your blurry and unclear photo now!
 Related Articles
- Evolution of Language Models: From Rules-Based Models to LLMs
- How to Integrate Google Calendar with Notion Using Appy Pie Automate
- 25 eCommerce Business Ideas to Start in 2024
- 220 Blur Photo Captions for Your Instagram
- How to Track Student Attendance in Microsoft Teams?
- 5 Best Email + CRM Integrations You Should Use in 2024
- Personality Development: 11 ways for self-improvement & personal growth.
- How Google Assistant Can Make People’s Life Easier
- Purple Color: Significance, Symbolism, and Shades
- Why Should You Choose Appy Pie’s White Label Reseller Program for iPaaS?