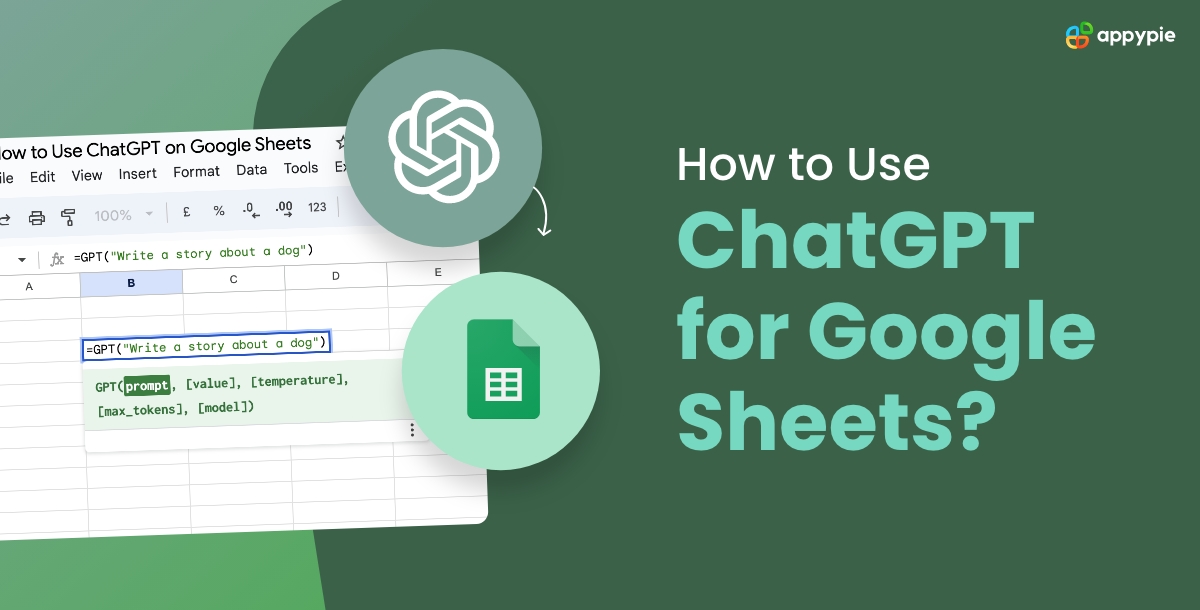

Google Sheets, with its user-friendly interface and collaborative features, has become a staple for professionals and enthusiasts involved in data management. However, even with its extensive capabilities, users may find certain tasks challenging, especially those without a strong background in data analytics or coding. Enter ChatGPT for Google Sheets, an innovative solution that bridges the gap between complex data-related tasks and users' varying skill levels.
Conversely, ChatGPT, which utilizes OpenAI's GPT-3.5, adds a new level of interaction to using Google Sheets. Based on user input, this natural language processing model comprehends and produces text that is similar to that of a human. This makes data analysis and management more approachable for a wider range of users by enabling them to interact with Google Sheets in natural language rather than through the use of conventional commands or formulas.
Using ChatGPT in Google Sheets acts as a democratizing force, empowering users with diverse backgrounds and skill sets to harness the full potential of data management. Its integration ensures that the benefits of Google Sheets are not limited to those proficient in traditional spreadsheet commands, opening the doors to a more inclusive and collaborative data-driven environment. In this blog, you will learn how to use ChatGPT for google sheets.
How to Integrate ChatGPT with Google Sheets Using Appy Pie Connect?
Integrating ChatGPT with Google Sheets using Appy Pie Connect can be a useful way to automate data entry or generate reports based on the information generated by ChatGPT. Here's a step-by-step guide on how to set up this integration:
Step 1: Go to Appy Pie Connect
Visit the Appy Pie Connect website.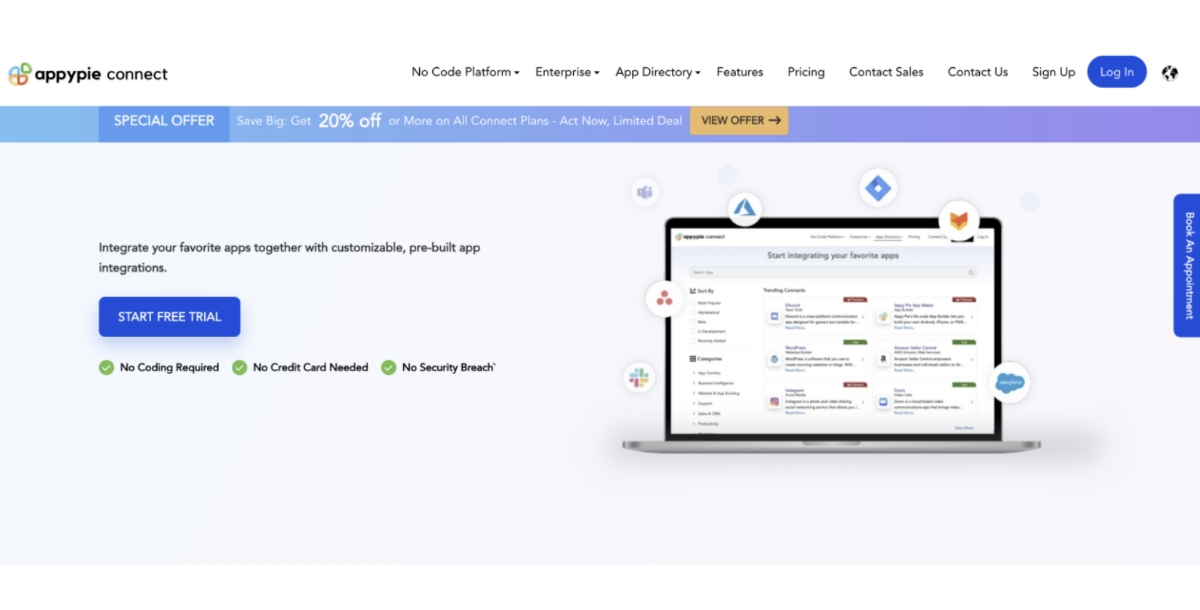
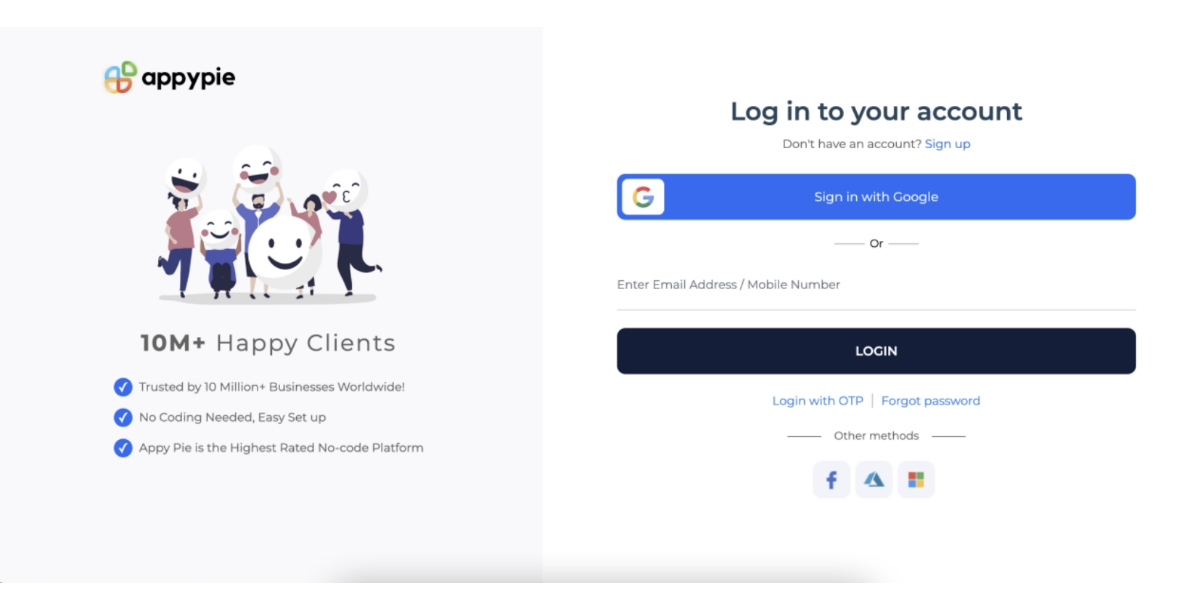
Step 2: Log in to Your Account
Click on the "Log in" button placed in the upper corner if you already have an account. If not, sign up for an account.
Step 3: Access Appy Pie Connect Dashboard
Enter your Appy Pie Connect credentials to access the Appy Pie Connect dashboard. Upon successful login, you will be redirected to Appy Pie Connect’s dashboard.
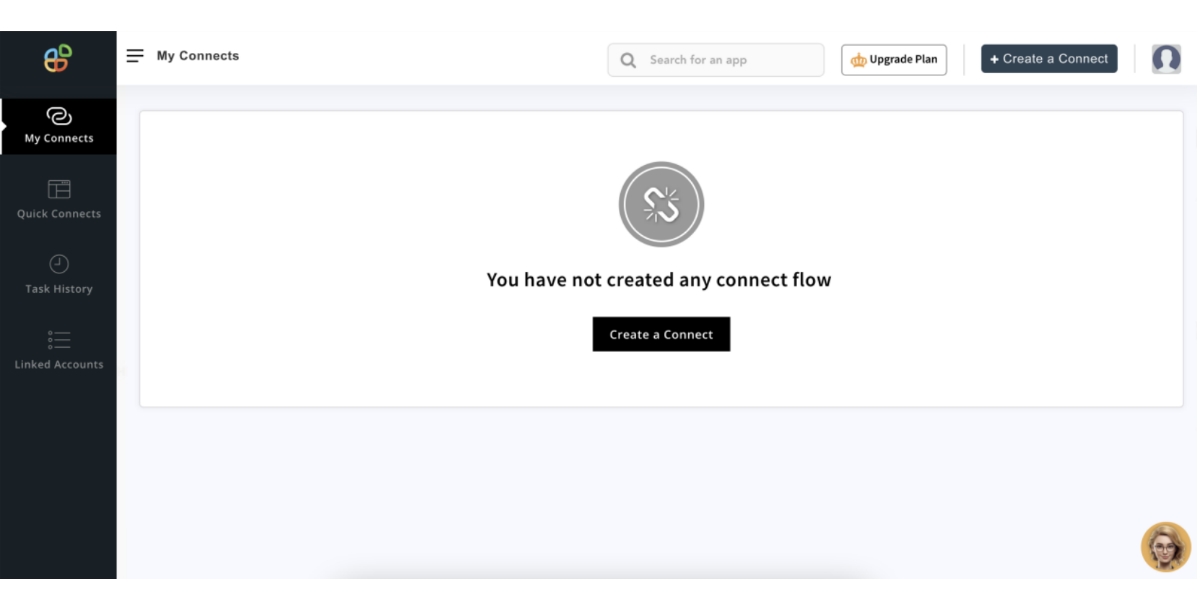
Step 4: Create a New Workflow
Click on "Create a Connect" to start setting up your workflow.

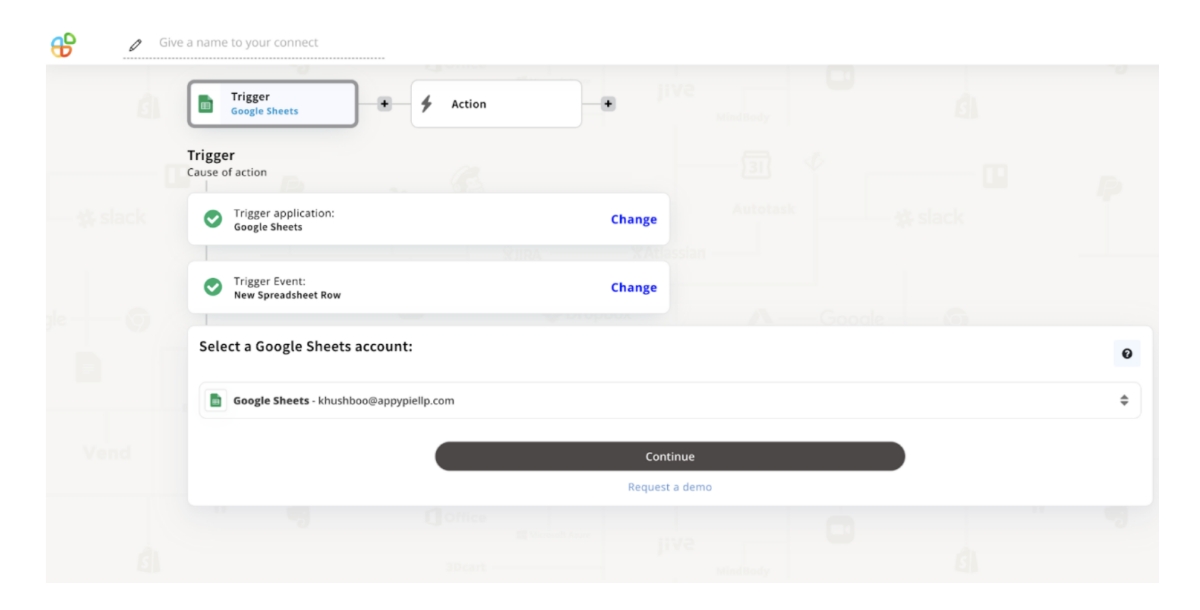
Step 5: Set Up Google Sheets as a Trigger
In the search bar, type "Google Sheets" and select it as the Trigger App.
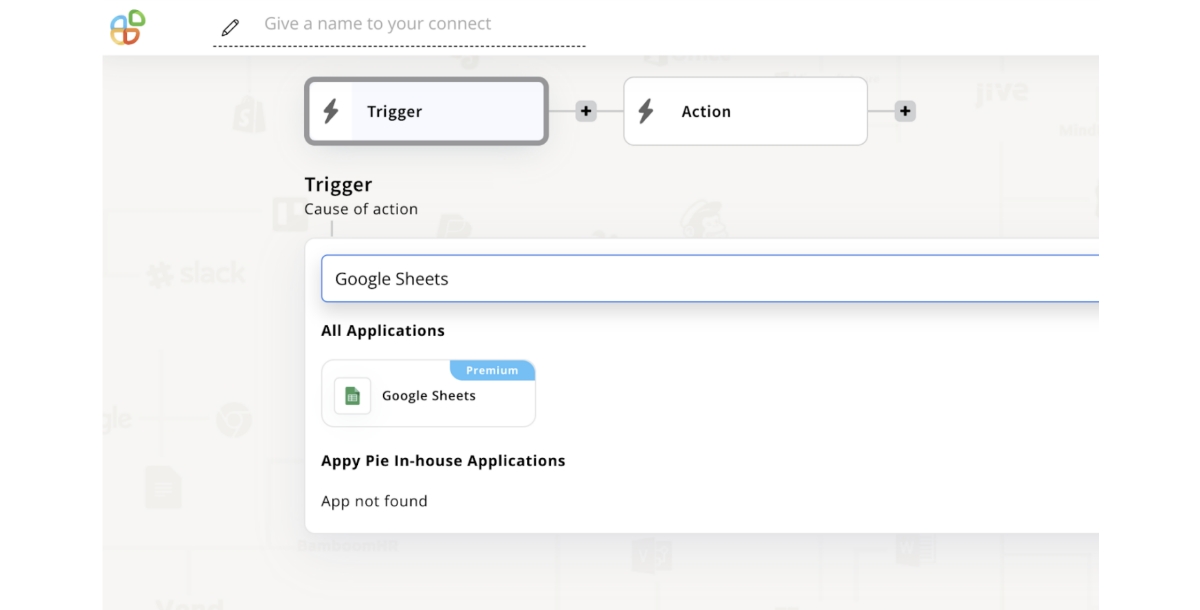
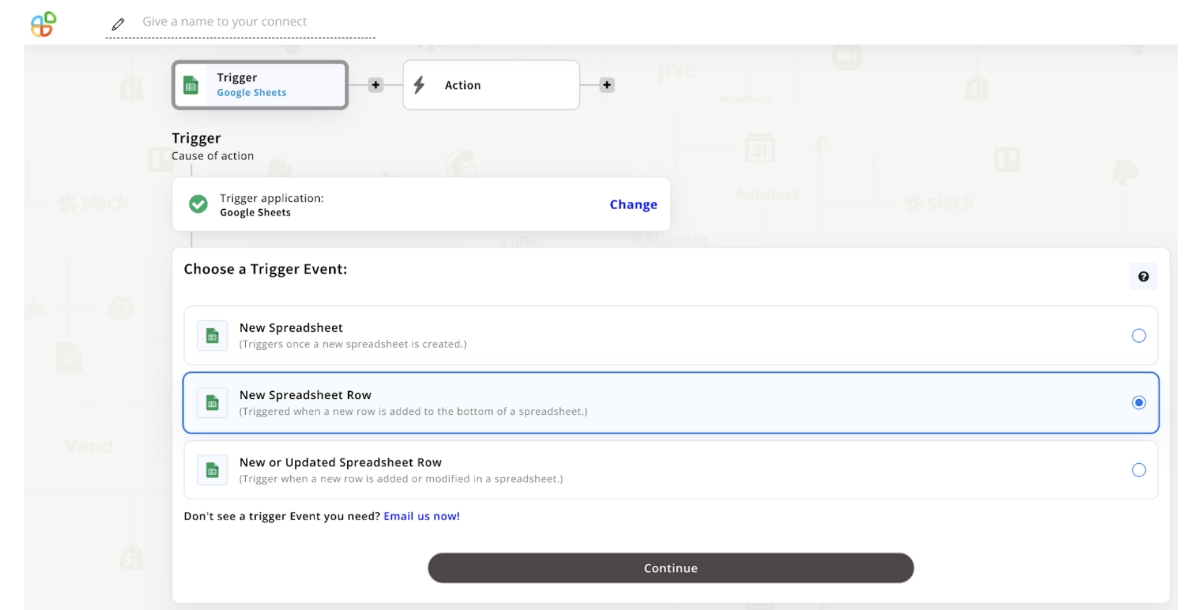
Step 6: Choose Trigger Event
Choose the trigger event that will initiate the integration, such as "New Spreadsheet Row." Then click on "Continue."
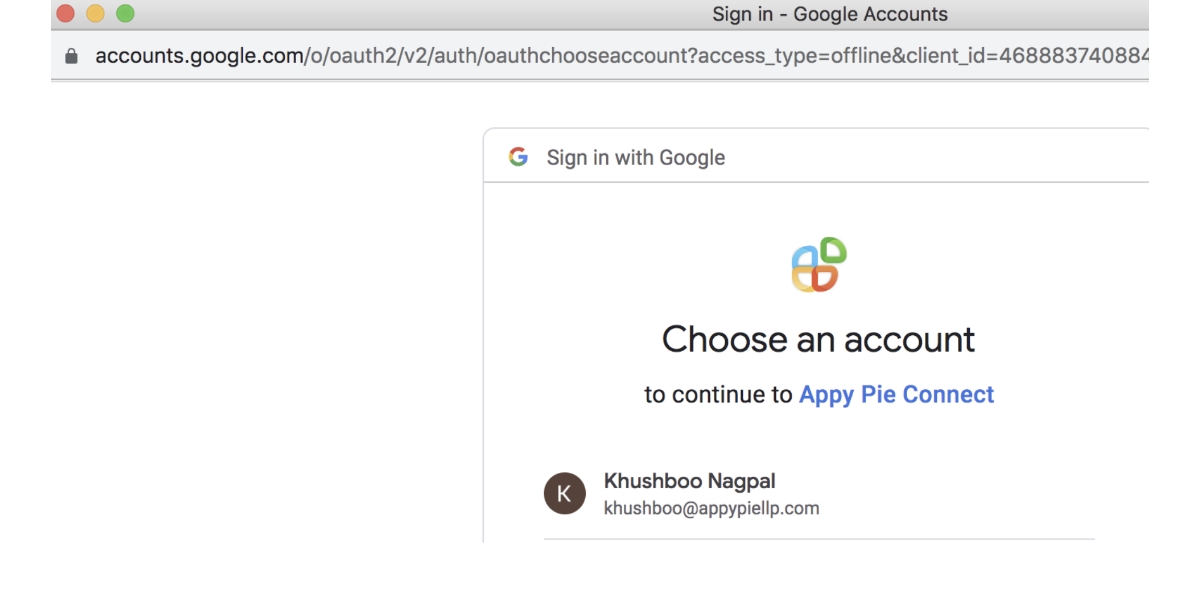
Step 7: Sign in with Google
Click on "Sign in with Google" to connect your Google account.

Step 8: Link Your Google Account
Select "Choose an Account" to link your Google account.
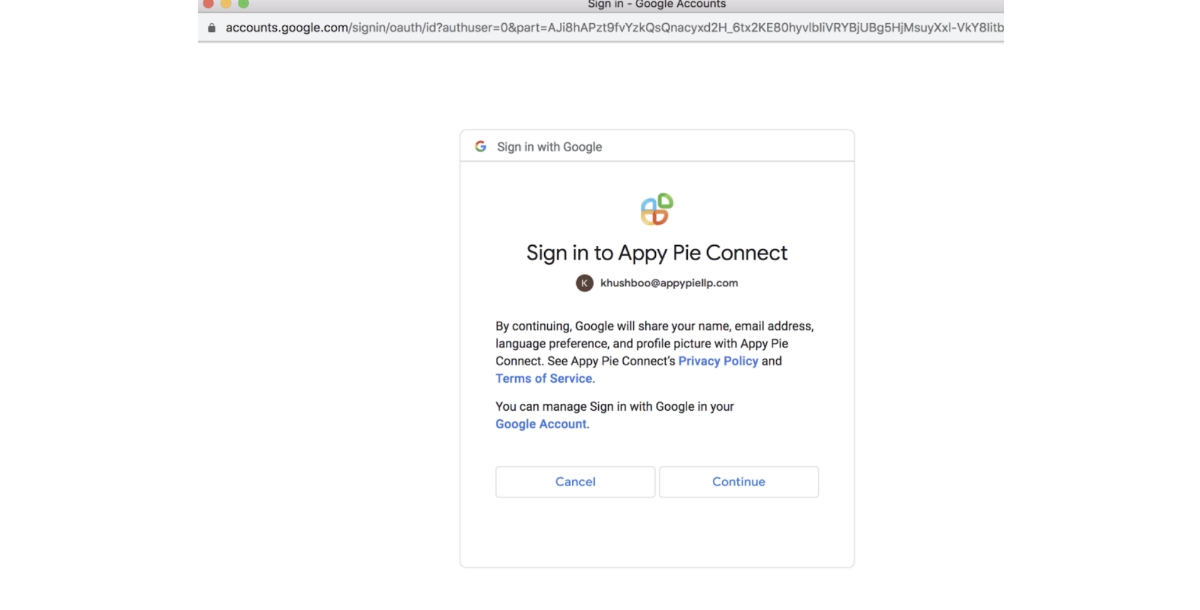
Step 9: Now Click on Continue
You will need to click on the "Continue" button to proceed with the next part of the process.
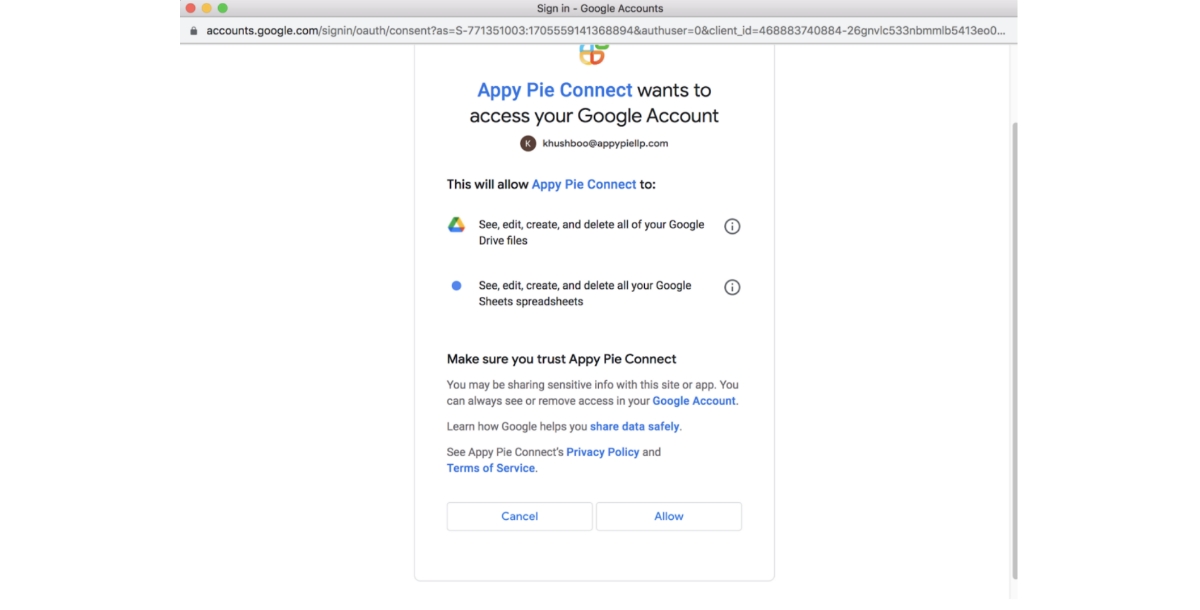
Step 10: Allow Access
To proceed, click on the "Allow" button to provide the necessary permissions or access.
Step 11: Connecting Your Google Account
Now your Google account is connected and you will be redirected to Appy Pie’s Connect dashboard where you need to click on “Continue”.
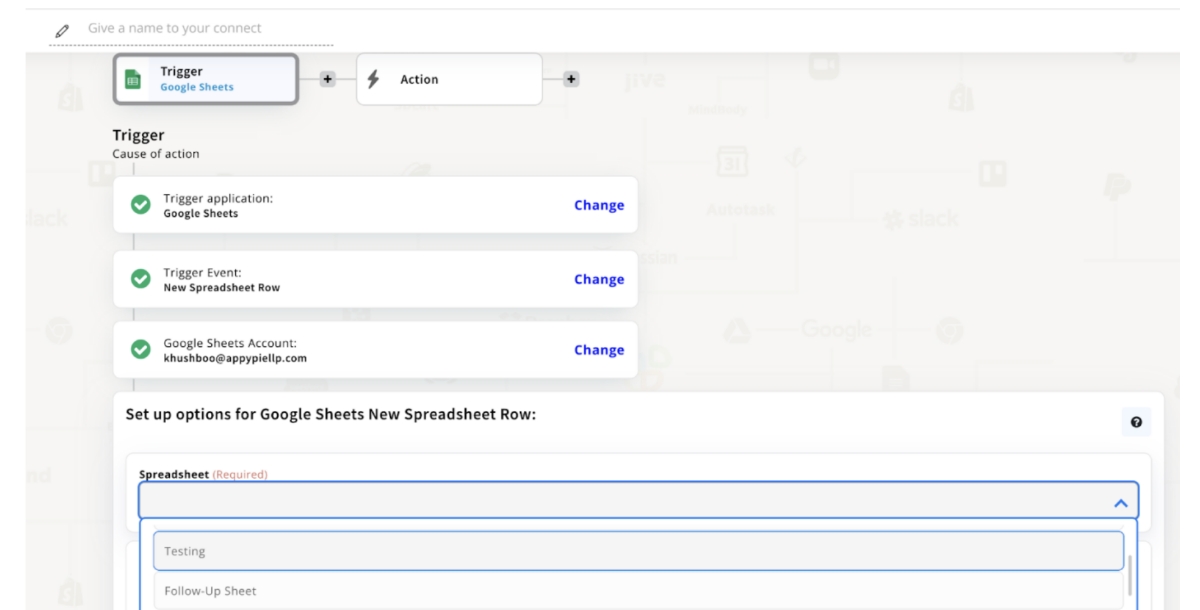
Step 12: Choose the Spreadsheet
Select the spreadsheet from the dropdown menu. Note that both Spreadsheet and Worksheet are required fields.
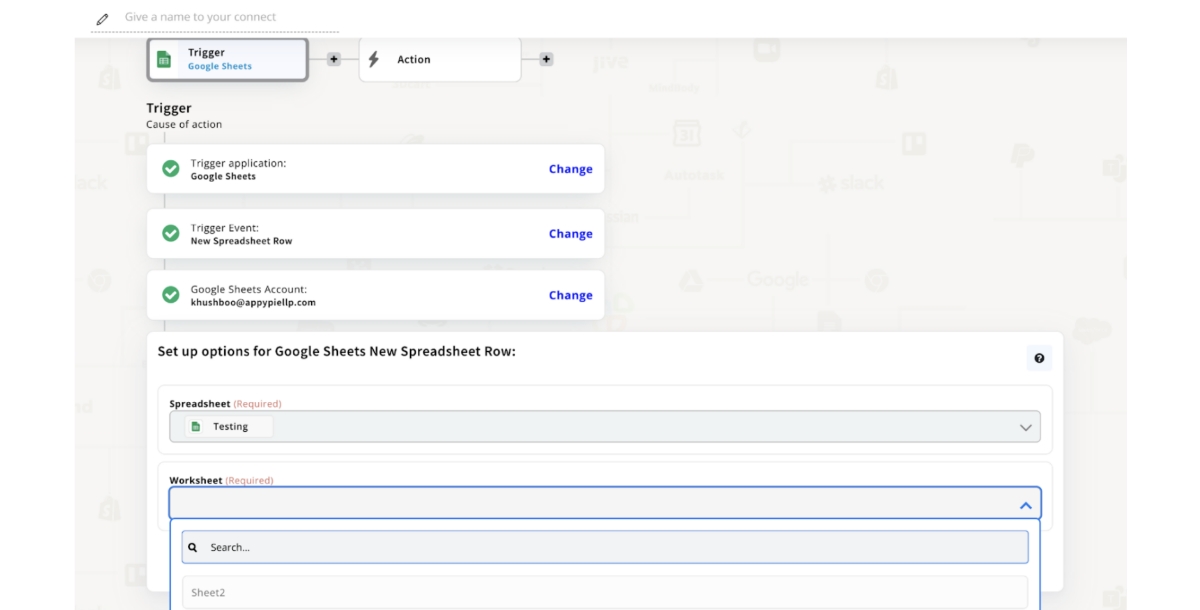
Step 13: Choose the Worksheet
Now choose the Worksheet from the Dropdown menu since both spreadsheet and worksheet are required fields for this connect.
Step 14: Continue
Now click on the “Continue” button.

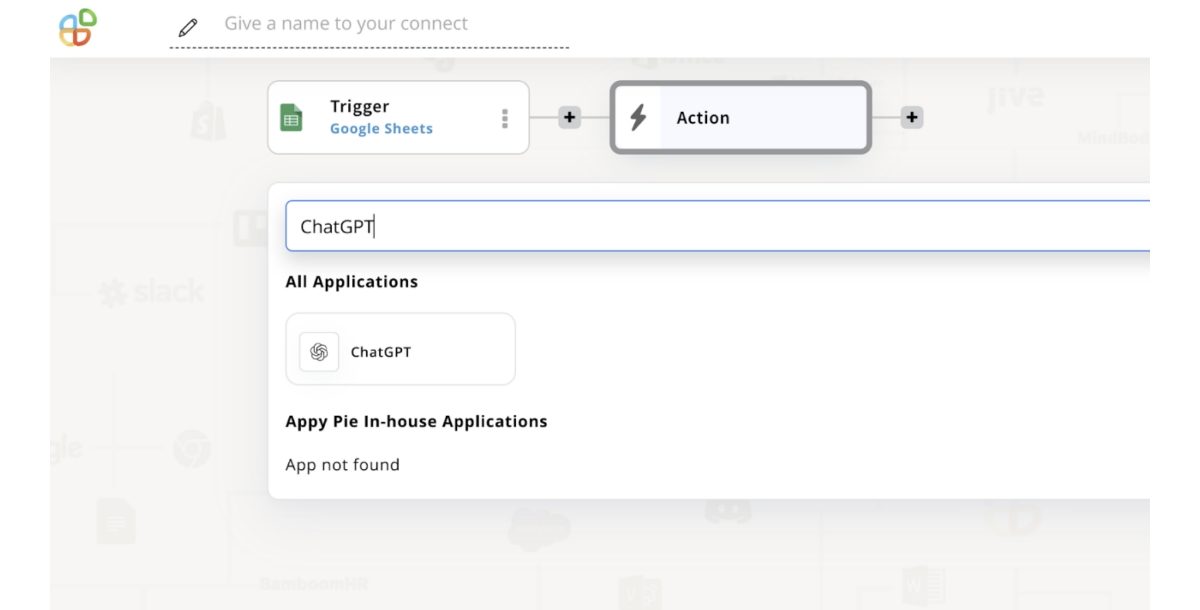
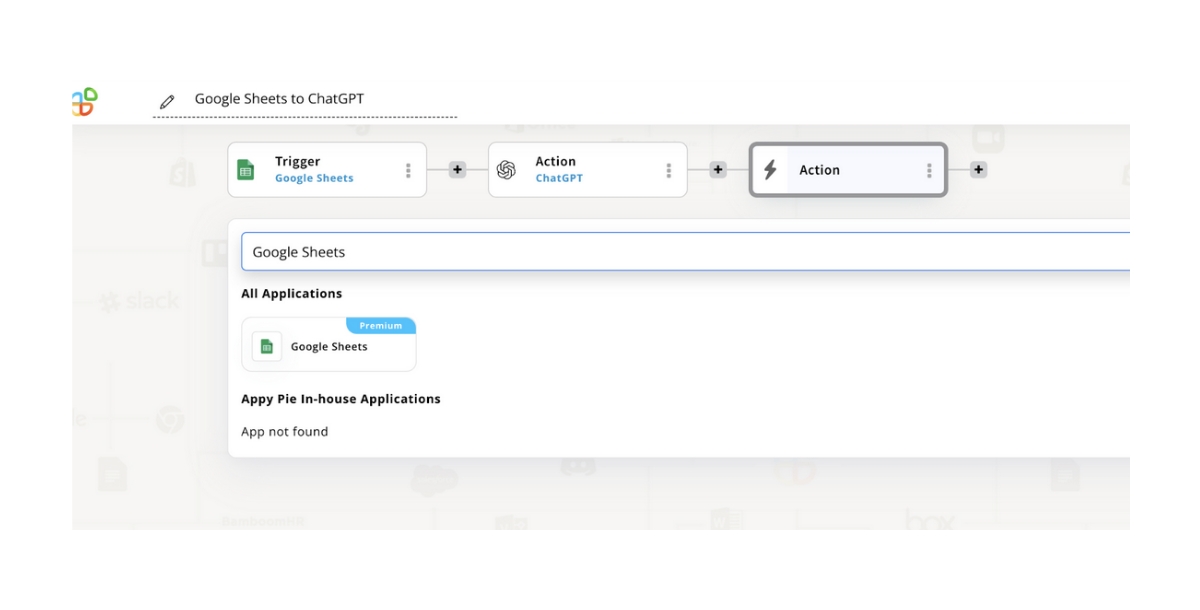
Step 15: Set Up ChatGPT as an Action
In the search bar, type "ChatGPT" and select it as the Action App.
Step 16: Choose Action Event
Choose the Action event, such as "Create Completion," and click on "Continue."

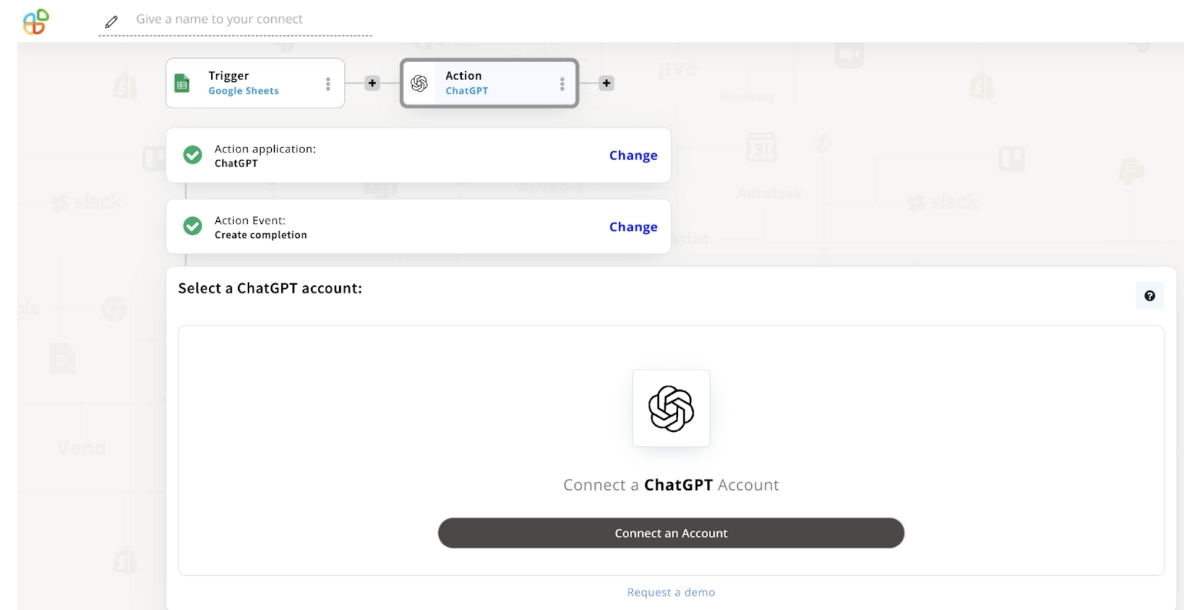
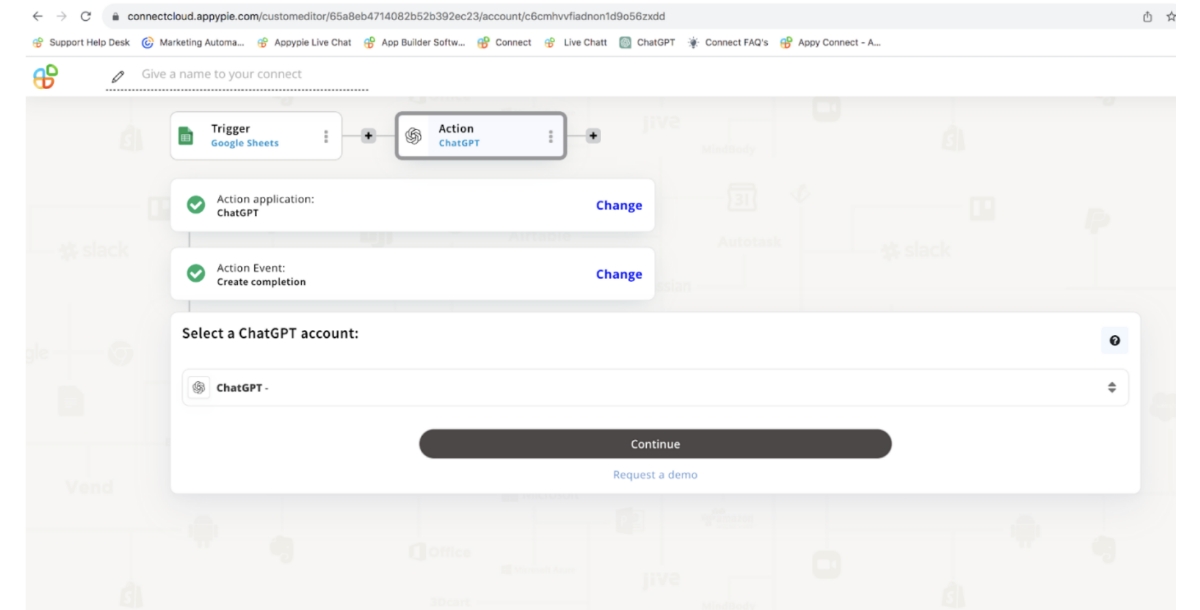
Step 17: Connect Your ChatGPT Account
To connect your ChatGPT account with Appy Pie Connect, click "Connect an Account."
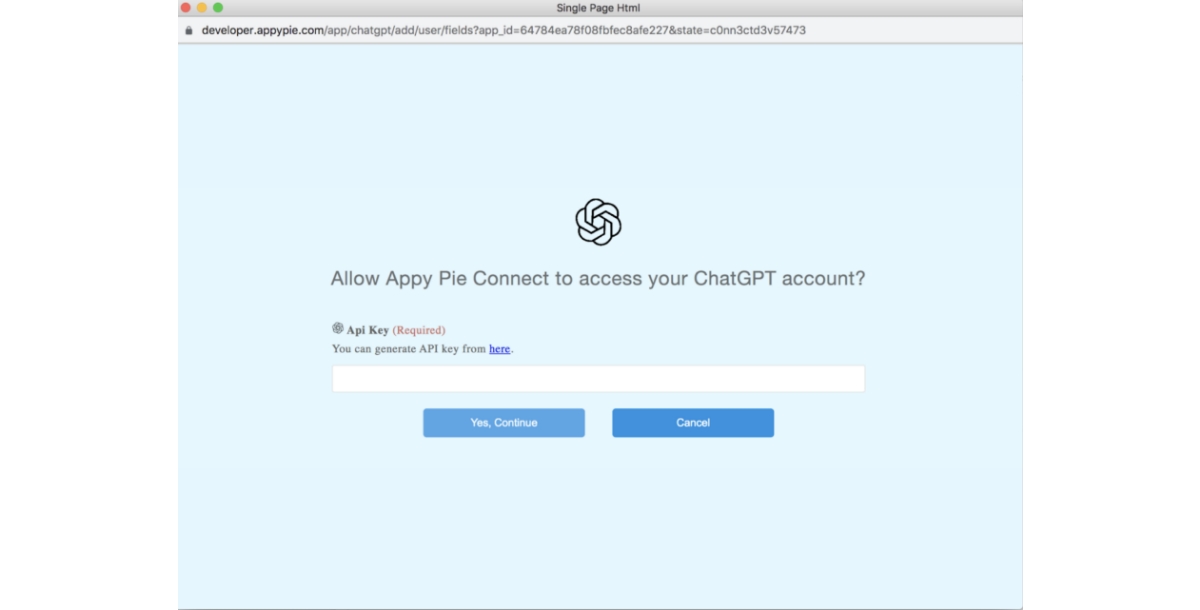
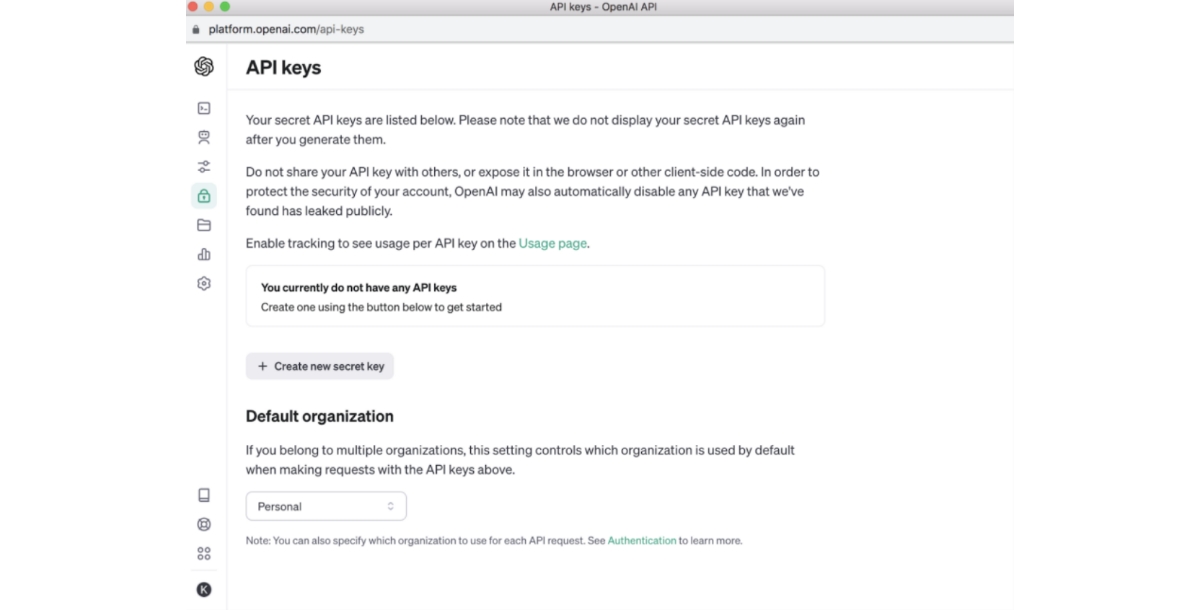
Step 18: Generate API Key
Click "here" to generate an API key.
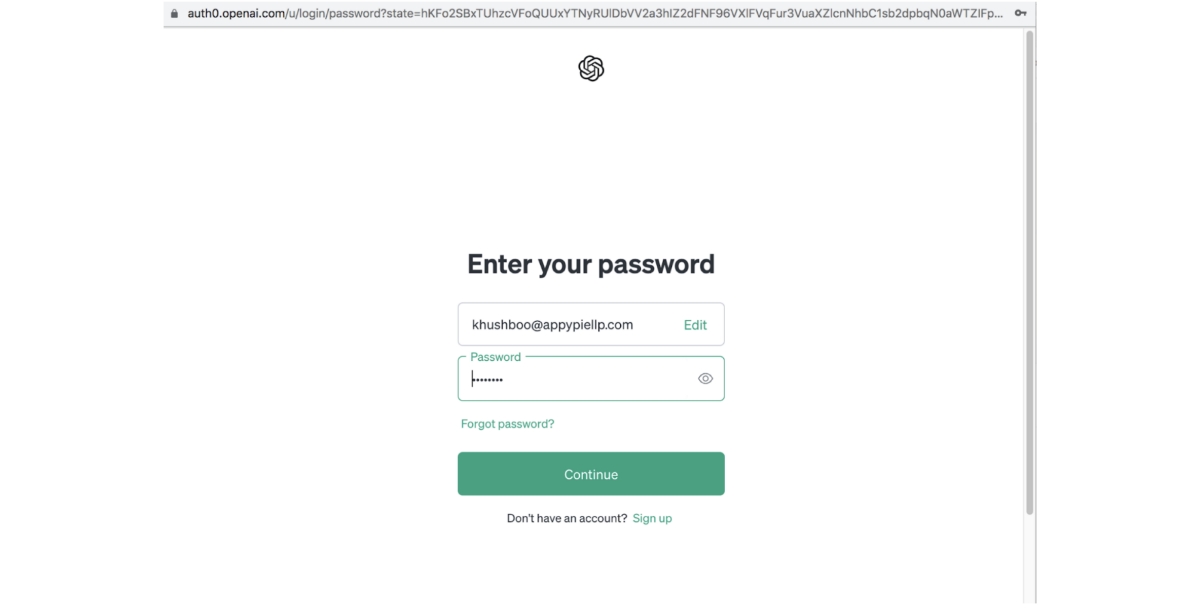
Step 19: Log in to ChatGPT
Click on “Log in” and enter your ChatGPT credentials.
Step 20: Continue
After entering your credentials, select "Continue."
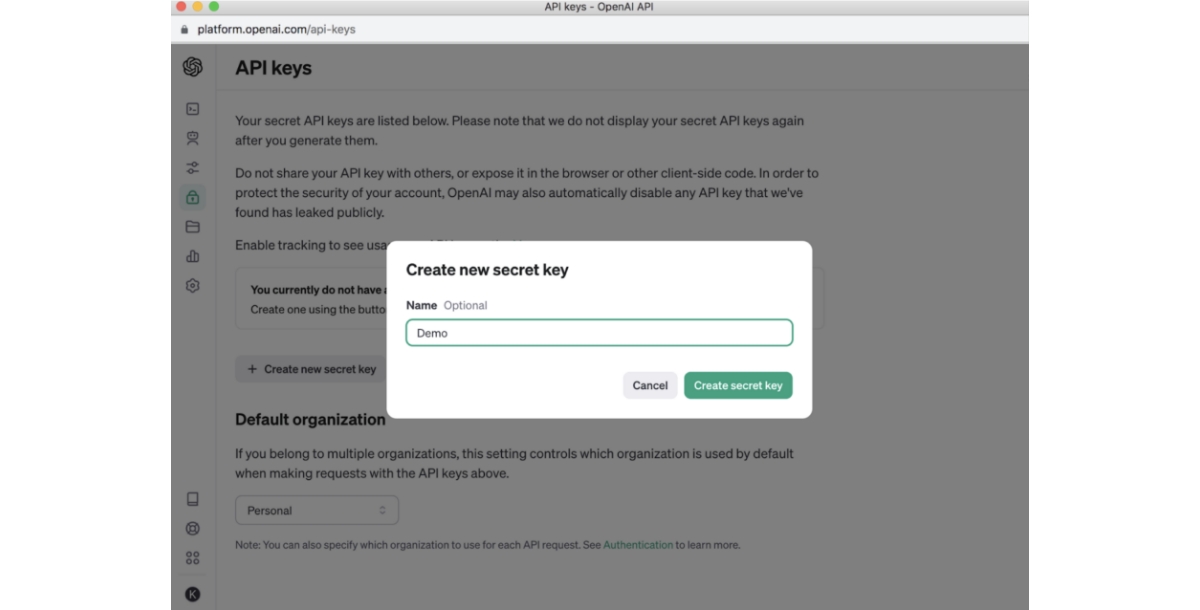
Step 21: Create a New Secret Key
Click on "Create new secret key" and give it a name (optional). Then click on "Create secret key."
Step 22: Give a name
Give a name(Optional) and click on “Create secret key”.
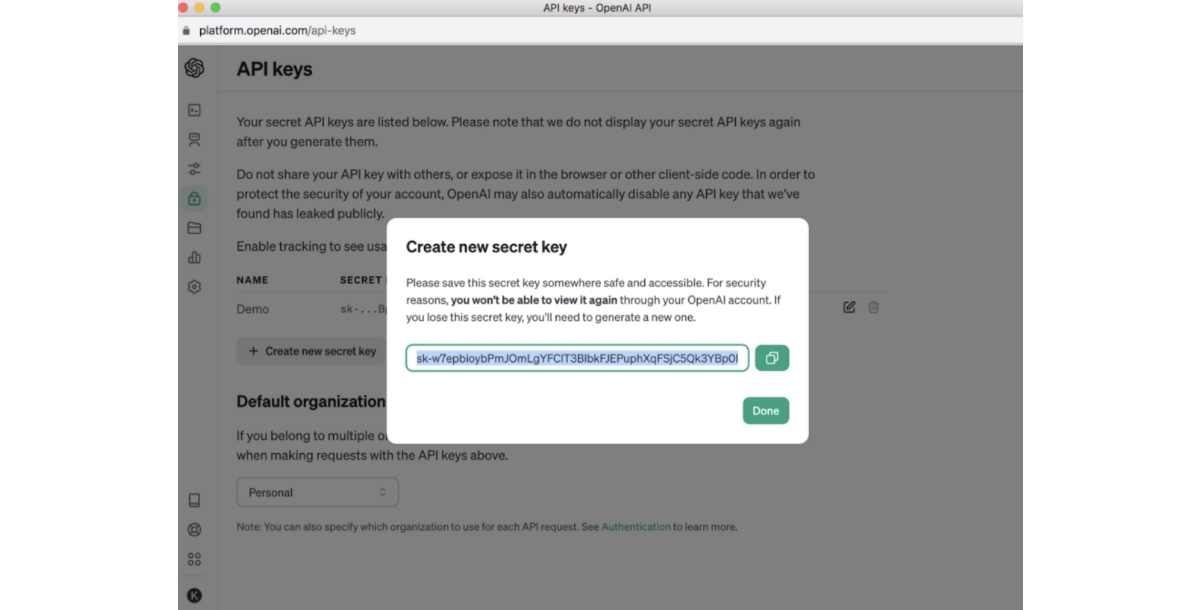
Step 23: Copy the Key
Copy the generated API key and click on "Done."
Step 24: Connect ChatGPT Account
Click on "Connect an Account" again.

Step 25: Paste the copied API
Now paste the copied API(Secret key) and click on “Yes, Continue”.

Step 26: ChatGPT account connected
Your ChatGPT account is connected now, click on “Continue”.
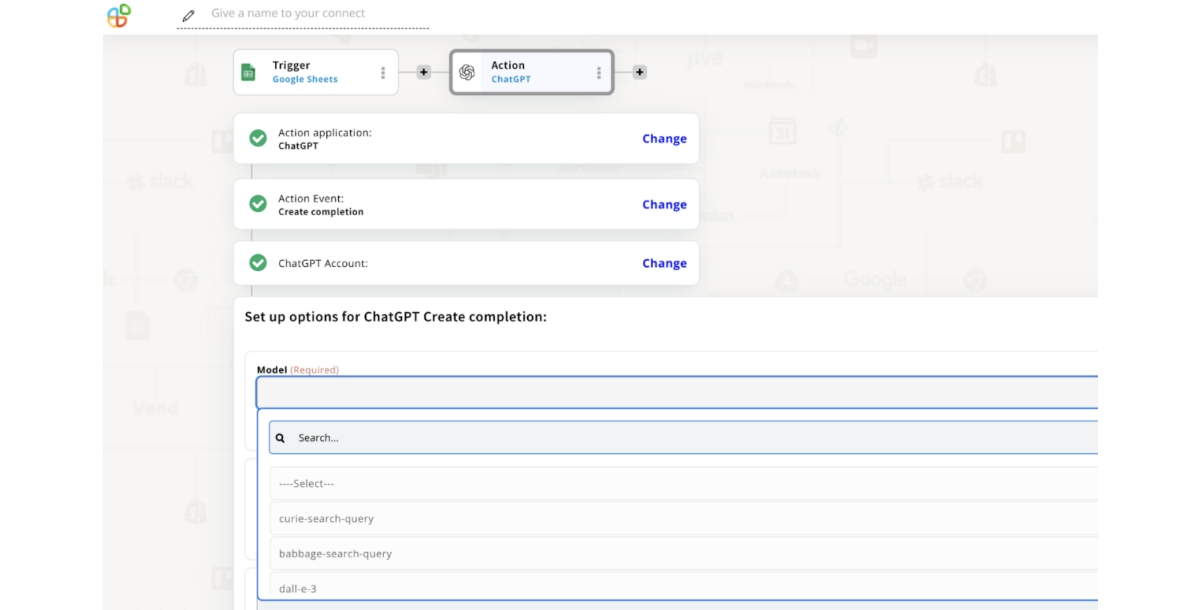
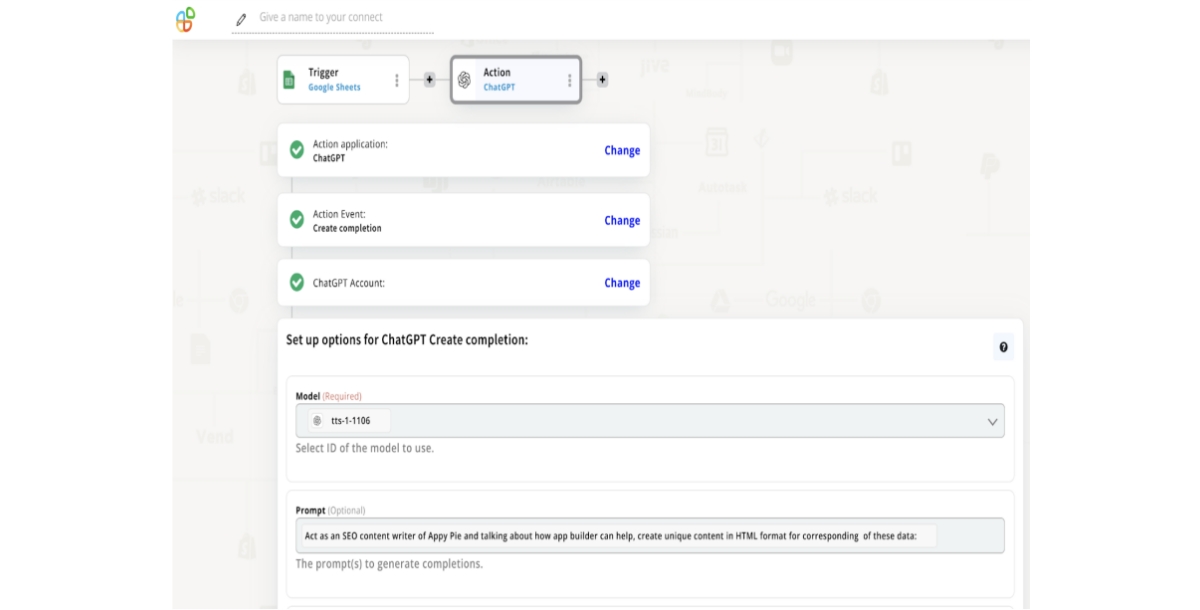
Step 27: Select Model
Choose a listed "Model" from the dropdown menu.
Step 28: Add Text Prompt
Add the text "Prompt" and then click on "Continue and Run Test."
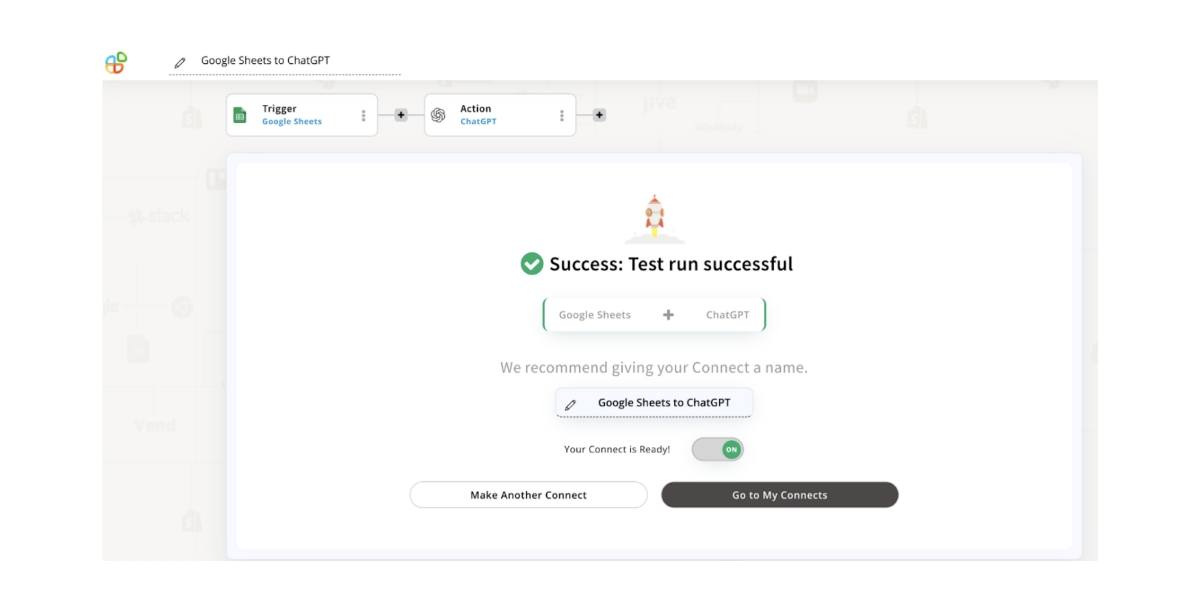
Step 29: Run Test
Ensure that the test executes successfully.
Step 30: Send ChatGPT Response to Google Sheets
Now open the connect and Click on “+” icon to send the chatgpt response back to the sheet.
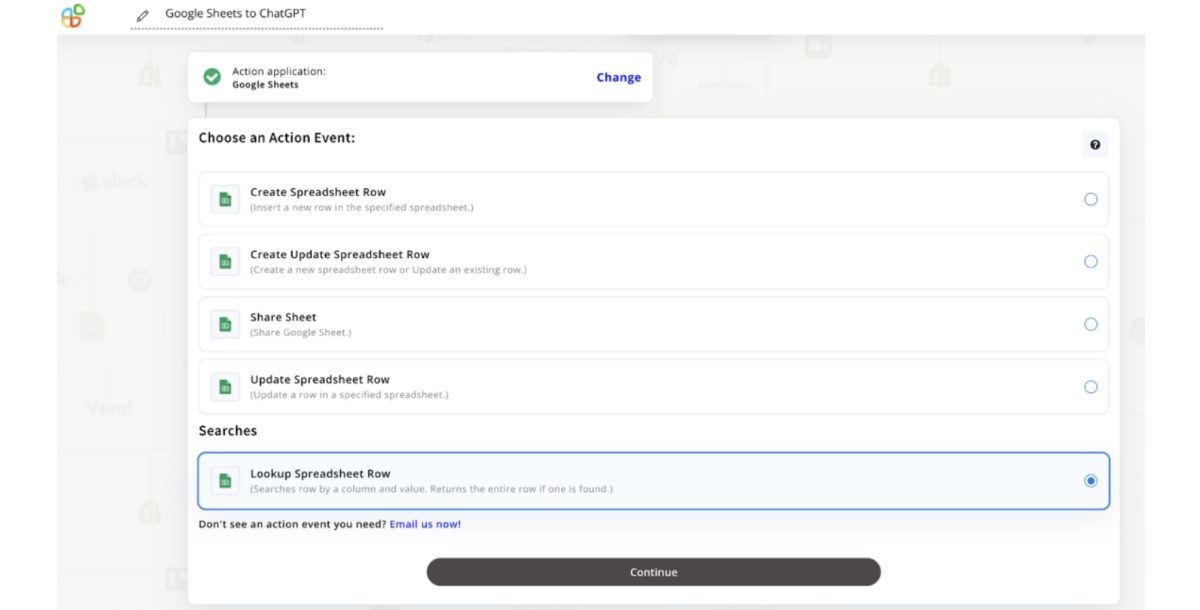
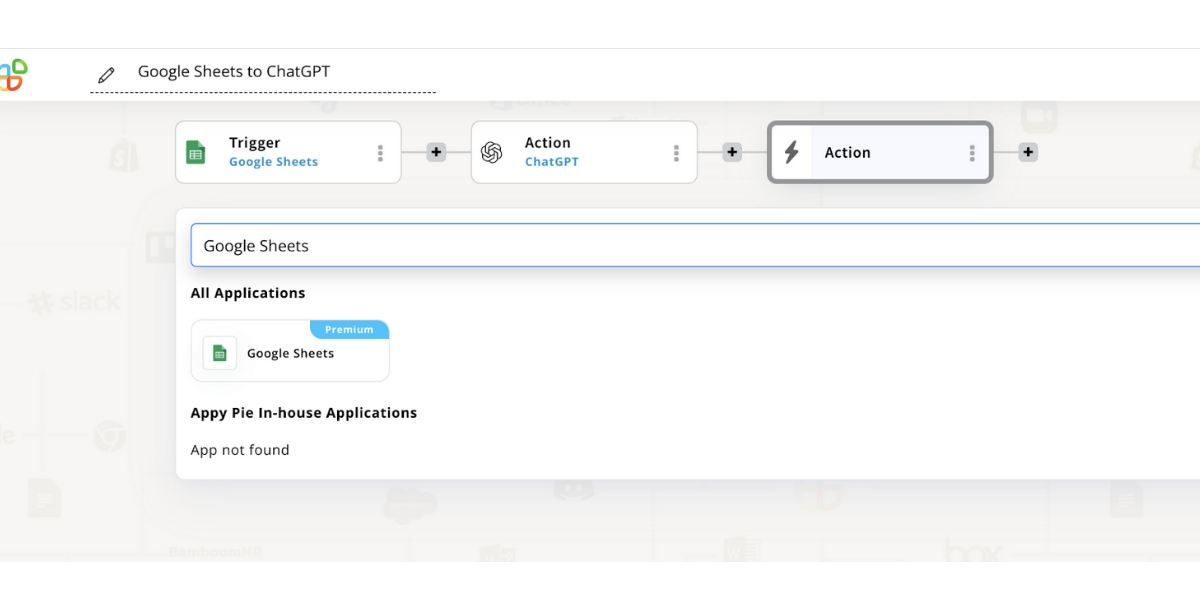
Step 31: Set Up Google Sheets as an Action Again
Search for and select "Google Sheets" as the "Action" application again.
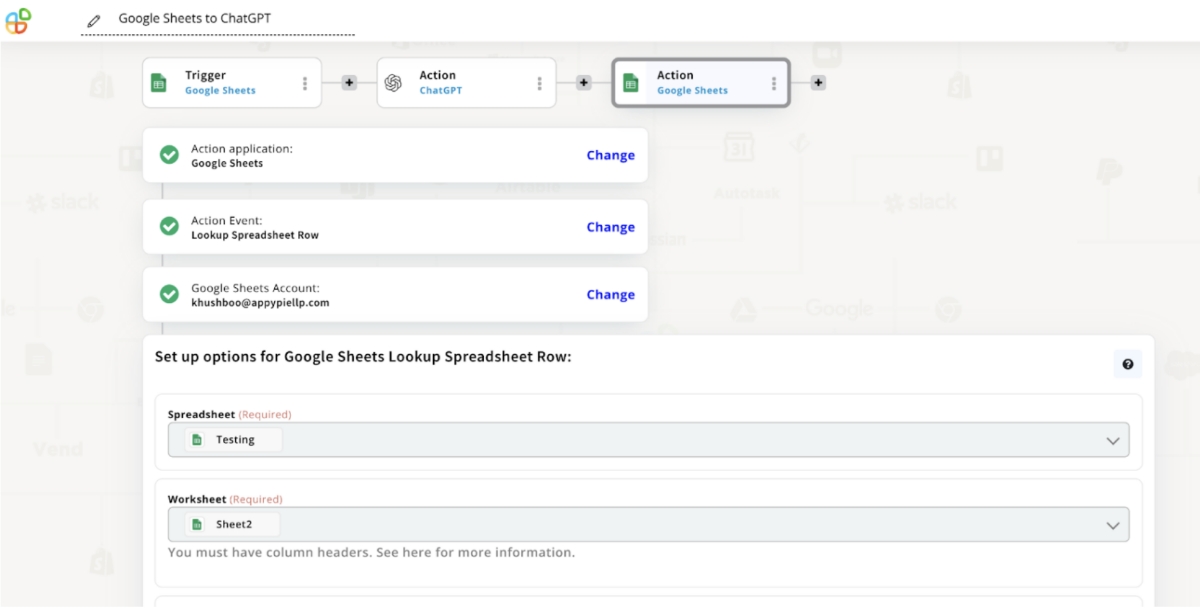
Step 32: Choose Action Event
Choose the Action event as "Lookup Spreadsheet Row" and click on "Continue."
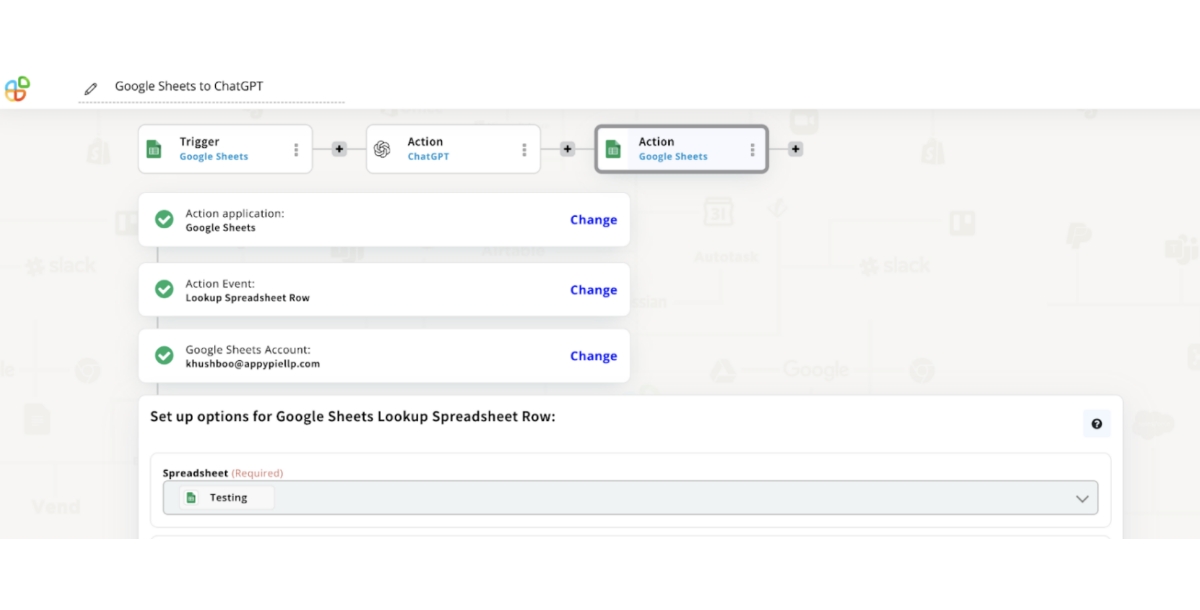
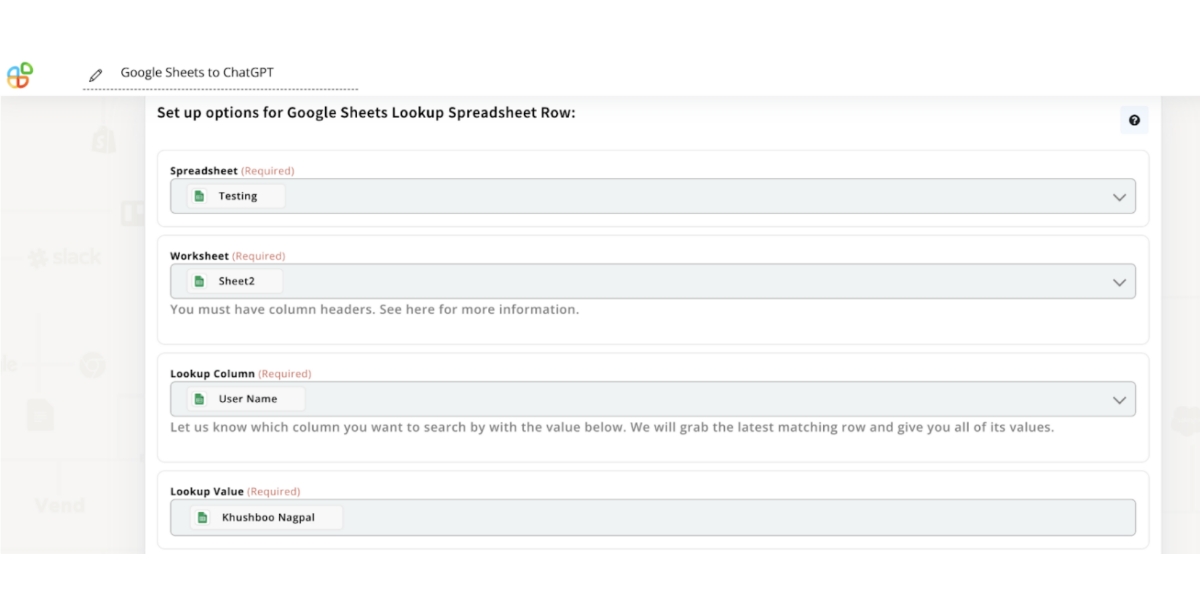
Step 33: Select the Spreadsheet
Now choose spreadsheet from the Dropdown menu.
Step 34: Choose the Worksheet
Click the Dropdown menu and select the Worksheet.
Step 35: Select "Lookup Row and Lookup Value"
Select "Lookup Column and Lookup Value" and then press the "Continue and Run Test" button.
Step 36: Open the Connect Again
Open the connect and click on the “+” icon once again.
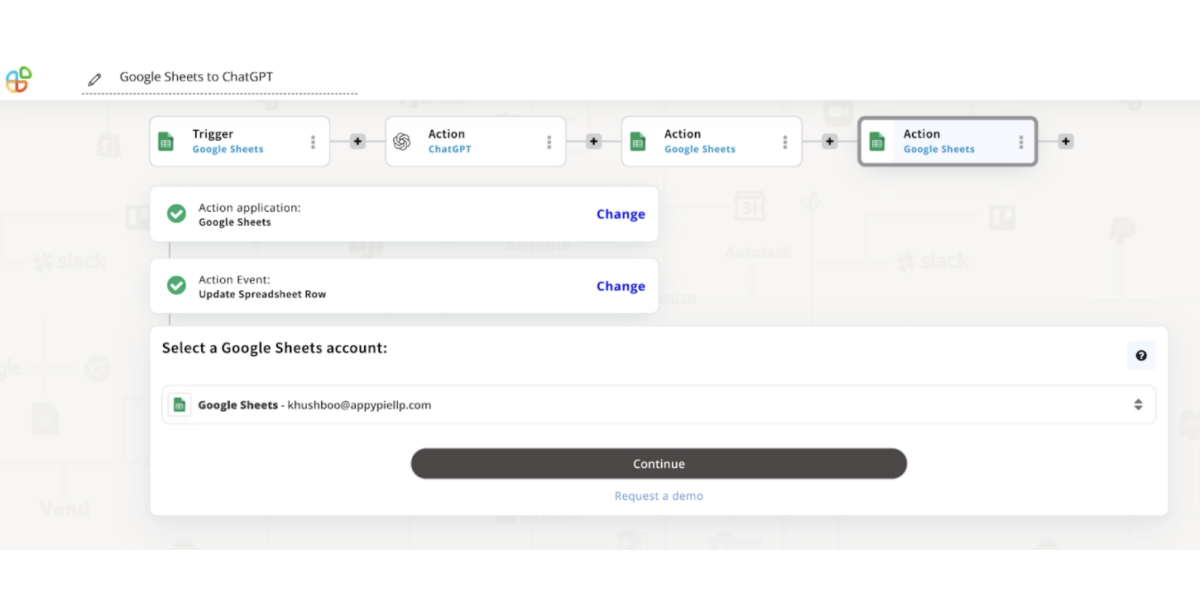
Step 37: Select Google Sheets as the Action again
Once again, search for and select "Google Sheets" as the "Action" application.
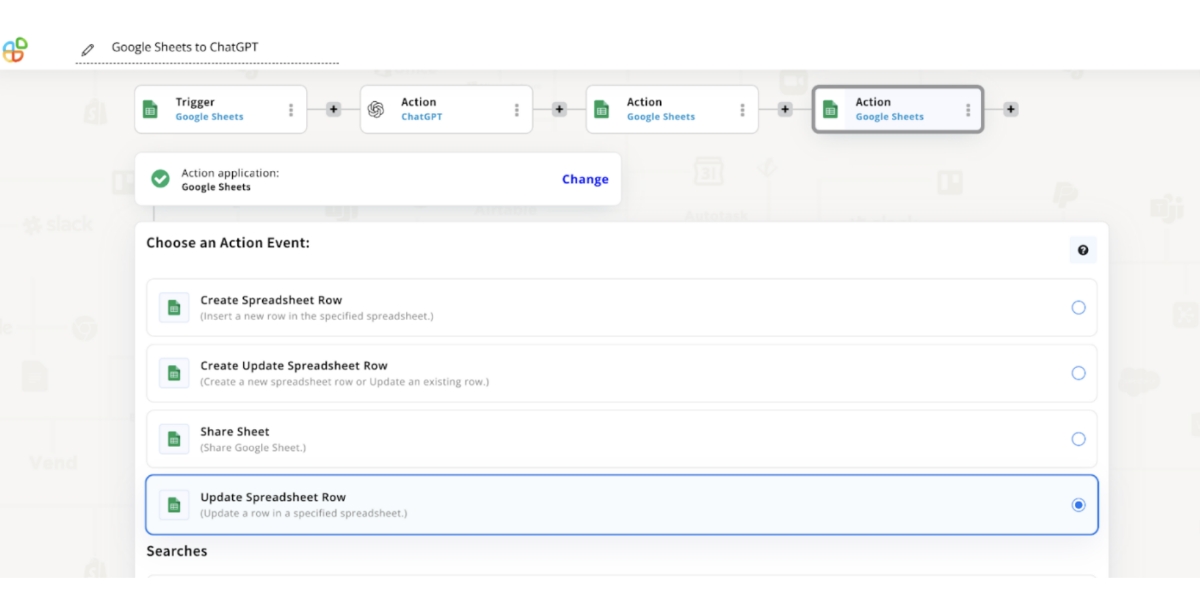
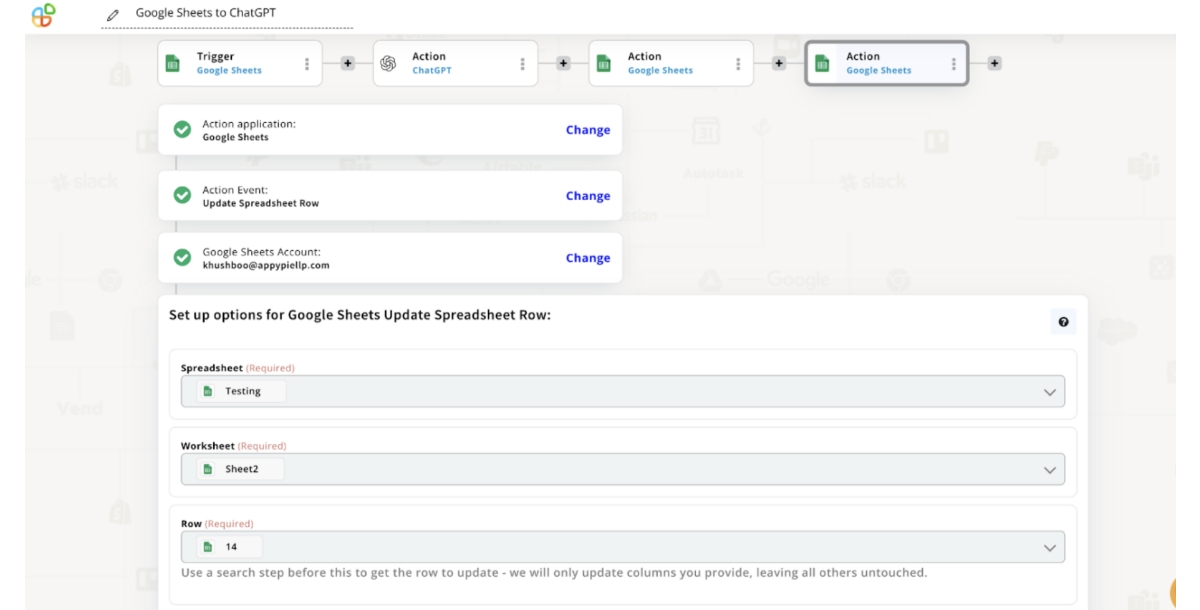
Step 38: Choose Action Event "Update Spreadsheet Row"
Choose the Action event as "Update Spreadsheet Row" and click on “Continue”. In this step, you will update the specific row where you want to input the ChatGPT responses.
Step 39: Continue Configuring Google Sheets
Click on “Continue”.
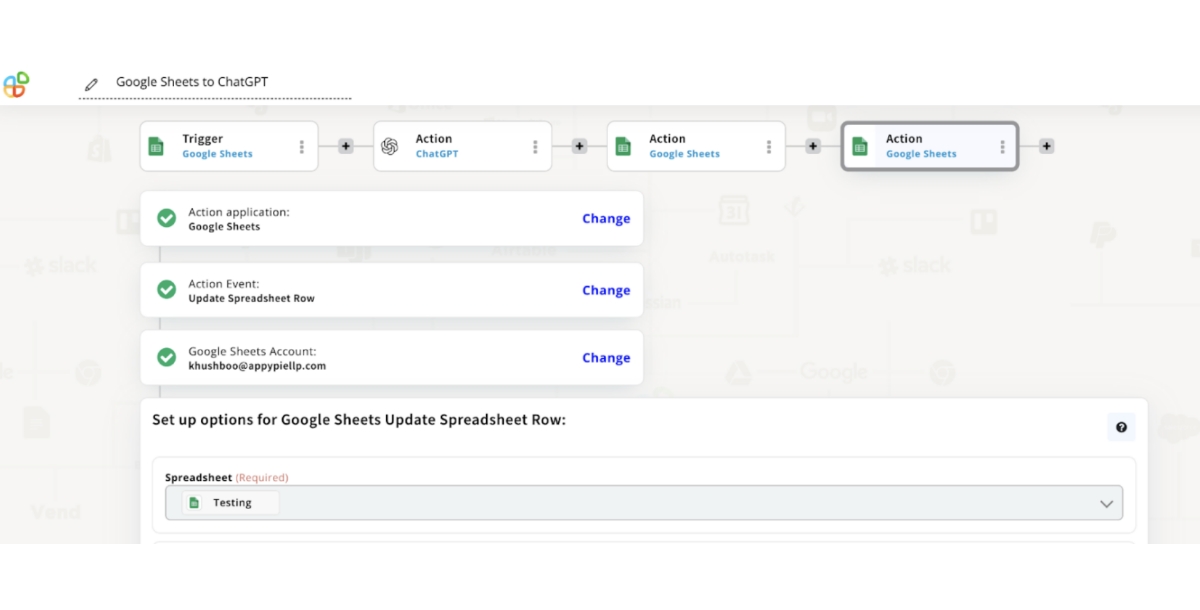
Step 40: Choose the Spreadsheet
Choose the appropriate Spreadsheet from the Dropdown menu.
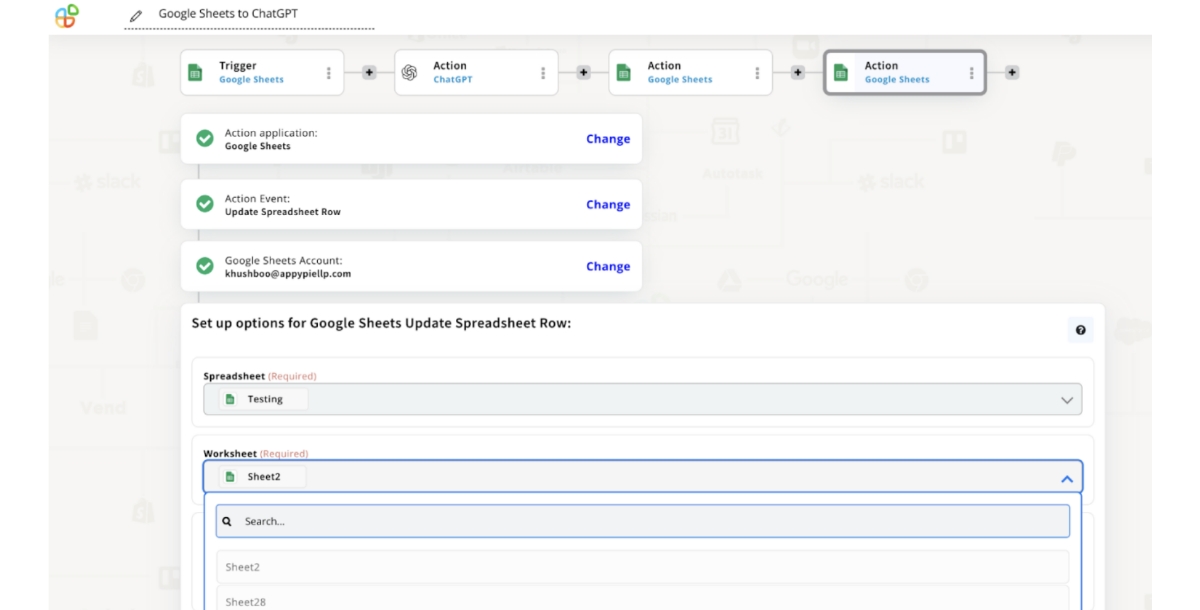
Step 41: Select the Worksheet
Now select the relevant Worksheet from the dropdown menu.
Step 42: Choose the Row
Choose the specific Row from the Dropdown menu where you want to update the ChatGPT responses.
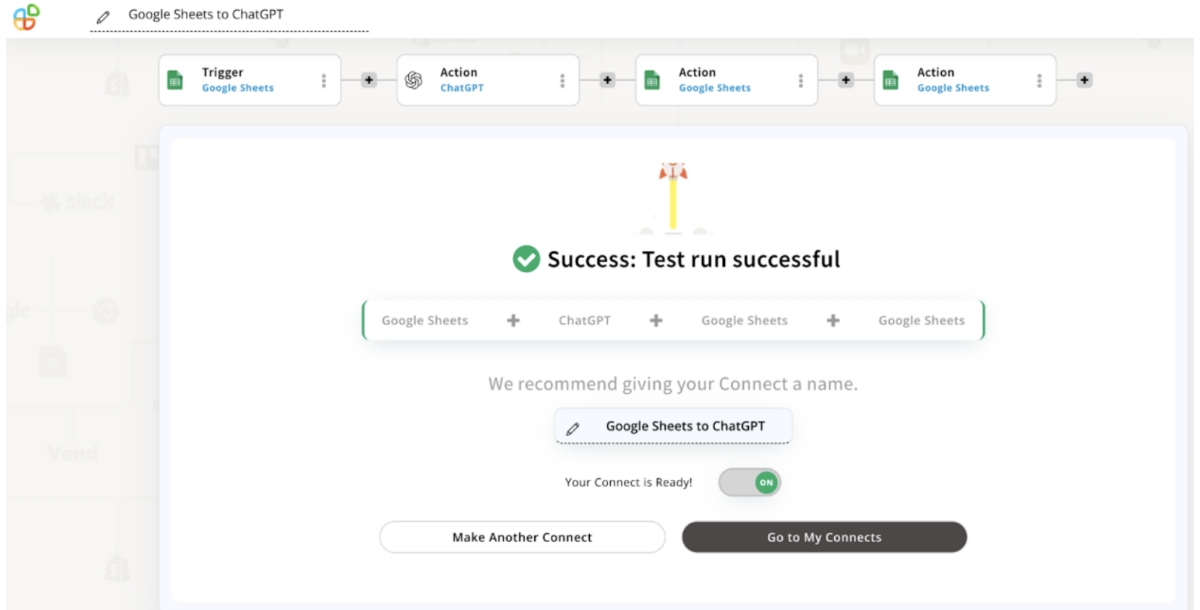
Step 43: Run the Text
Ensure that the test executes successfully.
Now that your ChatGPT account is set up to work with Google Sheets, you can effectively harness its capabilities to enhance your productivity and streamline various tasks within the spreadsheet application. Whether it's content generation, data analysis, brainstorming, or problem-solving, ChatGPT can be a valuable tool in your Google Sheets toolkit. By utilizing ChatGPT's AI-powered assistance, you can optimize your workflow and achieve more in less time.
How Does the ChatGPT-Google Sheets Integration Work in Real-time?
The integration of ChatGPT with Google Sheets in real-time leverages ChatGPT's advanced natural language processing capabilities to streamline tasks and directly populate Google Sheets with data.
For a clear understanding, let's explore a practical scenario: Consider the process where ChatGPT is tasked with creating webpages using Appy Pie Connect, followed by automatically transferring the generated content into a Google Sheet for subsequent actions. This workflow exemplifies how the synergy between ChatGPT's linguistic intelligence and Google Sheets' organizational functionality can automate and enhance data management tasks efficiently.
Here is how ChatGPT works in real time in Google Sheets:
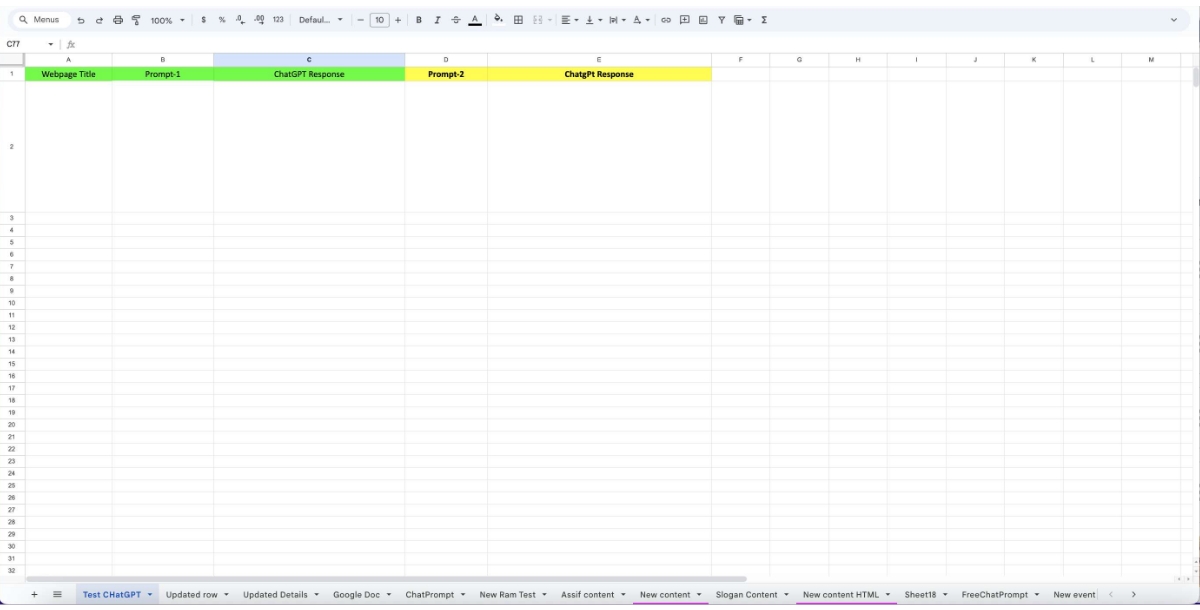
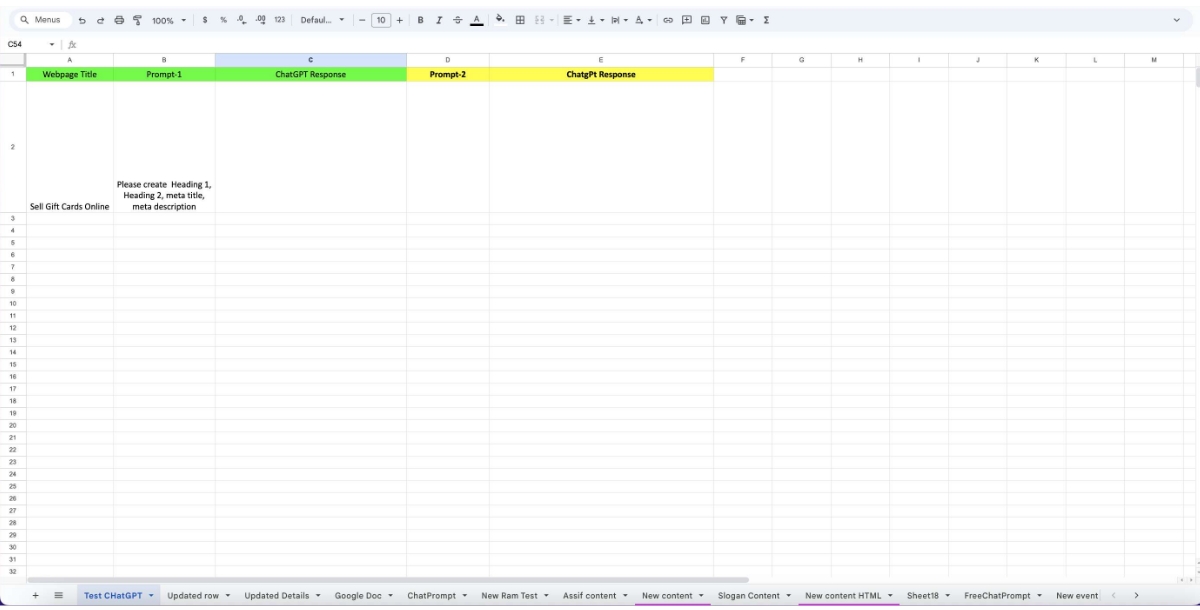
Step 1: I've created a Google Sheets Spreadsheet dedicated to Appy Pie content. In this setup, I've designated Column A for "Webpage Title," Column B for "Prompt-1," Column C for "ChatGPT Response," Column D for "Prompt-2," and Column E for a second "ChatGPT Response."
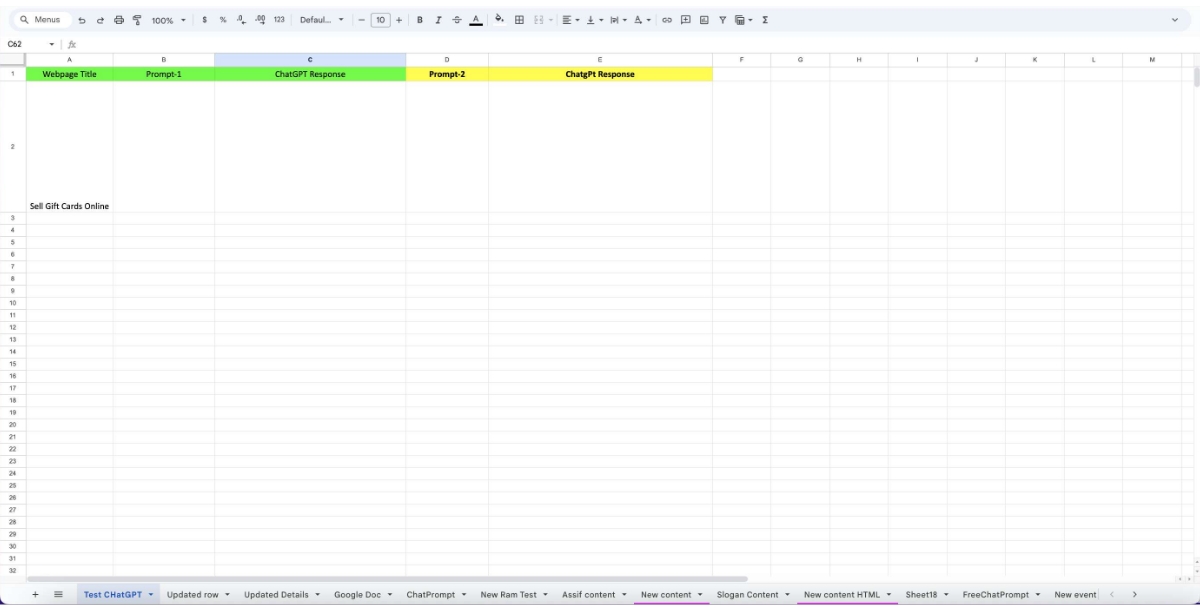
Step 2: In this step, I've inserted the page title "Sell Gift Cards Online" into Column A, since this is the topic of the content I need.
Step 3: Here, I've included prompts in Column B, instructing the creation of H1, H2, Meta Title, and Meta Description elements.
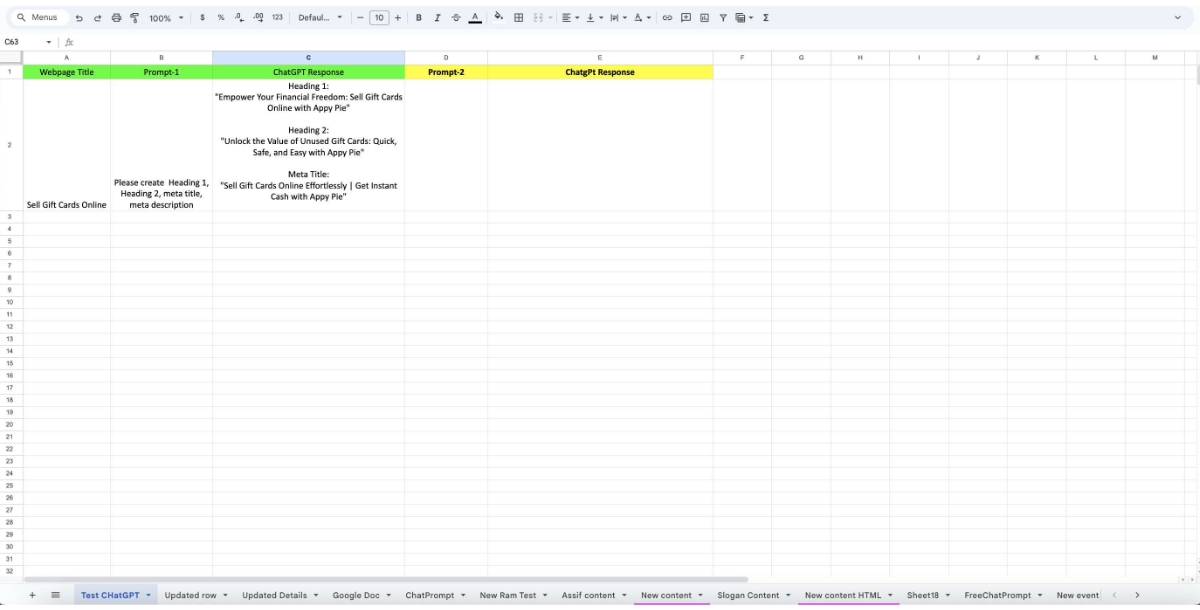
Step 4: Notice that the ChatGPT responses have been automatically updated in the ChatGPT Response section within Column C.
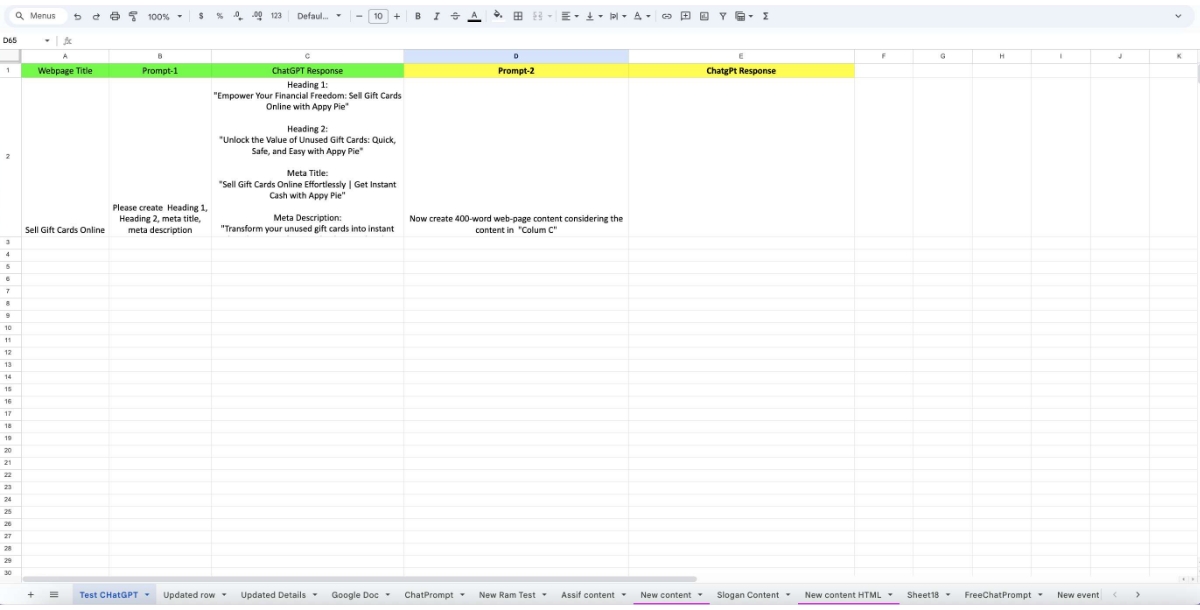
Step 5: In this final step, I instructed ChatGPT to generate the entire page content for the webpage, taking into account the previous ChatGPT responses provided in Column C.
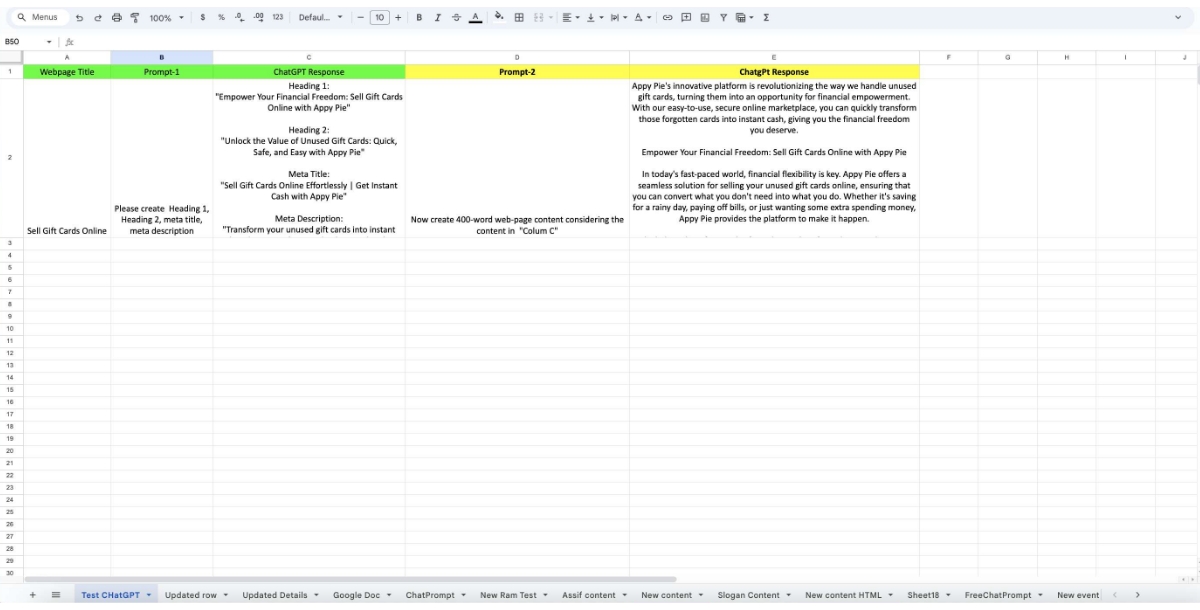
Step 6: See how the webpage content has automatically updated itself in Column E, which is the ChatGPT response section.
Boost Your Productivity With the Effective ChatGPT Prompts in Google Sheets
Here are some example prompts you can use with ChatGPT in Google Sheets to boost your productivity:
- Generate a series of blog post titles based on the keywords in Sheet 20.
- Prepare a slide presentation outline using the key points from the report in Sheet 12.
- Generate a list of the top 10 performing products from the inventory list in Sheet 3.
- Summarize key insights from the sales data in Sheet1 for the last quarter.
- Identify and flag duplicate entries in the customer database in Sheet 2.
- Create a summary report of employee performance metrics from Sheet 4.
- Analyze expense trends over the past year in Sheet 5 and highlight significant changes.
- Draft a weekly progress update email using data from the project tracker in Sheet 6.
- Calculate the average customer satisfaction score from survey data in Sheet 7.
- Compile a list of action items from the meeting notes in Sheet 8.
- Convert the currency values in Sheet 9 from USD to EUR at the current exchange rate.
- Create a pivot table to analyze regional sales data in Sheet10.
- Draft responses to frequently asked questions using the information in Sheet 11.
- Suggest improvements for the marketing strategy based on analysis from Sheet 13.
- Generate a list of potential suppliers from the vendor information in Sheet 14.
- Create a budget forecast for the next quarter using financial data in Sheet 15.
- Draft a customer satisfaction survey based on the product list in Sheet 16.
- Prepare a risk analysis report using the project data in Sheet 17.
- Analyze the time tracking data in Sheet18 to identify productivity patterns.
- Summarize the key findings from the market research data in Sheet 19.
- Create a checklist for the event planning details in Sheet 21.
- Draft a project proposal using the requirements specified in Sheet 22.
- Analyze the social media metrics in Sheet 23 and suggest content strategies.
- Compile a report of monthly expenses and revenues from Sheet24.
- Generate email templates for client outreach using data from Sheet 25.
- Prepare an analysis of competitor pricing strategies from the data in Sheet 26.
- Create a meal plan and shopping list from the nutrition data in Sheet 27.
- Draft an onboarding guide for new employees using the information in Sheet 28.
- Generate a maintenance schedule based on equipment logs in Sheet 29.
- Prepare a summary of customer testimonials and feedback from Sheet 30.