How to Make a Mobile App for Your Store, No Coding Required
How to Make a Mobile App for Your Store, No Coding Required

By Garima Singh | Last Updated on February 21st, 2024 12:00 pm
Launching your digital presence is simpler than ever, thanks to platforms like Appy Pie that eliminate the need for coding expertise. Ideal for entrepreneurs eager to set up an online shop or showcase their products through a mobile app, Appy Pie offers a seamless route into the app and website creation. This platform is a beacon for those curious about crafting a digital space without delving into programming complexities.
Appy Pie is a tool you can use online to make apps without needing to know how to code. With it, you can create mobile apps, websites, chatbots, automate tasks, and make app designs.
To make your app, you have to use Appy Pie’s app maker, but this feature is only available in the Gold and Premium plans. For this guide, we’ll use the free trial of the Gold plan to make our app. We’ll also show you how to cancel the trial if you find it’s not right for you.
Navigating the complexities of how to make an app poses a substantial hurdle for businesses looking to strengthen their online footprint. Appy Pie addresses this challenge by streamlining the app development process, which traditionally demands extensive coding knowledge. With Appy Pie, businesses can effortlessly create functional and visually appealing apps in a fraction of the time it would normally take. The benefits of making an app with Appy Pie are:
Usability: Appy Pie’s interface is welcoming for beginners, offering a straightforward path to digital creation.
Flexibility: The platform serves various entrepreneurial endeavors, from e-commerce to informational apps.
Monetization: Appy Pie allows for multiple monetization strategies, not limited to direct sales.
Customization: The platform boasts a diverse range of templates and an AI builder that crafts your app based on simple descriptions.
Push Notifications: Enhance your app’s appeal with push notifications, keeping your audience engaged and informed.
You can follow the steps below to create your mobile application using Appy Pie;
Begin your app-building journey with Appy Pie by registering on their site. Sign-up is a breeze—choose between Google or an email registration. Once you’ve accepted the terms, you’re ready to dive into the world of no-code app development.
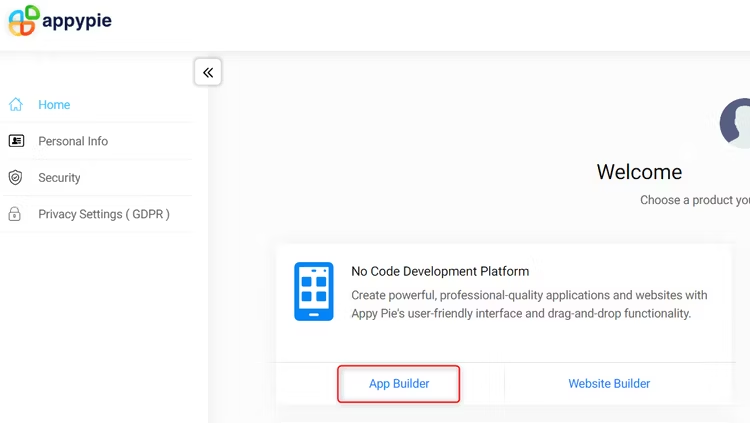
After you log in, you’ll be on Appy Pie’s main page where you can see all their products. Go to the section named “No Code Development Platform” and click on “App Builder.
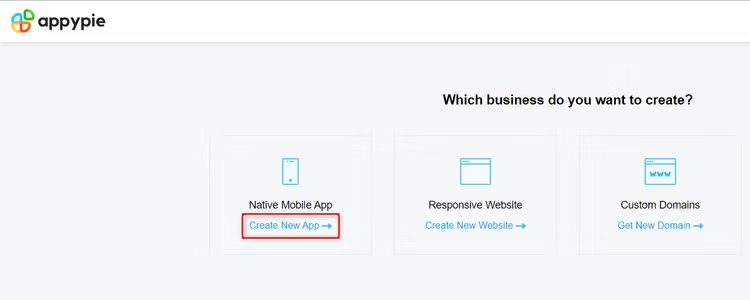
Then, under “Native Mobile App”, choose “Create New App”. This takes you to the app builder page on Appy Pie.
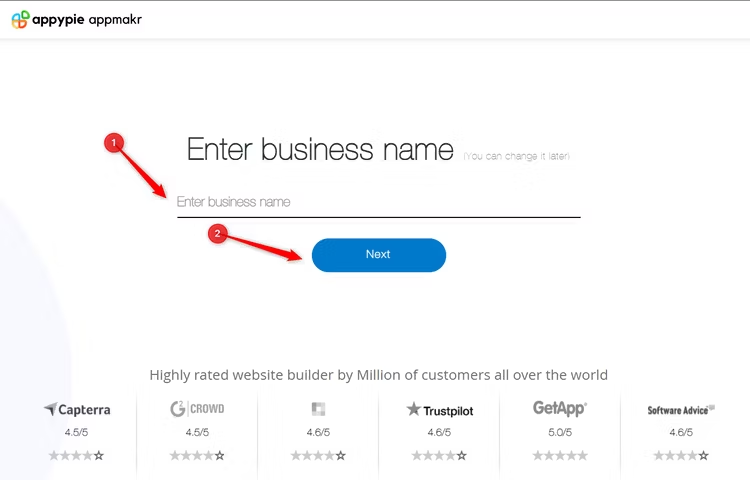
Here, type in the name of your business or app in the space provided and hit “Next”. Remember, the name you type here will be your app’s name.
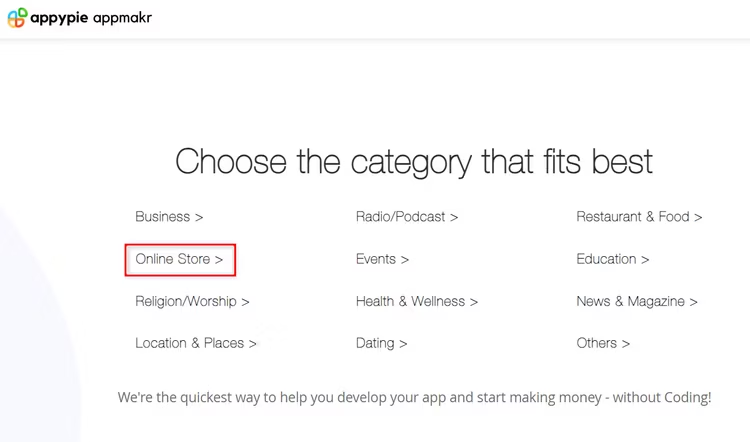
Next, pick the kind of app you’re making. Since we’re making an online store app, click on “Online Store. Appy Pie will then show you different templates for online stores to choose from.
Pick a template you like and wait a bit for it to load. We’ll use the “Online Grocery Store” template. Just hover over it and press the “Edit” button.

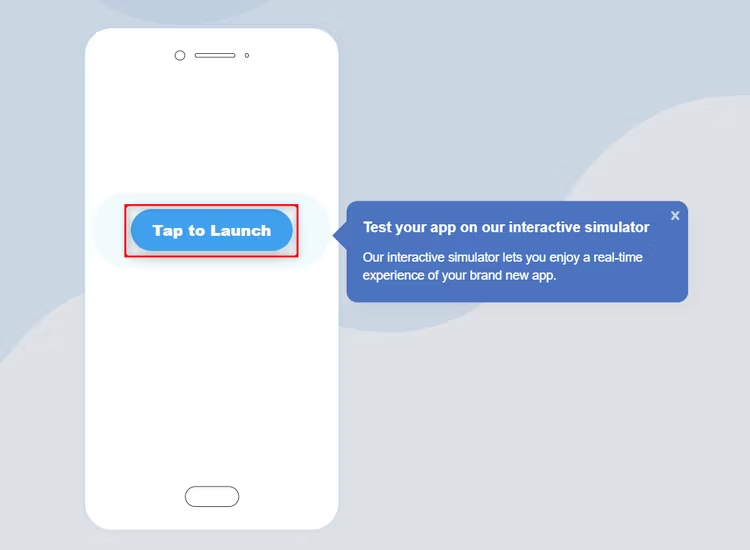
Then, hit “Tap to Launch” to start and try out your app in a simulator that shows you what it looks like in real life.
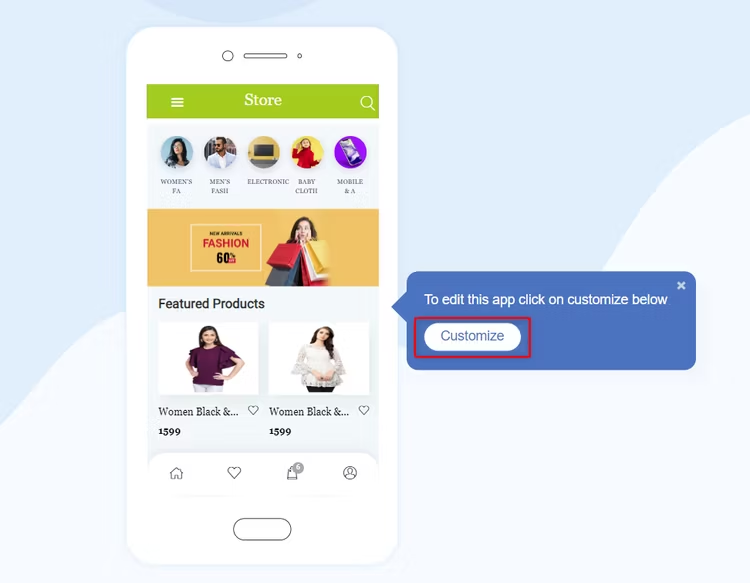
After that, click on “Customize” to make the template more personal and to your liking.
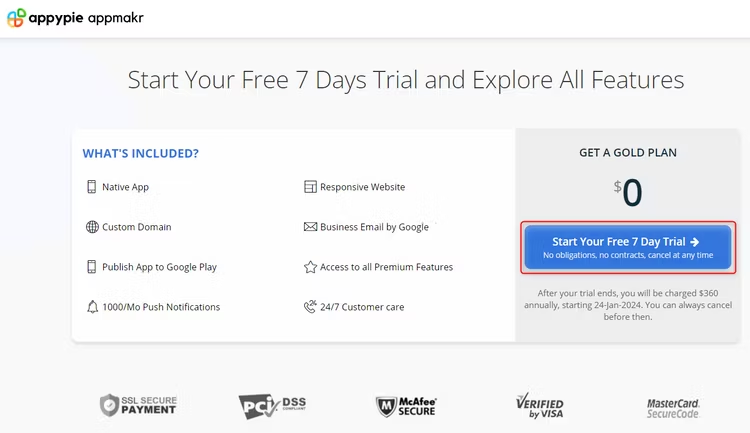
You can try out the app with a free 7-day Gold plan trial. After the trial, you can either pick a paid plan to keep using it or cancel your subscription. To start the trial, just click “Start Your Free 7 Day Trial.”
You’ll need a PayPal account for the next part. Enter your PayPal information to set up automatic subscription renewal.
After submitting your information, you’ll get an email with a link to claim your trial. Click “Claim Your Free Trial Now” in the email, and it will take you to a page where you can start your trial by entering your details.
Remember, the trial lasts only 7 days. If you don’t want to be charged, make sure to cancel the subscription or delete your account before the trial ends. We’ve explained how to do this at the end of this article if you need help.
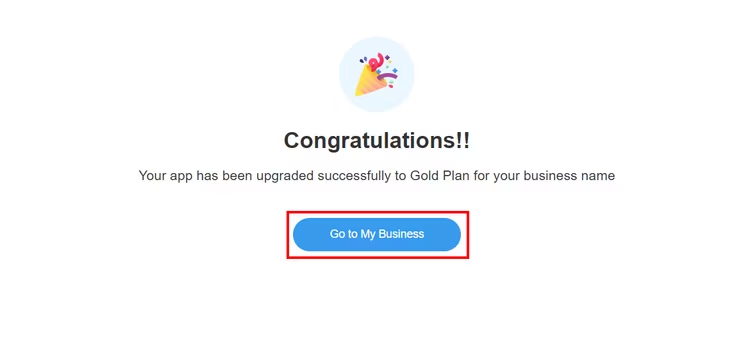
Once you’re all set, you’ll see a message saying your account is now on the Gold plan. Click “Go to My Business” to see your business dashboard.
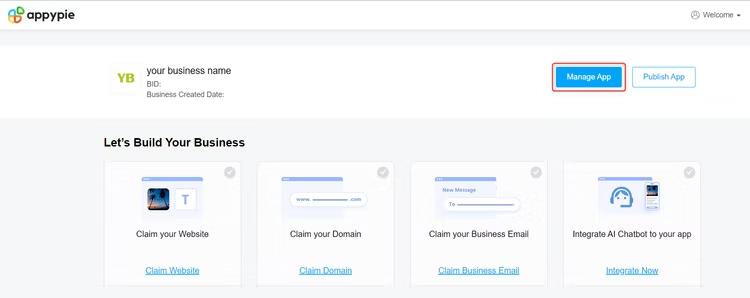
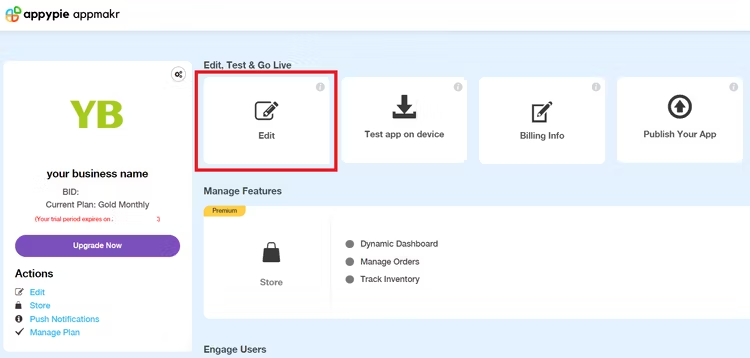
Go to your dashboard and select “Manage App” to get to your app’s main page. Here, press “Edit” to start making changes to your app.
Remember this editing page – we’ll talk about it more in this guide.
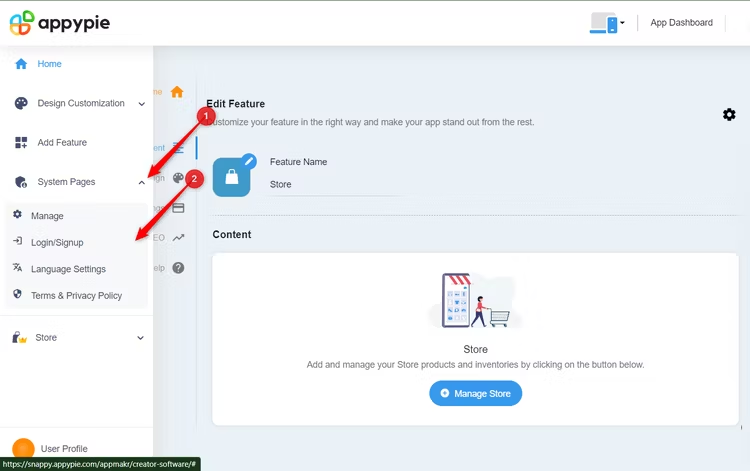
To add pages for signing up or logging in, choose “System Pages” on the top left of the editing page, and then select “Login/ SignUp”.
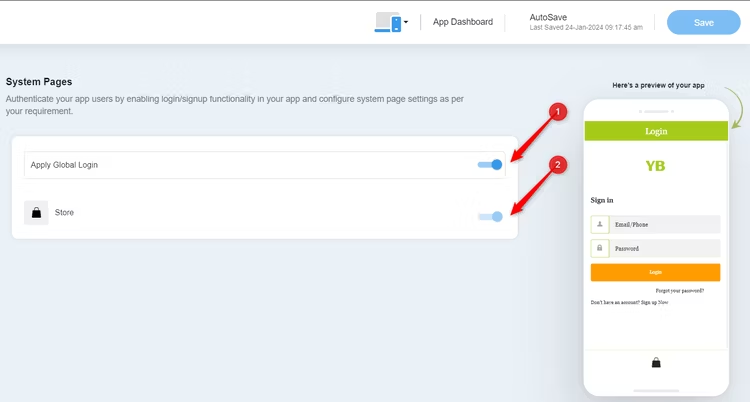
Turn on the options for “Apply Global Login” and “Store” by clicking the switches next to them. On the right side, you can see how your app looks on a phone as you make changes.
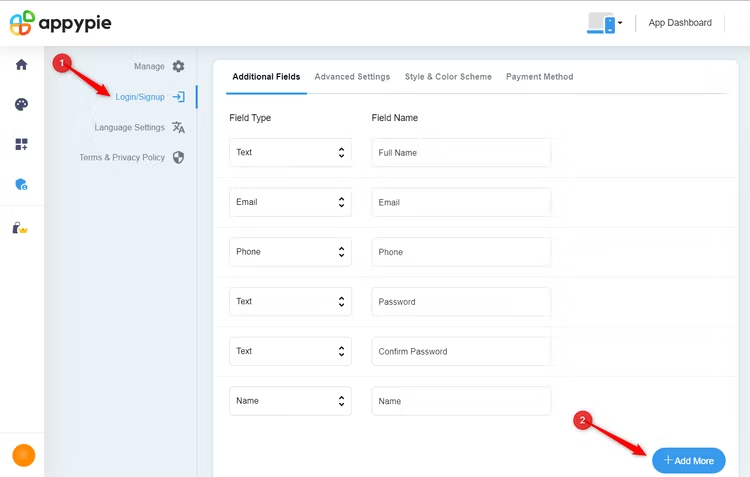
If you want to add more fields to your signup page, click “Login/ Signup” again and then “Add More”. You can also change the look and color theme here.
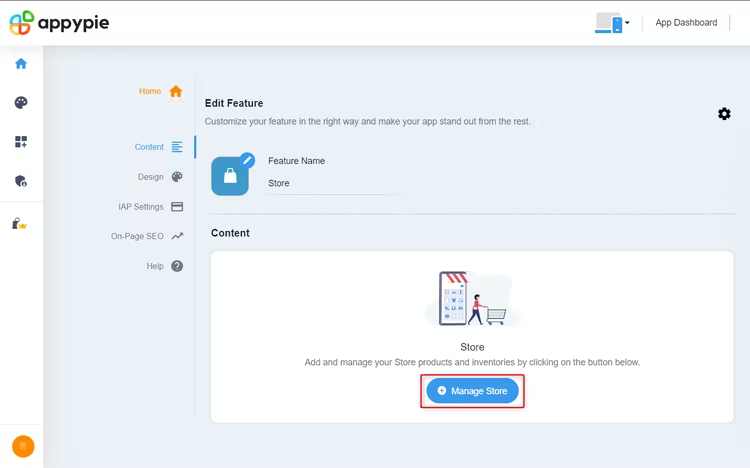
To handle your store, choose “Manage Store” on the editing page. This lets you add or change your product details, like photos, prices, and if something’s out of stock.
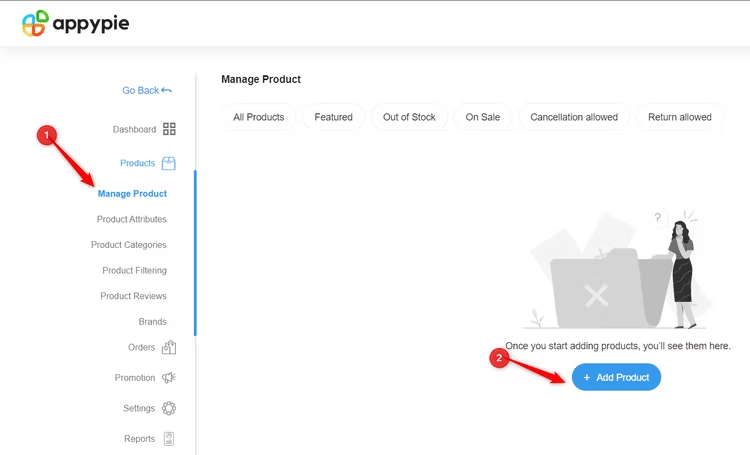
To add products, click “Products”, then “Manage Product” and “Add Product” to enter your product information.
For shipping settings, go back to “Manage Store” and select “Set up Shipping”. Appy Pie lets you add shipping options like FedEx to your app.

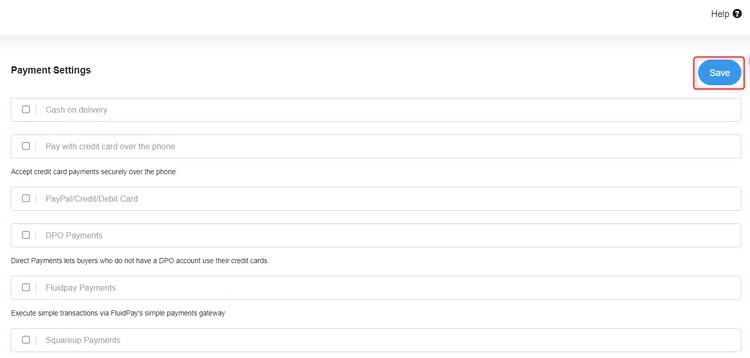
To arrange payments, click “Manage Store” again, then “Edit Payments.
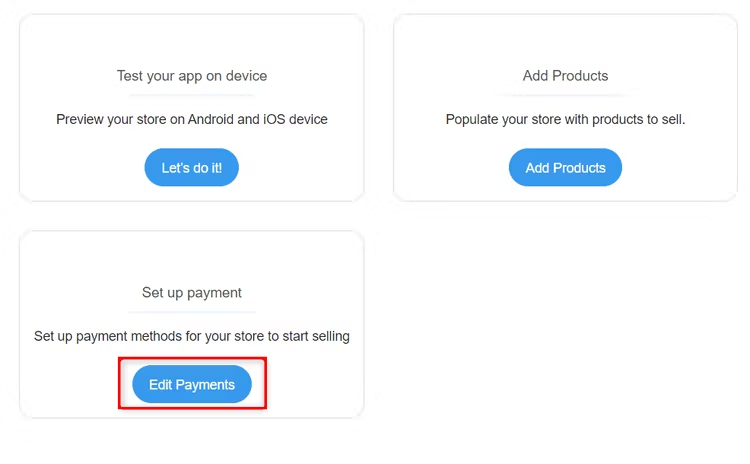
Choose the payment methods you want, like credit card, cash on delivery, or PayPal, and press “Save”.
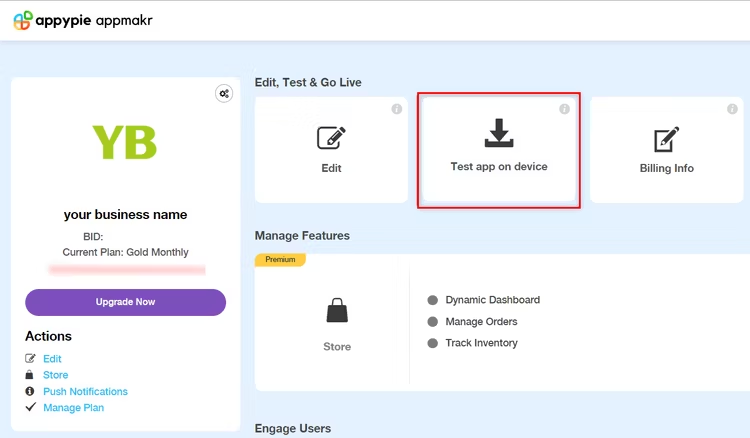
From the main page of your app, select “Test App on Device” for testing your app.
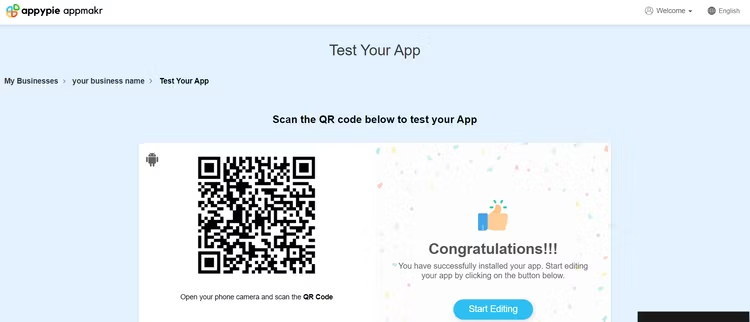
Then, use your smartphone’s camera to capture the QR code. You’ll be guided to download a program named “Test Lab App.” Post-download, input the email linked to your Appy Pie account. Now, you can view your app directly on your mobile device.
After you’re satisfied with how your app looks and works, it’s time to share it on the Google Play store or Apple’s App Store. This way, people who might be interested in what you’ve created can download and start using your app.
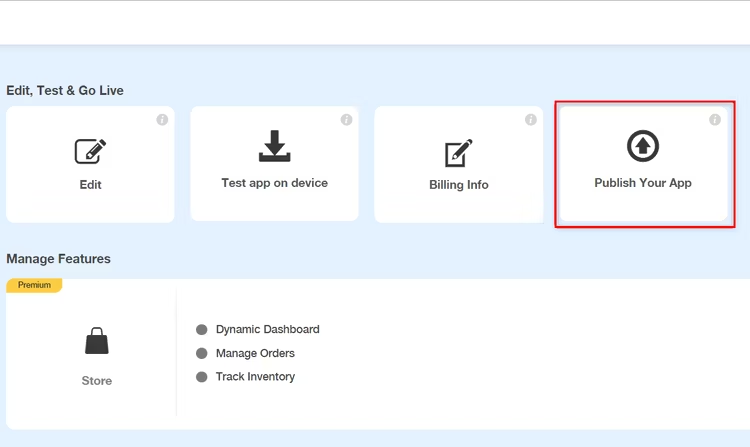
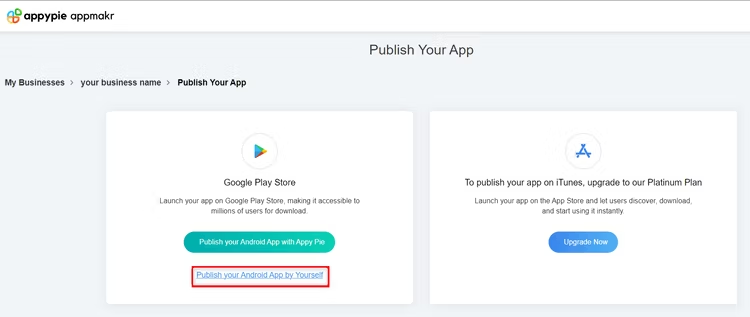
To begin, go to your app’s main page and click on “Publish Your App”.
If you’re using the free trial, you can only share your app on the Google Play Store. Want to put it on the App Store? You’ll need to switch to the premium plan.
Now, select “Publish Your Android App by Yourself”. You’ll see a list of instructions after that. Just follow these instructions to get your app on the Google Play Store.
If you’d rather have some help with this process, choose “Publish Your Android App With Appy Pie” and set up a time to get assistance with submitting your app.
Remember, you must have a Google Developer account to upload your mobile app to the Google Play Store.
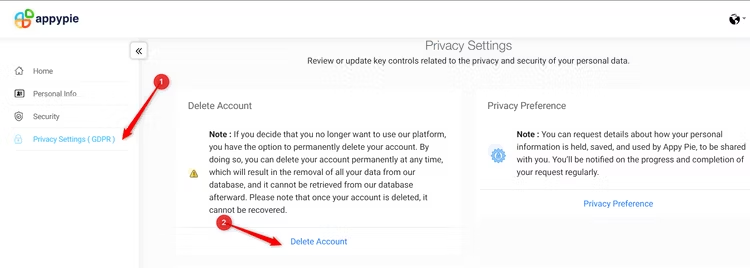
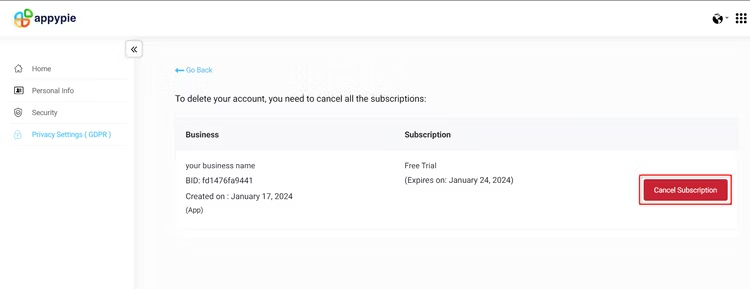
If you choose not to buy a premium plan, you can cancel your subscription easily. Just go to “Privacy Settings (GDPR)” on the bottom left of your homepage and click on “Delete Account”.
Then, hit “Cancel Subscription” and follow the steps. Appy Pie will take care of canceling your subscription for you.
Well done on making your mobile app! Make sure to use high-quality pictures of your products so customers can clearly see what they’re buying.