How to get your Facebook App ID to integrate Facebook login into your Android/iOS app created with Appy Pie ?
Follow the below steps to get your Facebook App ID:
Step 1 : Go to Facebook Developer page and click Log In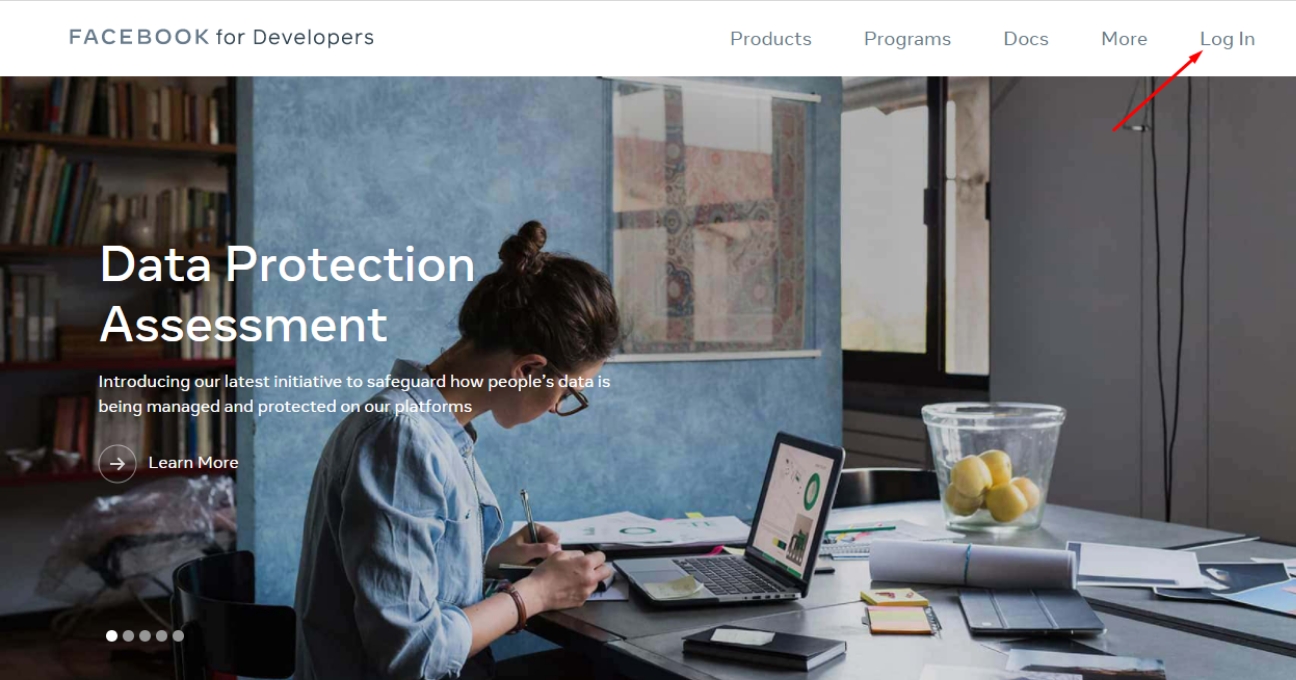
Step 2 : If you have a Facebook account, log in, else create a new account. 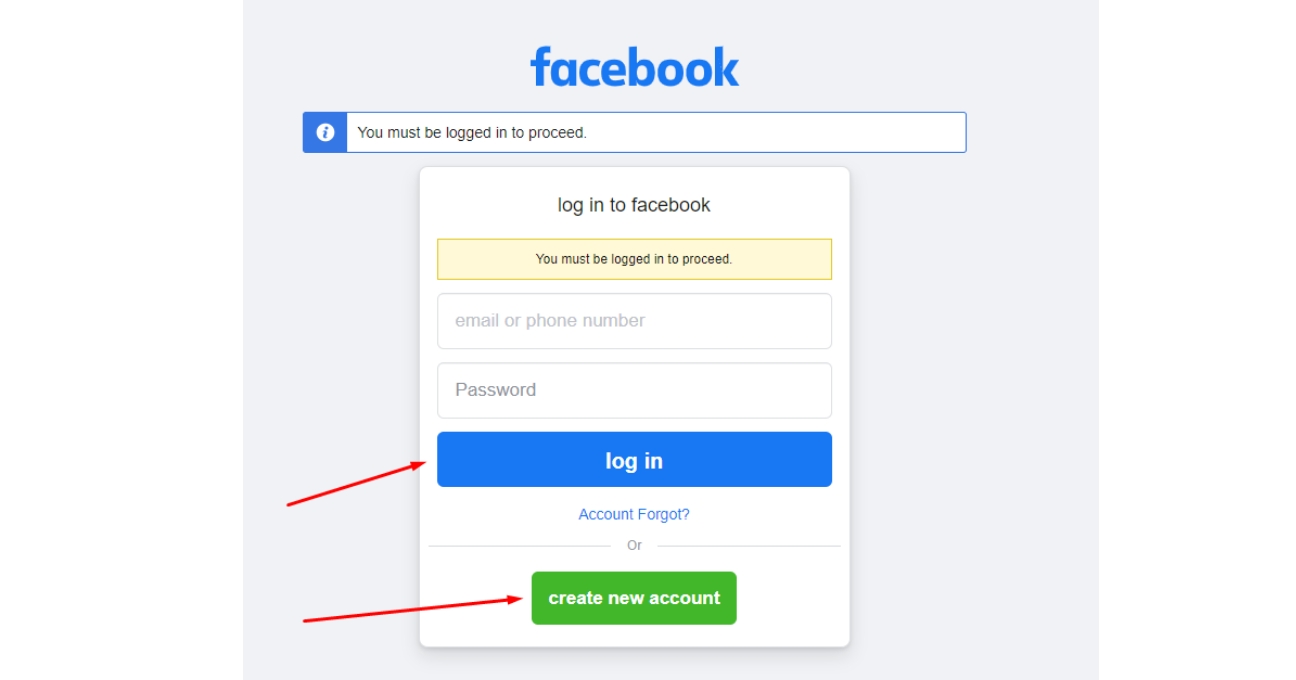 Step 3 : Once you have logged in, click My Apps in the top right corner of the page.
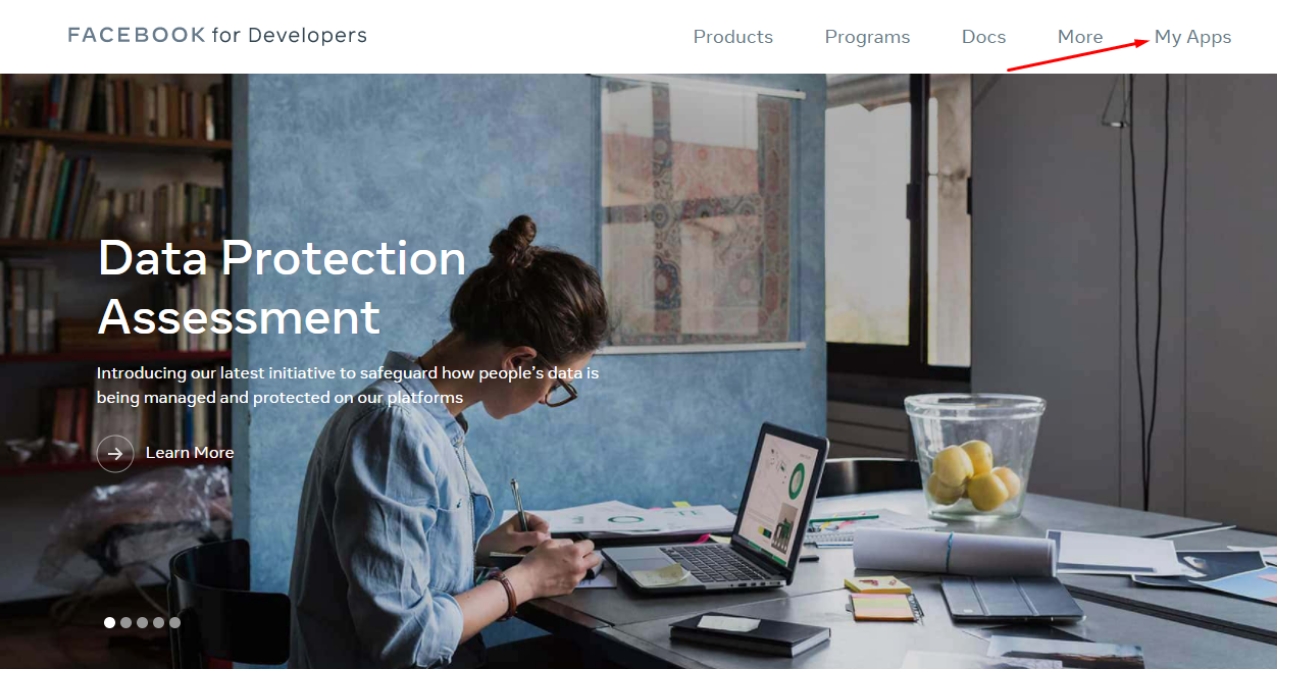
 Step 4 : Click the Create App button to create a new app.
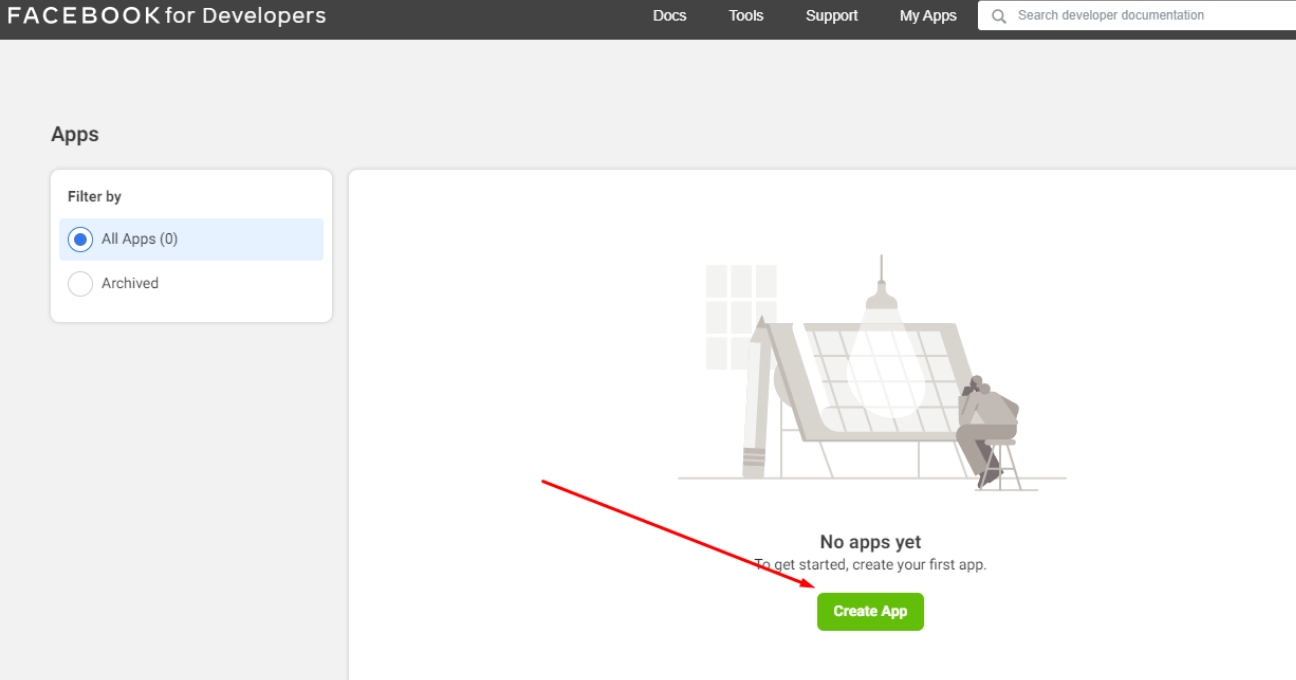
Step 5 : Select the Consumer option as the app type, then click Continue.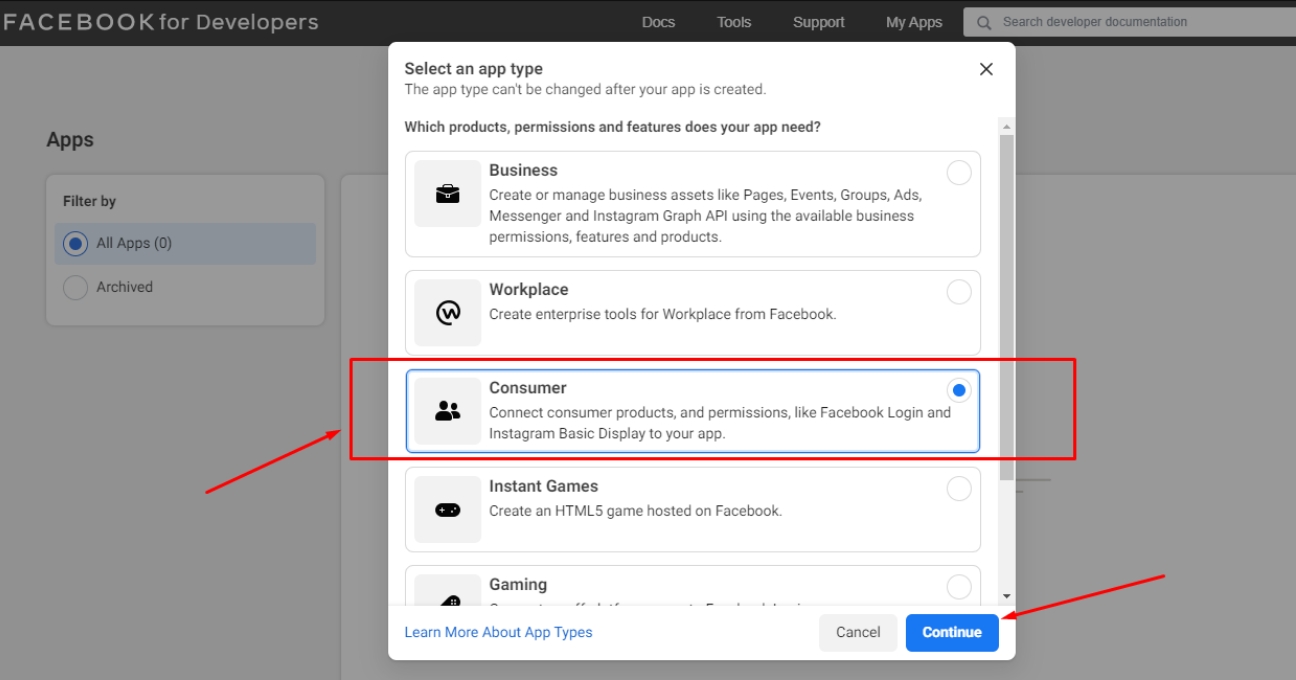
Step 6 : In the Create an App dialog, enter an app display name and app contact email. For the Business Manager account option, select No Business Manager account selected from the dropdown. Once done, click Create App.

Step 7 : Next, authenticate your account by entering your password and click Submit to continue.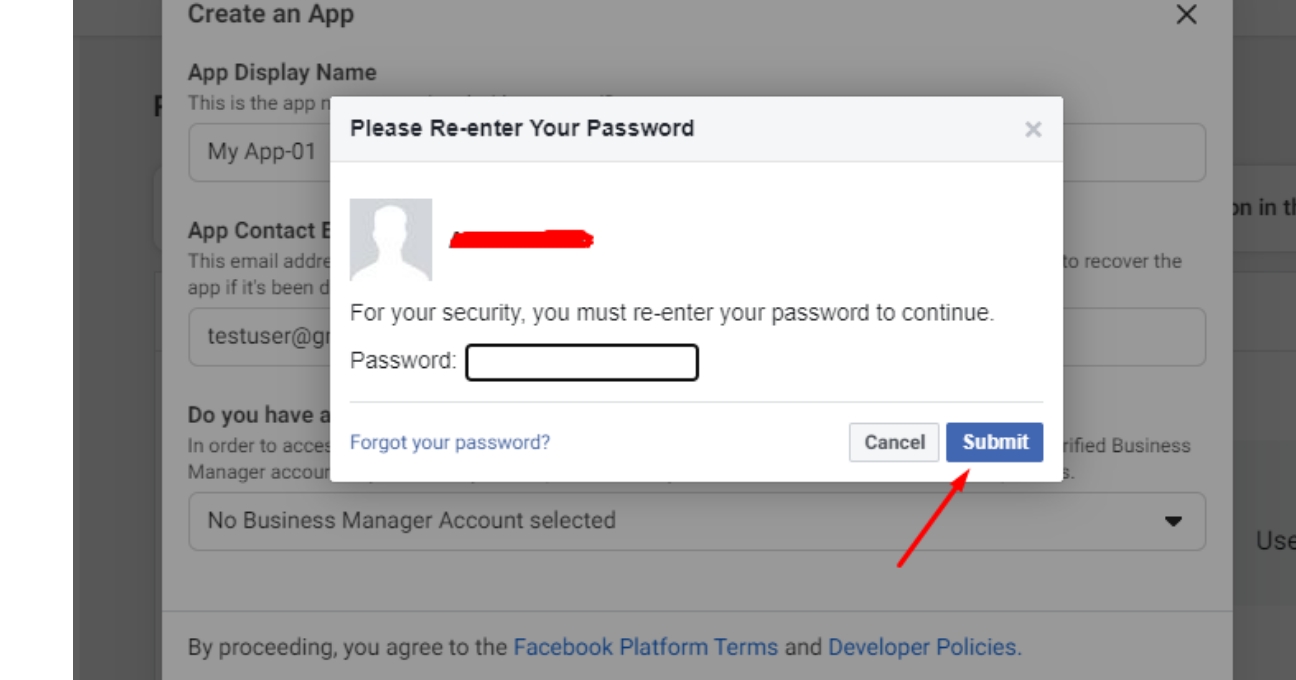
Step 8 : Open the Settings menu and click Basic.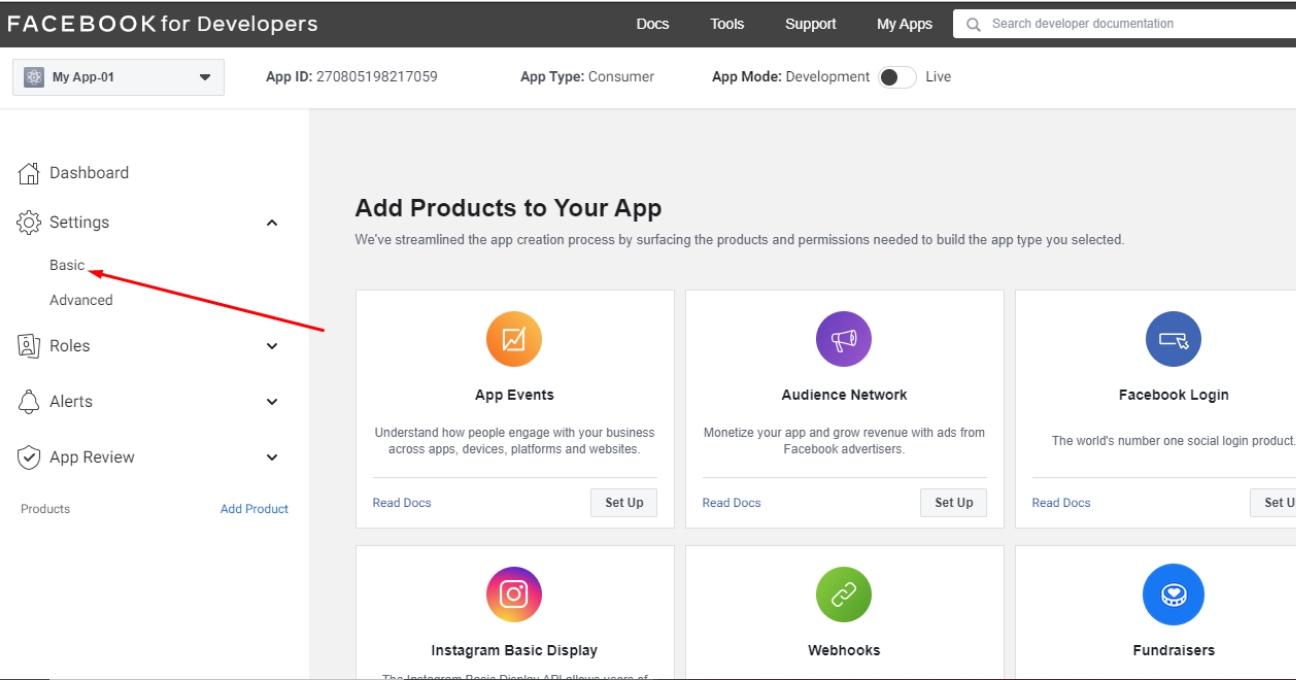
Step 9 : Enter your App Domain, Privacy Policy URL, Term of Service URL, and Data deletion Callback URL in the respective fields.
Note: If you don’t have Data deletion Callback URL and Privacy Policy URL, copy and paste Appy Pie’s URL- https://appcdn.media/privacy/?app=APPNAME in both the fields.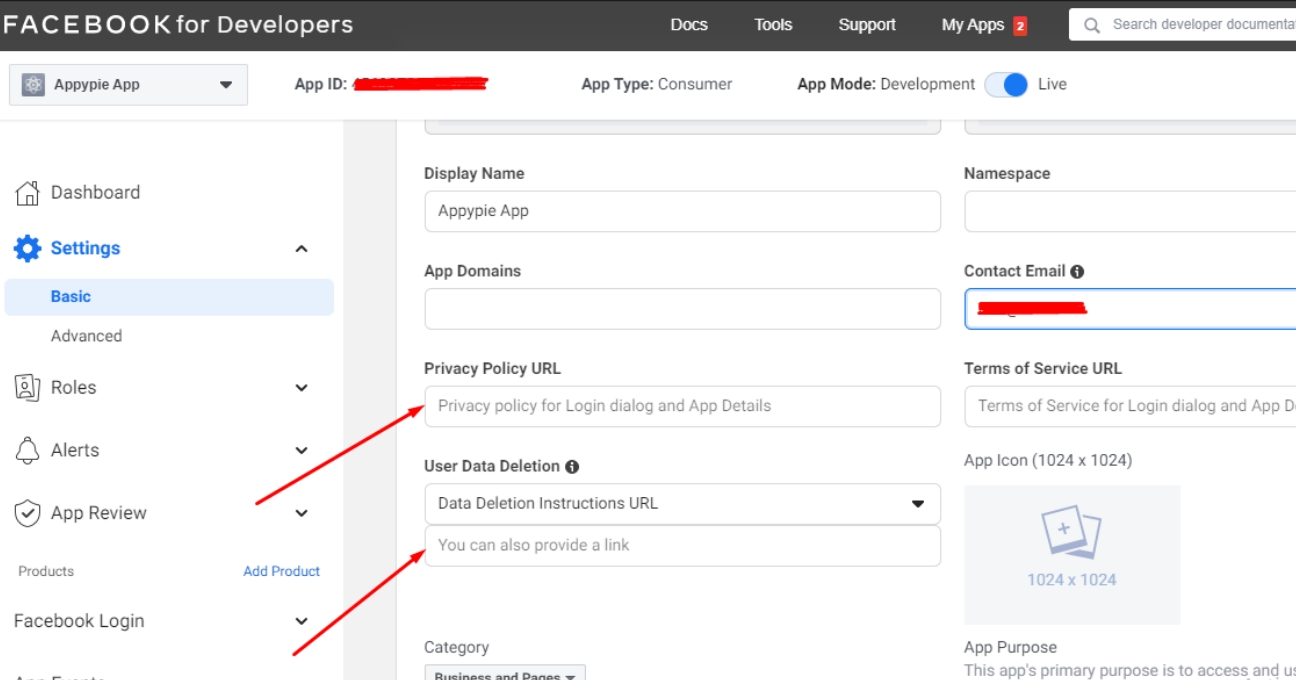
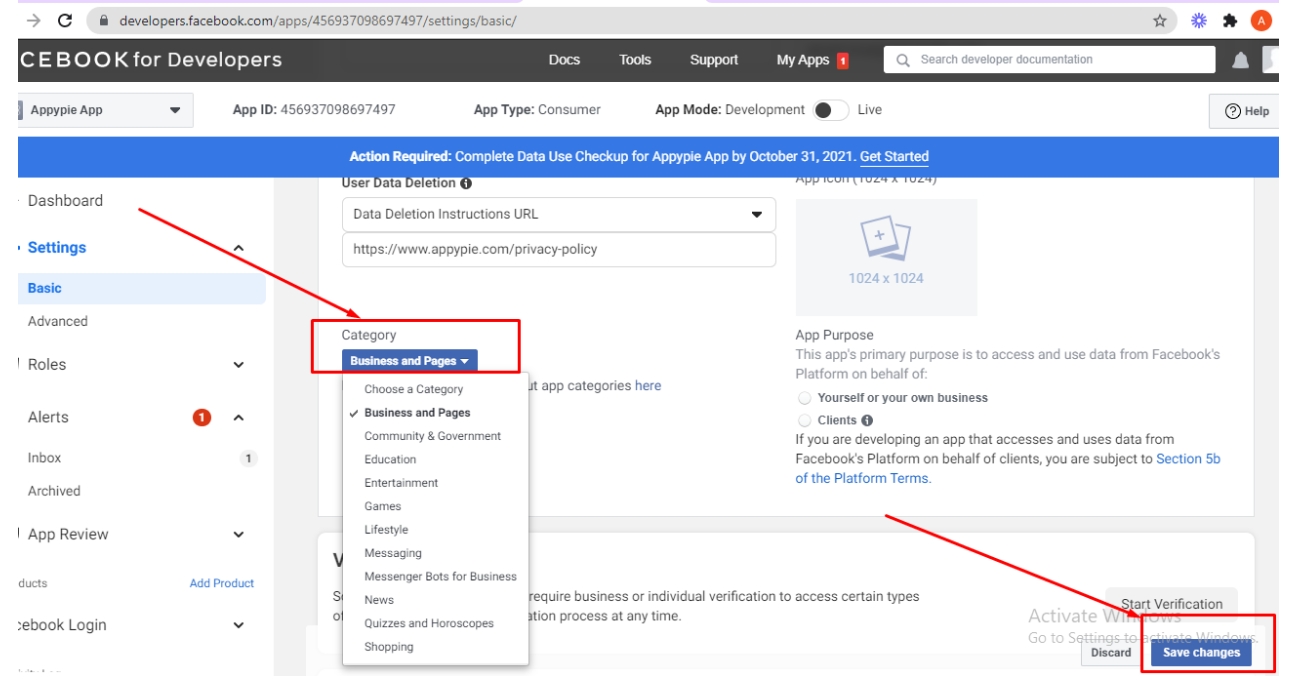
Step 10 : Scroll down the Basic Settings page, then open the Category dropdown menu and select Business and Pages. Once done, click Save Changes.
Step 11 : Scroll down to the bottom of the Basic Settings page, then click the Add Platform button.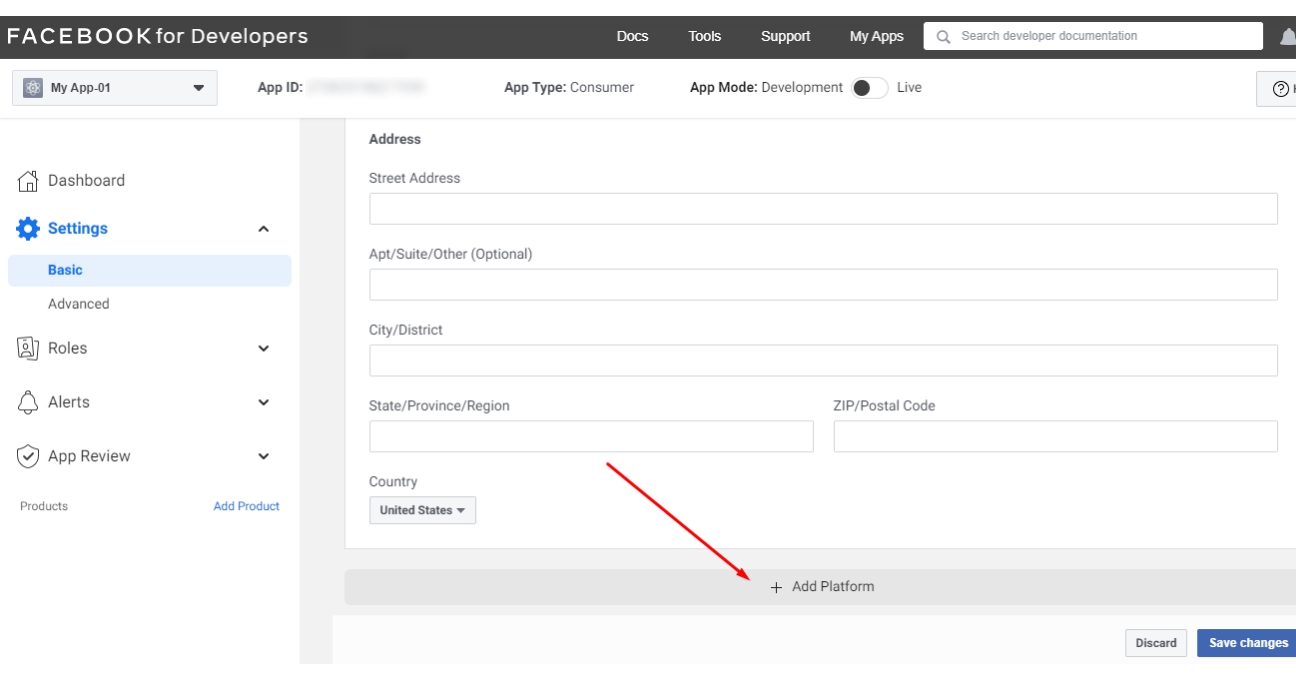
Step 12 : Select Android and click Next.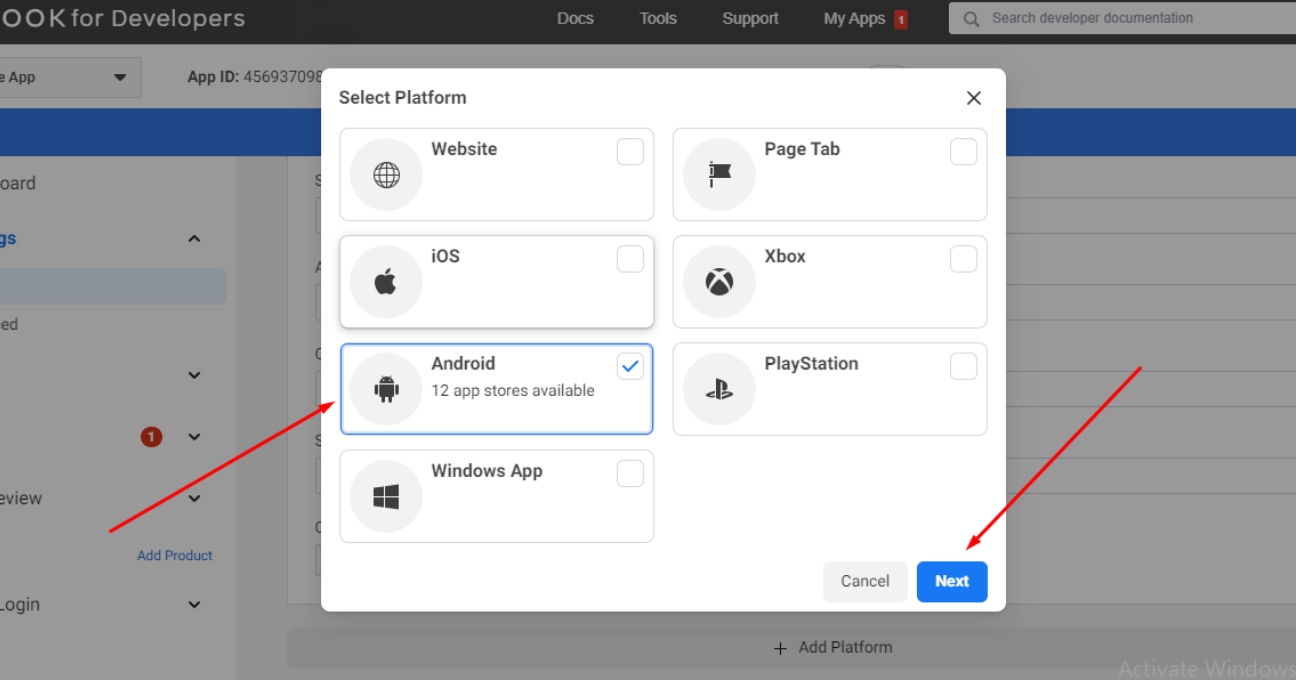
Step 13 : In the Select Android Store dialog, select Google Play from the dropdown menu.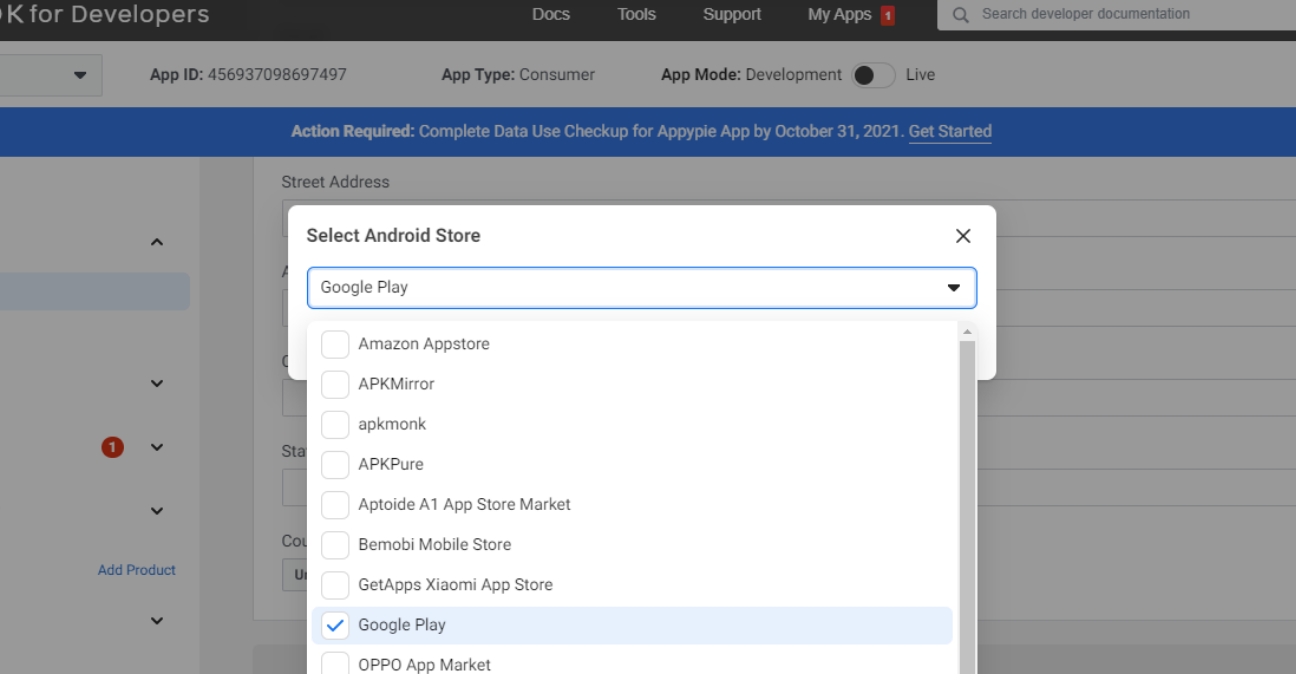
Step 14 : Once you have selected Google Play, click Next.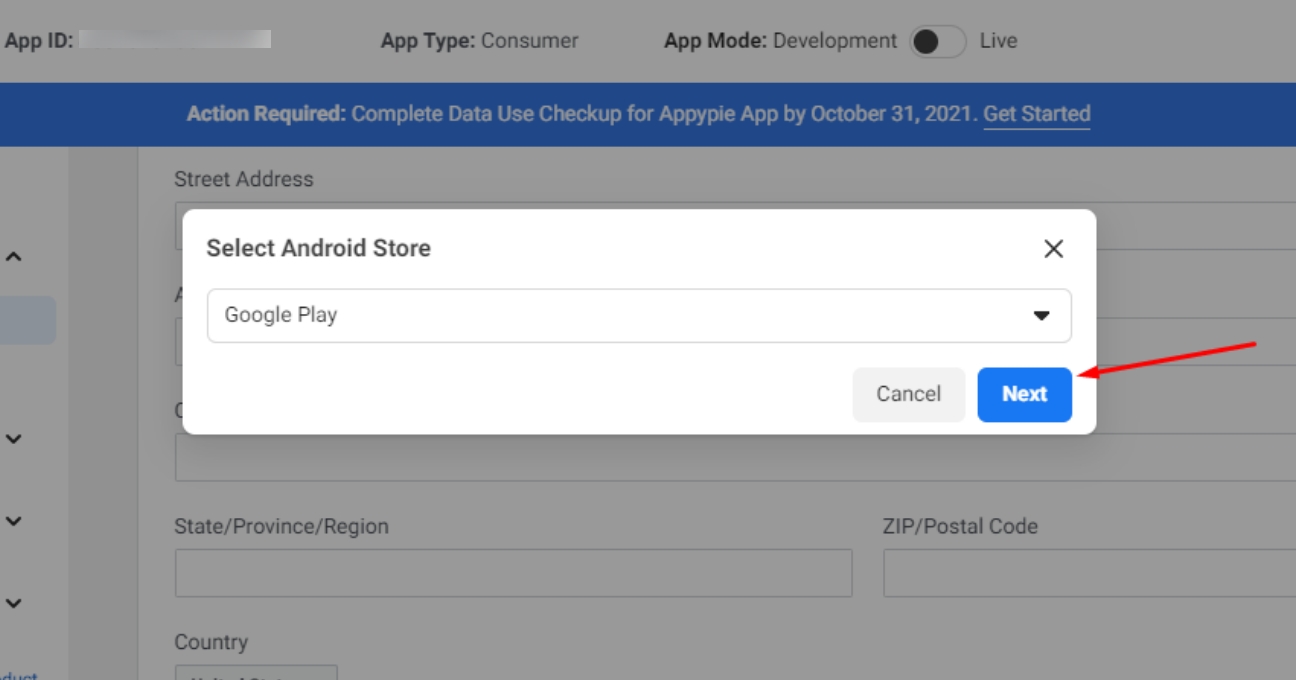
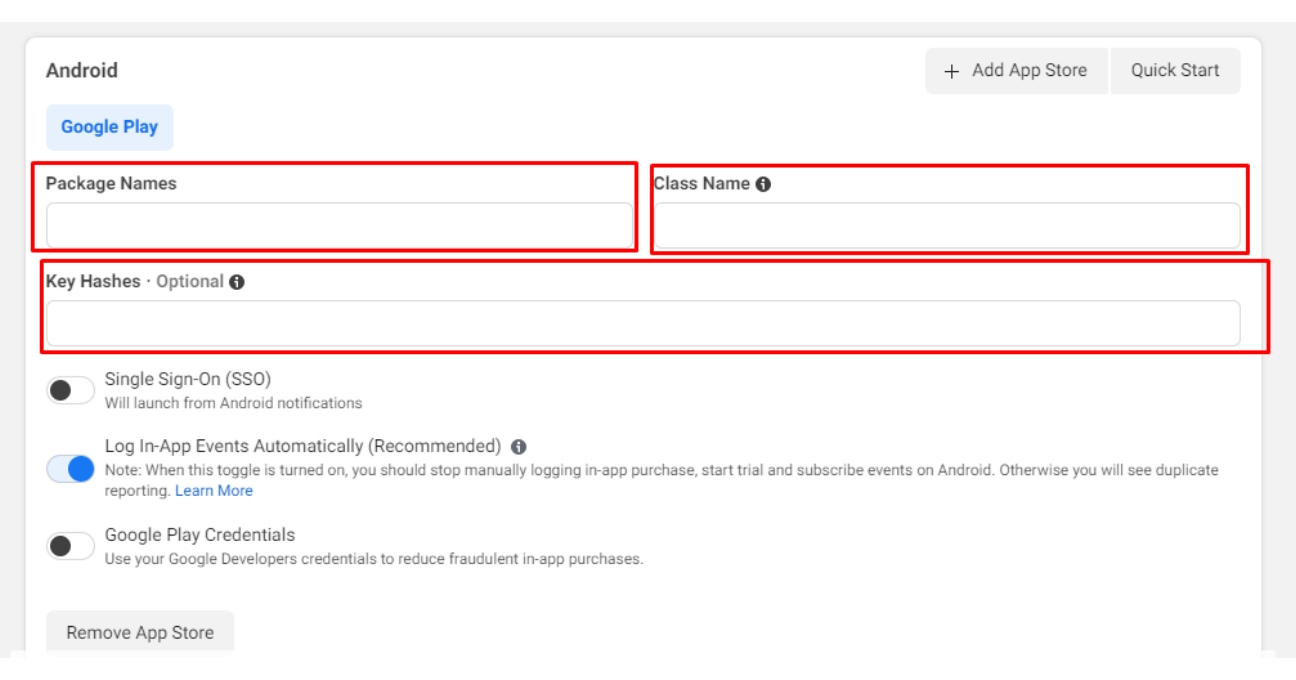
Step 15 :Under the Android section, enter Google Play Package Names, Class Name, and Key Hashes in the highlighted fields. If you don’t have these keys, copy-paste the following values:
- Google Play Package Name - com.app.packagename
Note: packagename is unique for each app. To find your package name, refer to our tutorial: How to Find Your App Package Name?
- Class Name - HomeActivity
- Key Hashes - VaSOGhegZ8f7Iu+zY5VY6sD8MT8=
Step 16 : Once you have provided the required details, click Save Changes.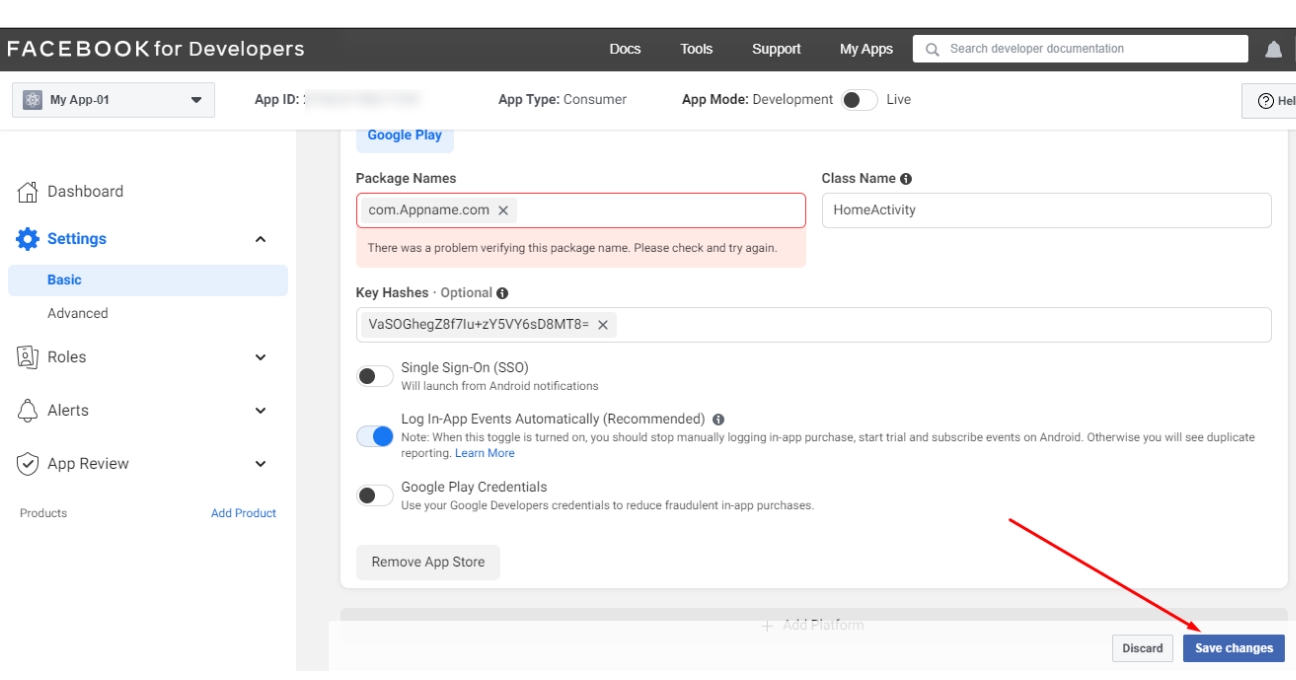
Step 17 : Similarly, you can add the iOS platform. Click Add Platform at the bottom of the Basic settings page.
Note: You can jump to Step 21 if you do not want to configure Facebook login for the iOS platform.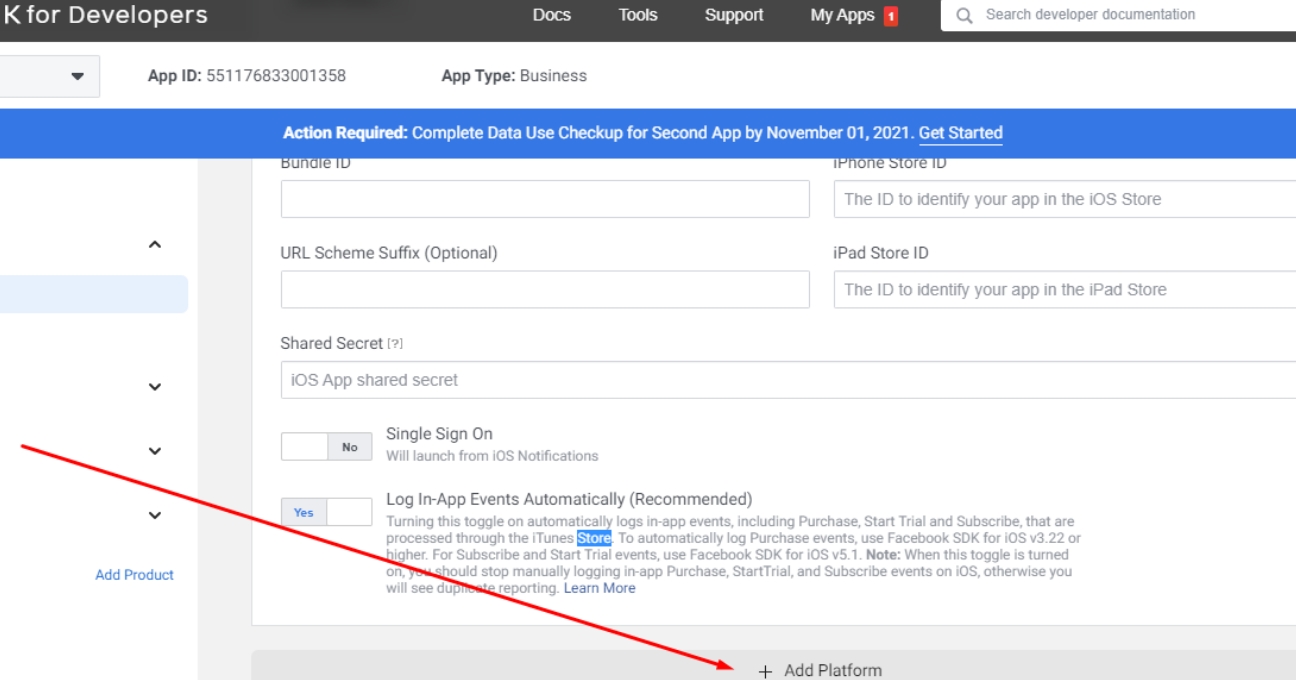
Step 18 : In the Select Platform dialog, select iOS and click Next.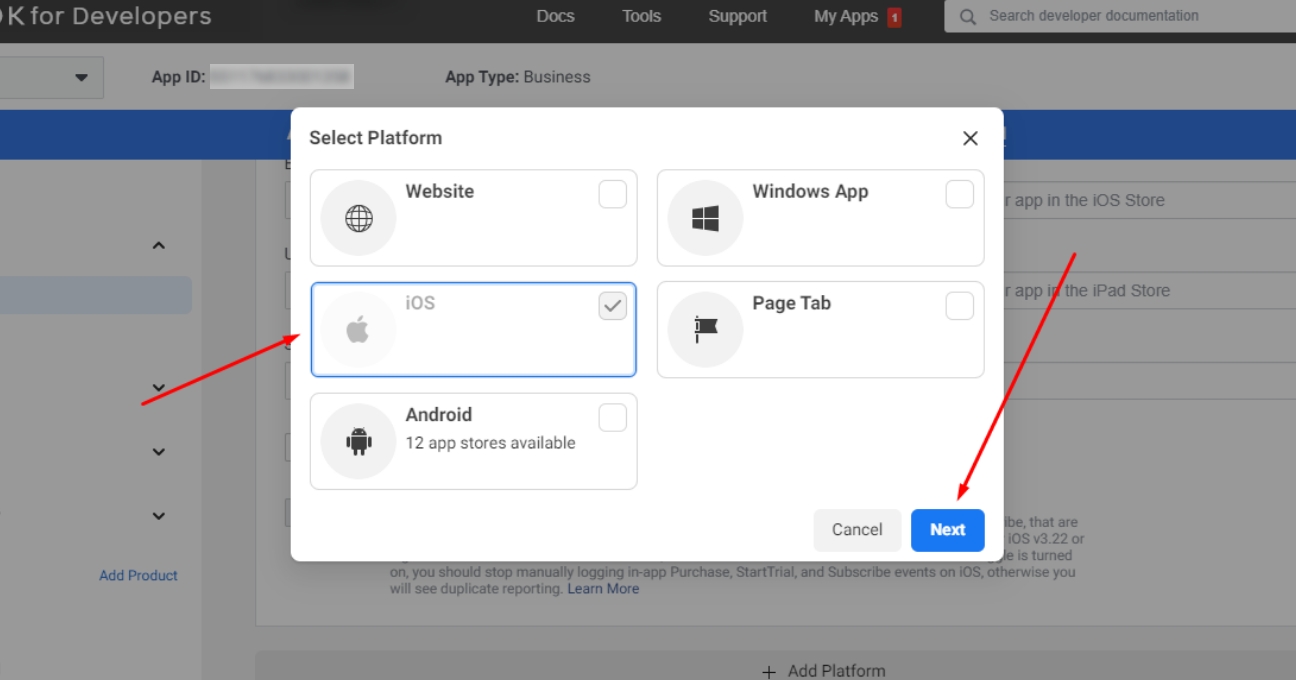
Step 19 : Under the iOS section, enter Bundle ID in the highlighted field. If you don’t have these keys, copy and paste the following values:
Bundle ID - com.app.packagename
Note: Packagename is unique for each app. To find your package name, refer to our tutorial: How to Find Your App Package Name?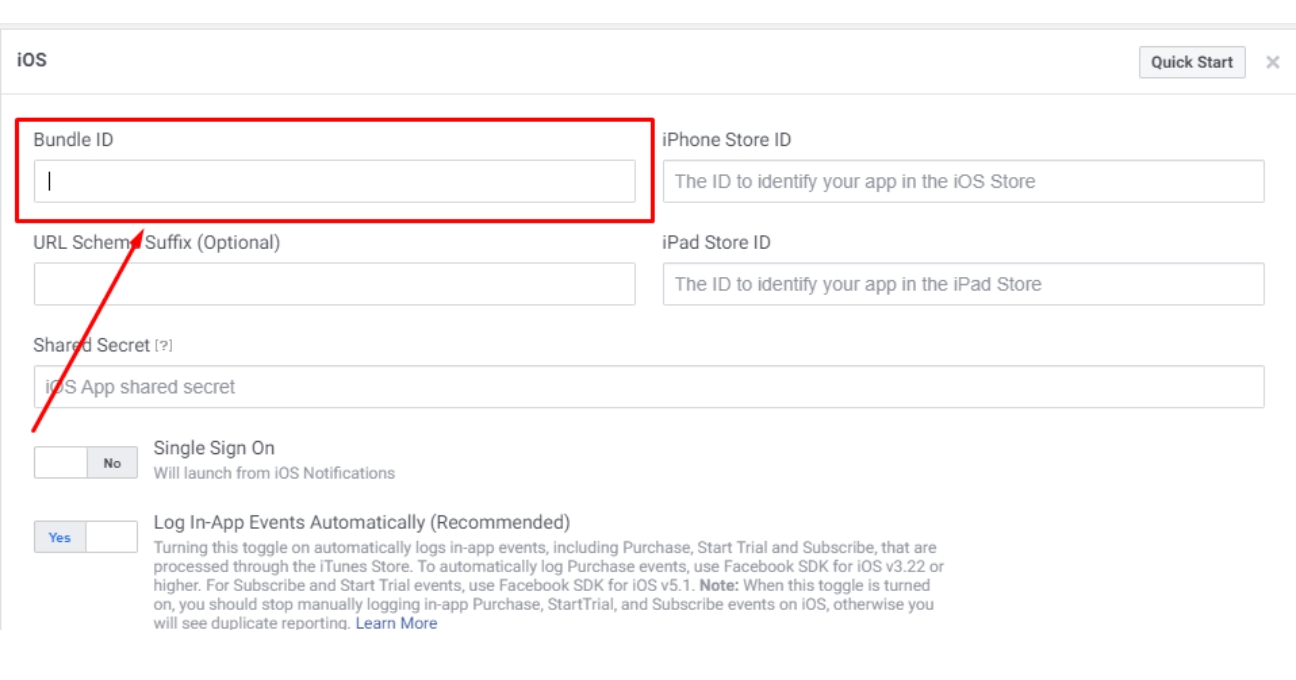
Step 20 : Once you have provided the required details, click Save Changes.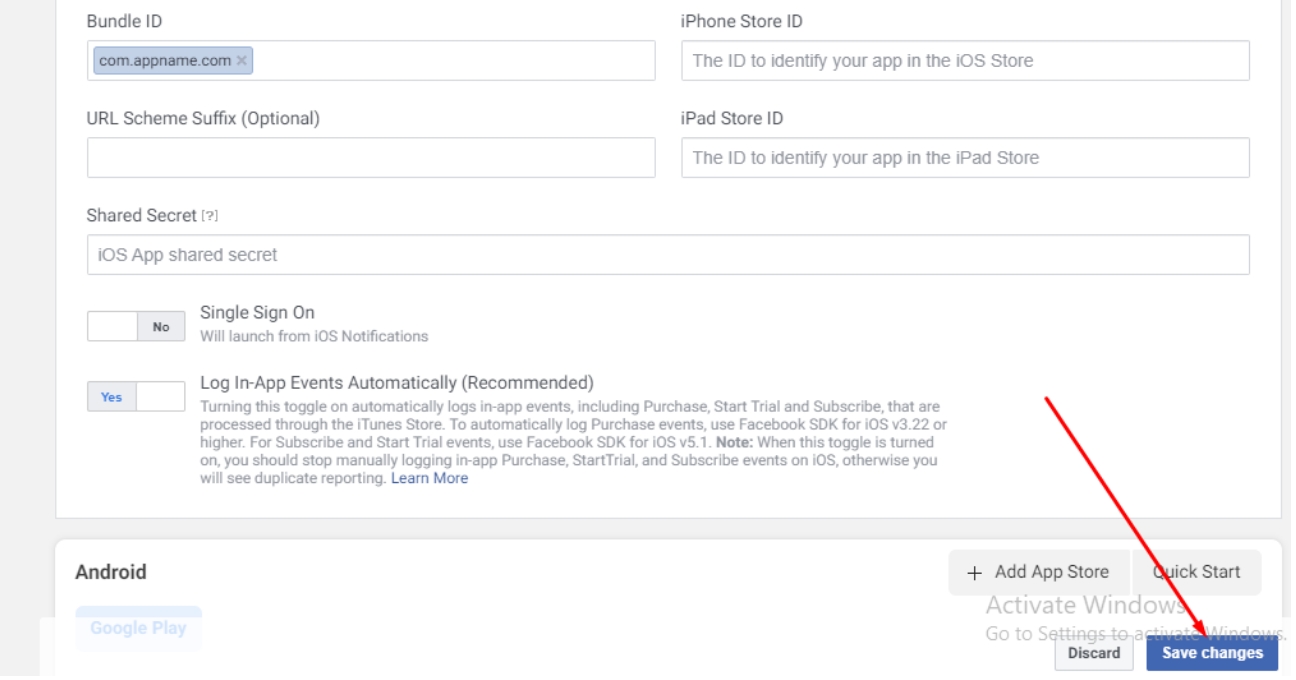
Step 21 : Click App Review in the side menu, then select Permissions and Features.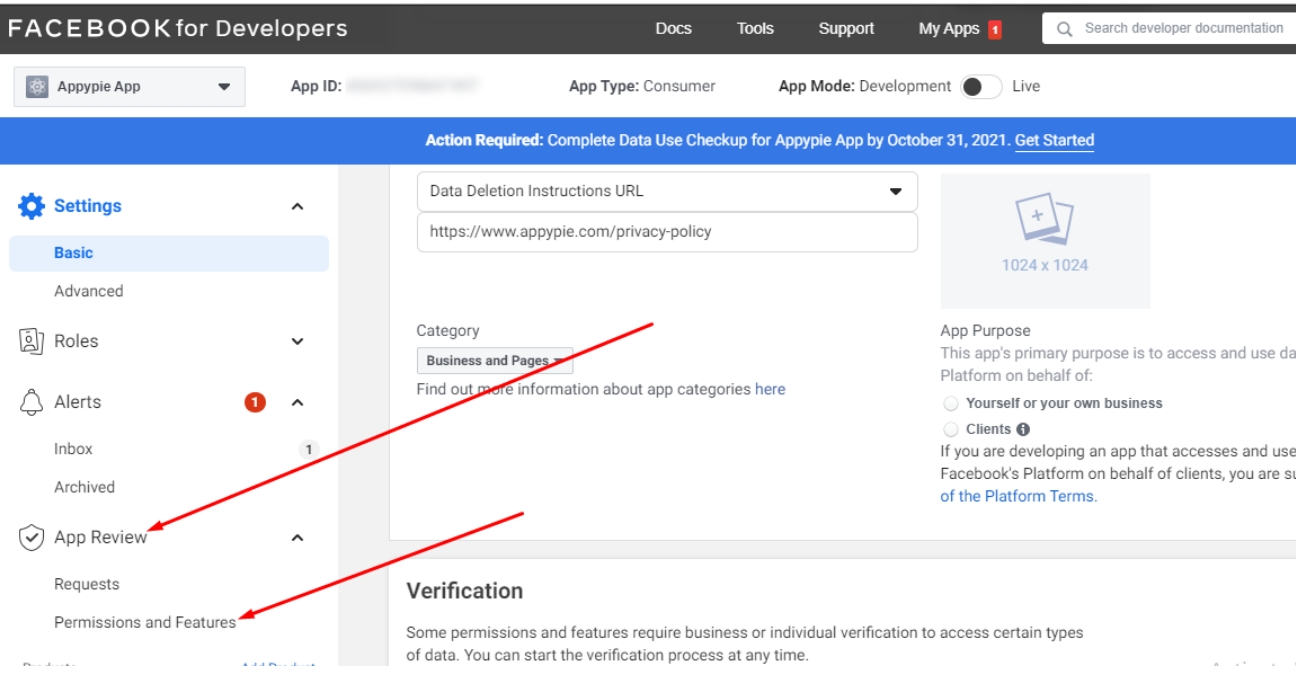
Step 22 : Review the information and guidelines carefully and click Done.
Step 23 : In the ‘How This App Requests Data” dialog, click Not Now.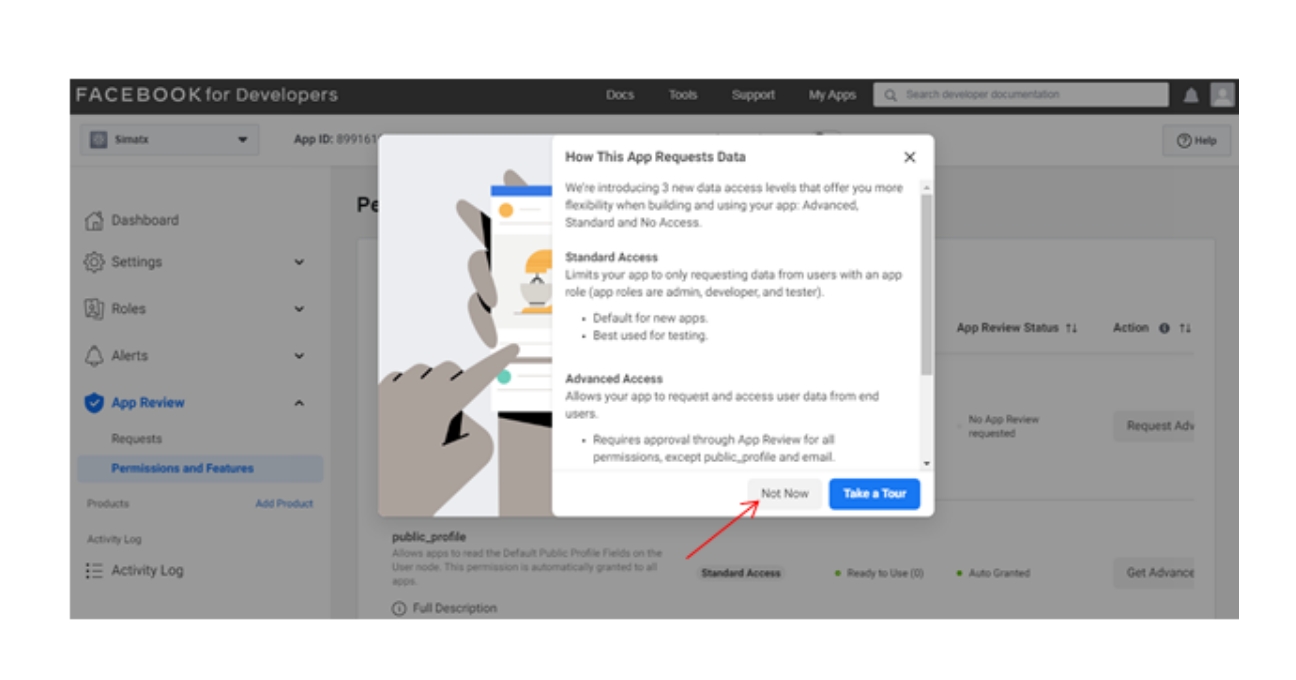
Step 24 : On the Permissions and Features Page, find the public_profile section and click the Get Advanced Access button.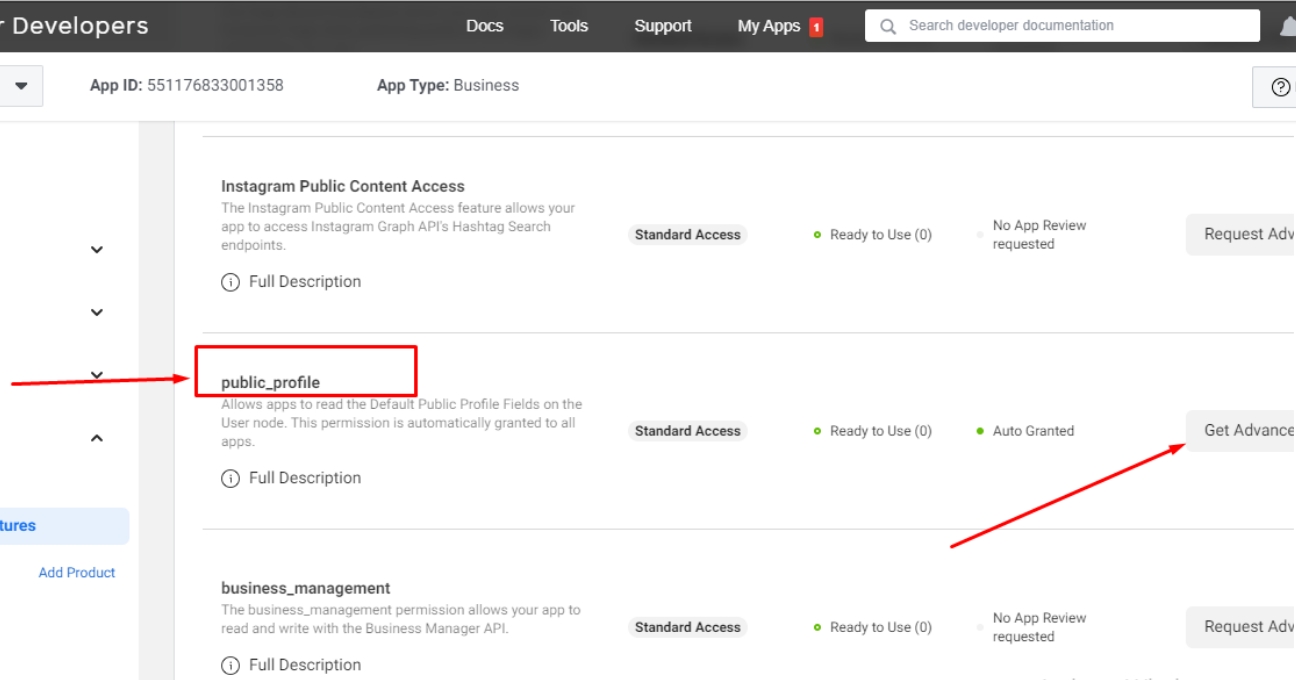
Step 25 : In the Confirm Advanced Access for public_profile dialog, tickmark the confirmation checkbox and click Confirm.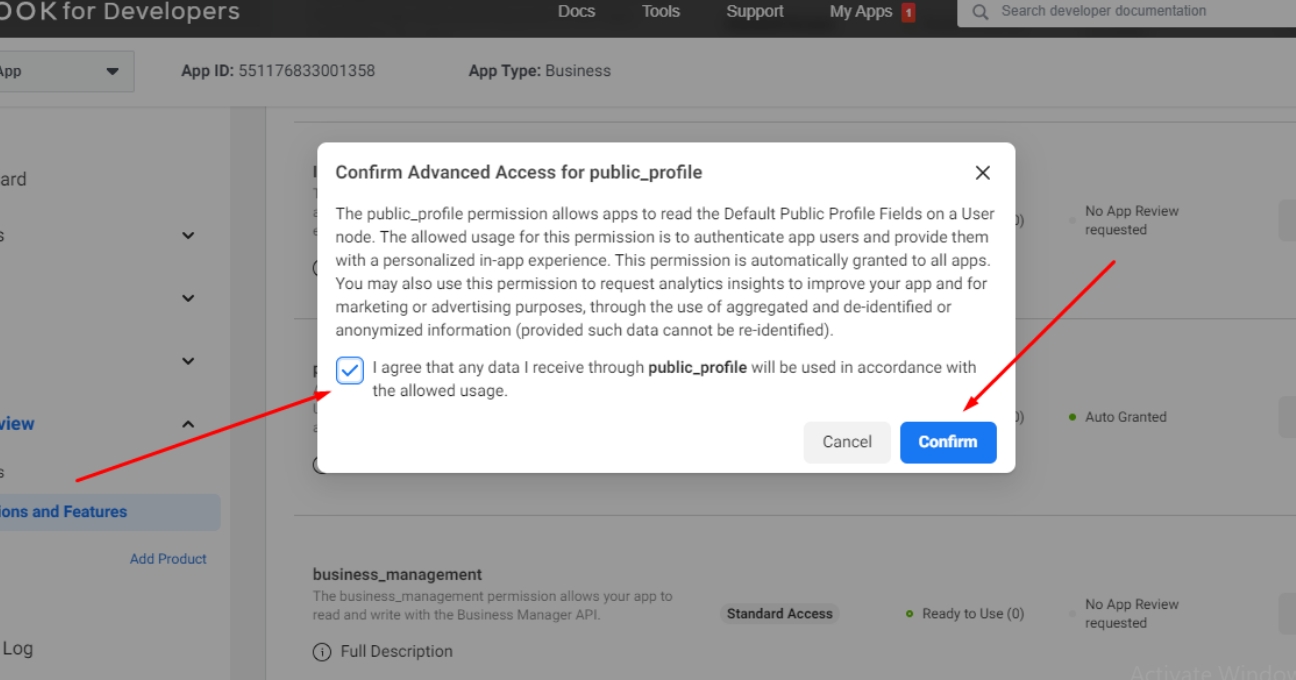
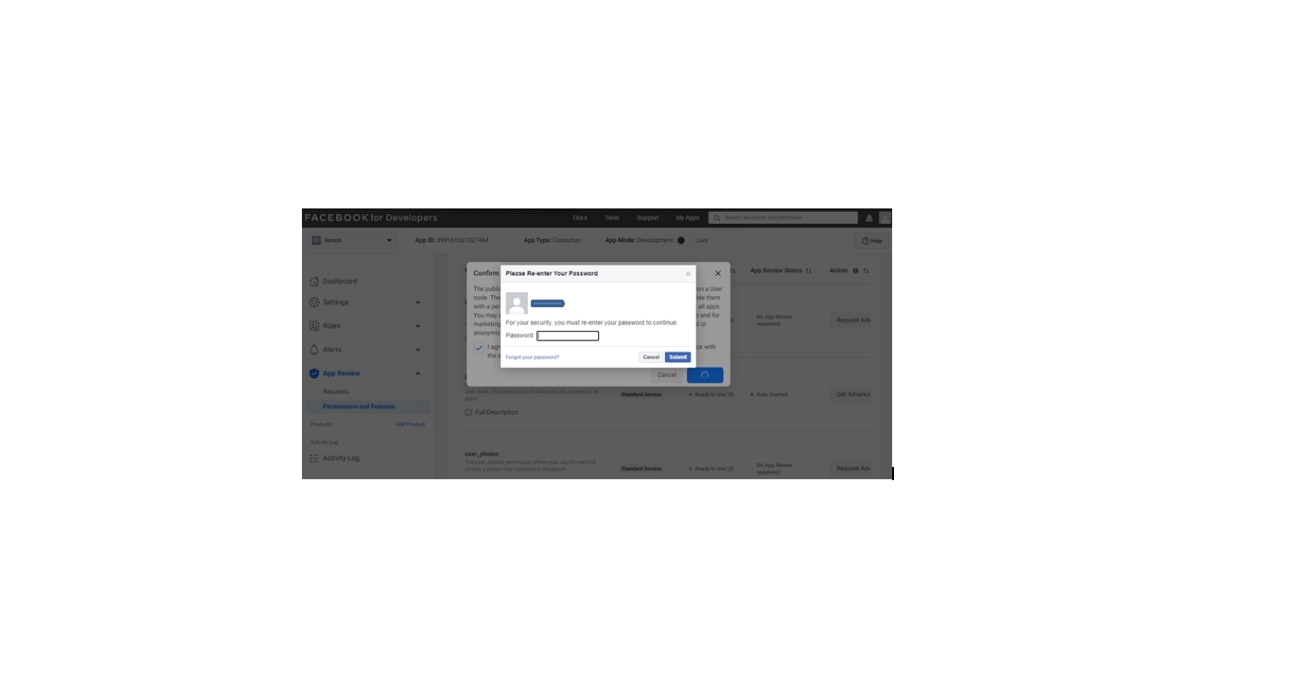
Step 26 : Authenticate your account by entering your password and click Submit to continue.
Step 27 : Again, on the Permissions and Features Page, search the email option and click the Get Advanced Access button.
Step 28 : In the Confirm Advanced Access for email dialog, tickmark the confirmation checkbox and click Confirm.
Step 29 : Again, authenticate your account by entering your password and click Submit to make the required changes.
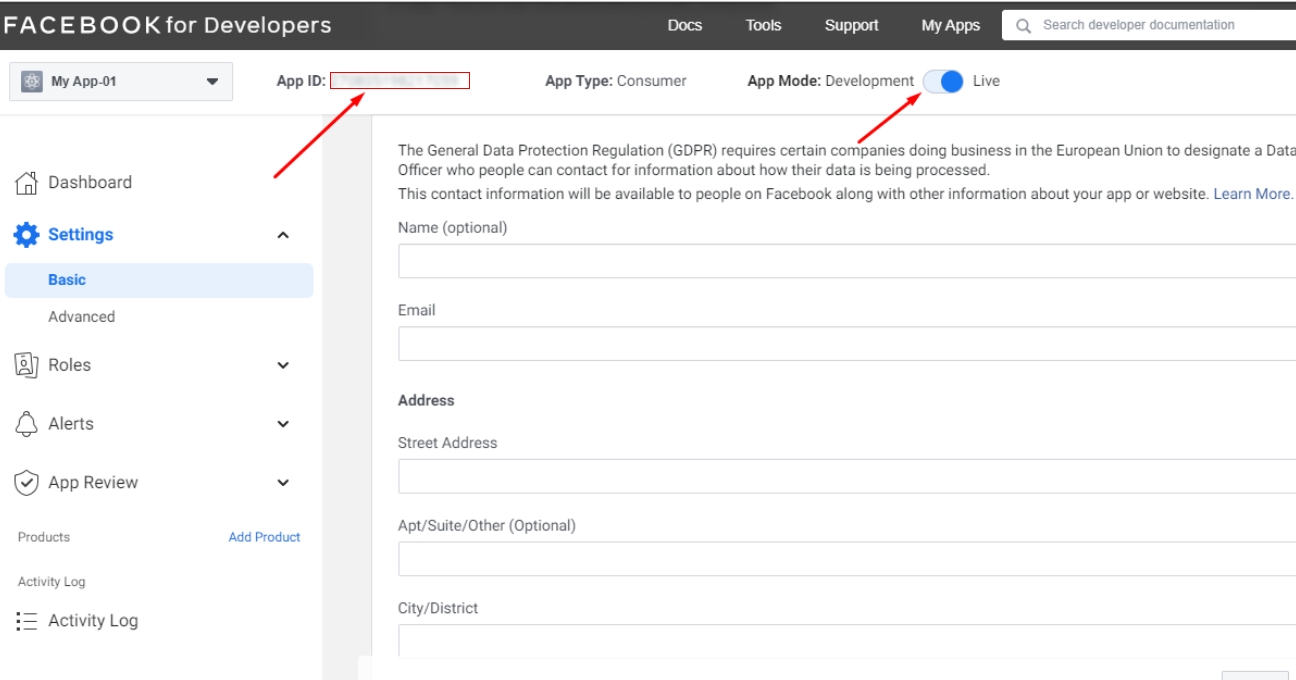
Step 30 : Now, go back to the Basic Settings page, enable the Status toggle button at the top, and copy the App ID.
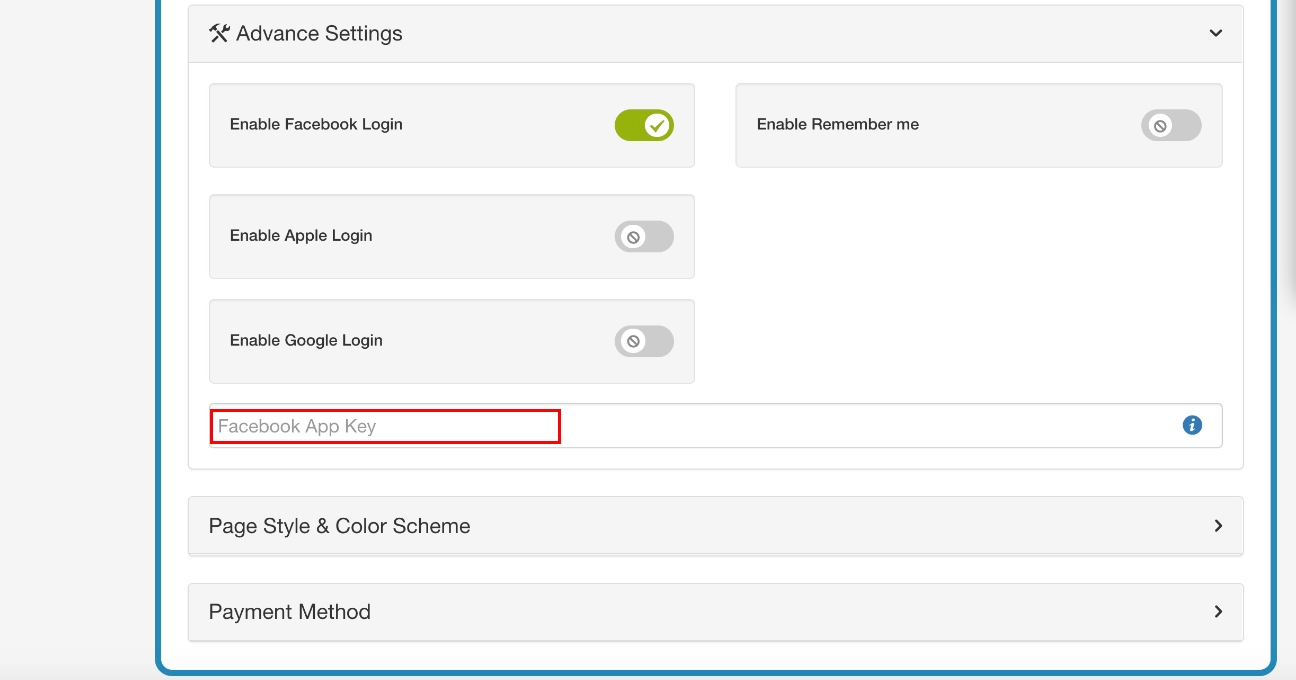
Step 31 : Now paste the copied App ID in the highlighted field in the Sign-in section on System pages.
Note : If you want to add the website to your Facebook app, please follow this tutorial: How to get your Facebook App's APP ID.