Appy Pie : How to Install the PrintNode Client in Windows ?
Follow steps mentioned below to to Install the PrintNode Client in Windows :
1. Go to PrintNode
2. If you have created an account with PrintNode, login, else Create an Account
3. Click on Download button to download client software on your system
4. Download the latest client version from here
5. Click open the downloaded PrintNode software Click on PrintNode

6. Accept the Licence Agreement and click on Next
7. Choose an installation location and click on Next
Note : Unless you have a specific need to install to a different location, leave this at the default setting.

8.Select a Start Menu folder and click on Next 9.Click on next
  10.Click on Install
 11.Click on finish
 12.Enter your Email Address and Password

13. Click on Sign In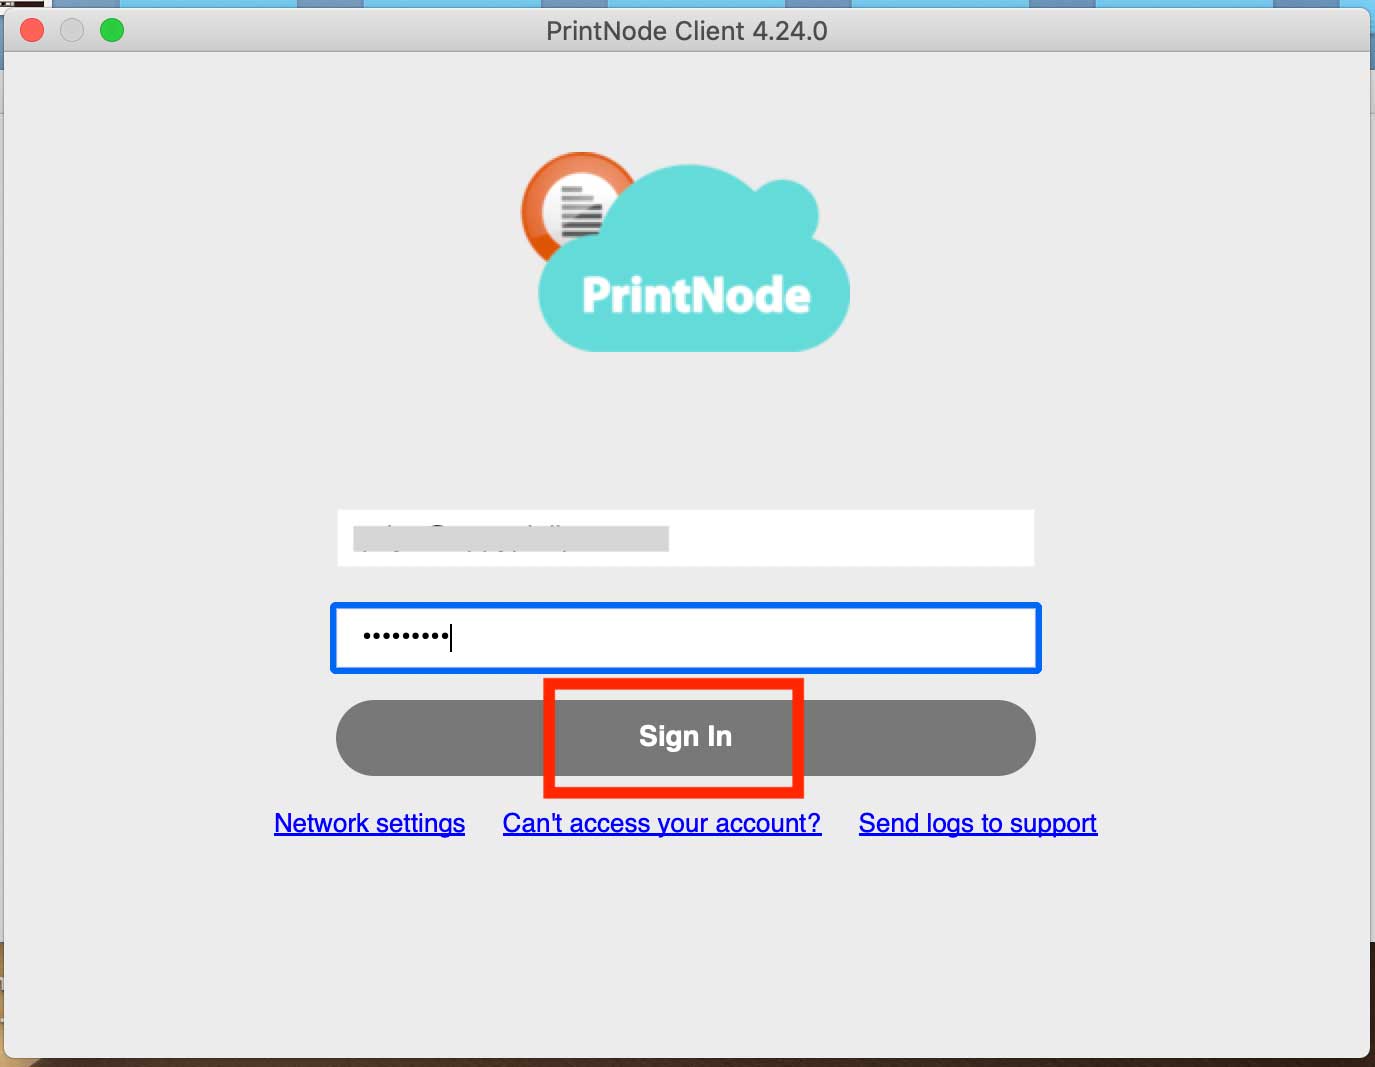
14. Go to Devices section present on left side panel
15. You can check the status of your connected computer here.
16. On the dashboard, you will see the Printer is successfully connected. Click on API Keys

17. Enter your account password
18. Click on Next
19. Enter the API Key description
20. Click on Create
21. Here is your API Key, copy it
22. Now paste the copied key in the PrintNode API Keys field
Note : For Installing the PrintNode Client in macOS / OS X , Follow this tutorial How to get PrintNode API Key?