Appy Pie : How to find Google web client id and secret key ?
Follow below steps to create find Google web client id and secret key :
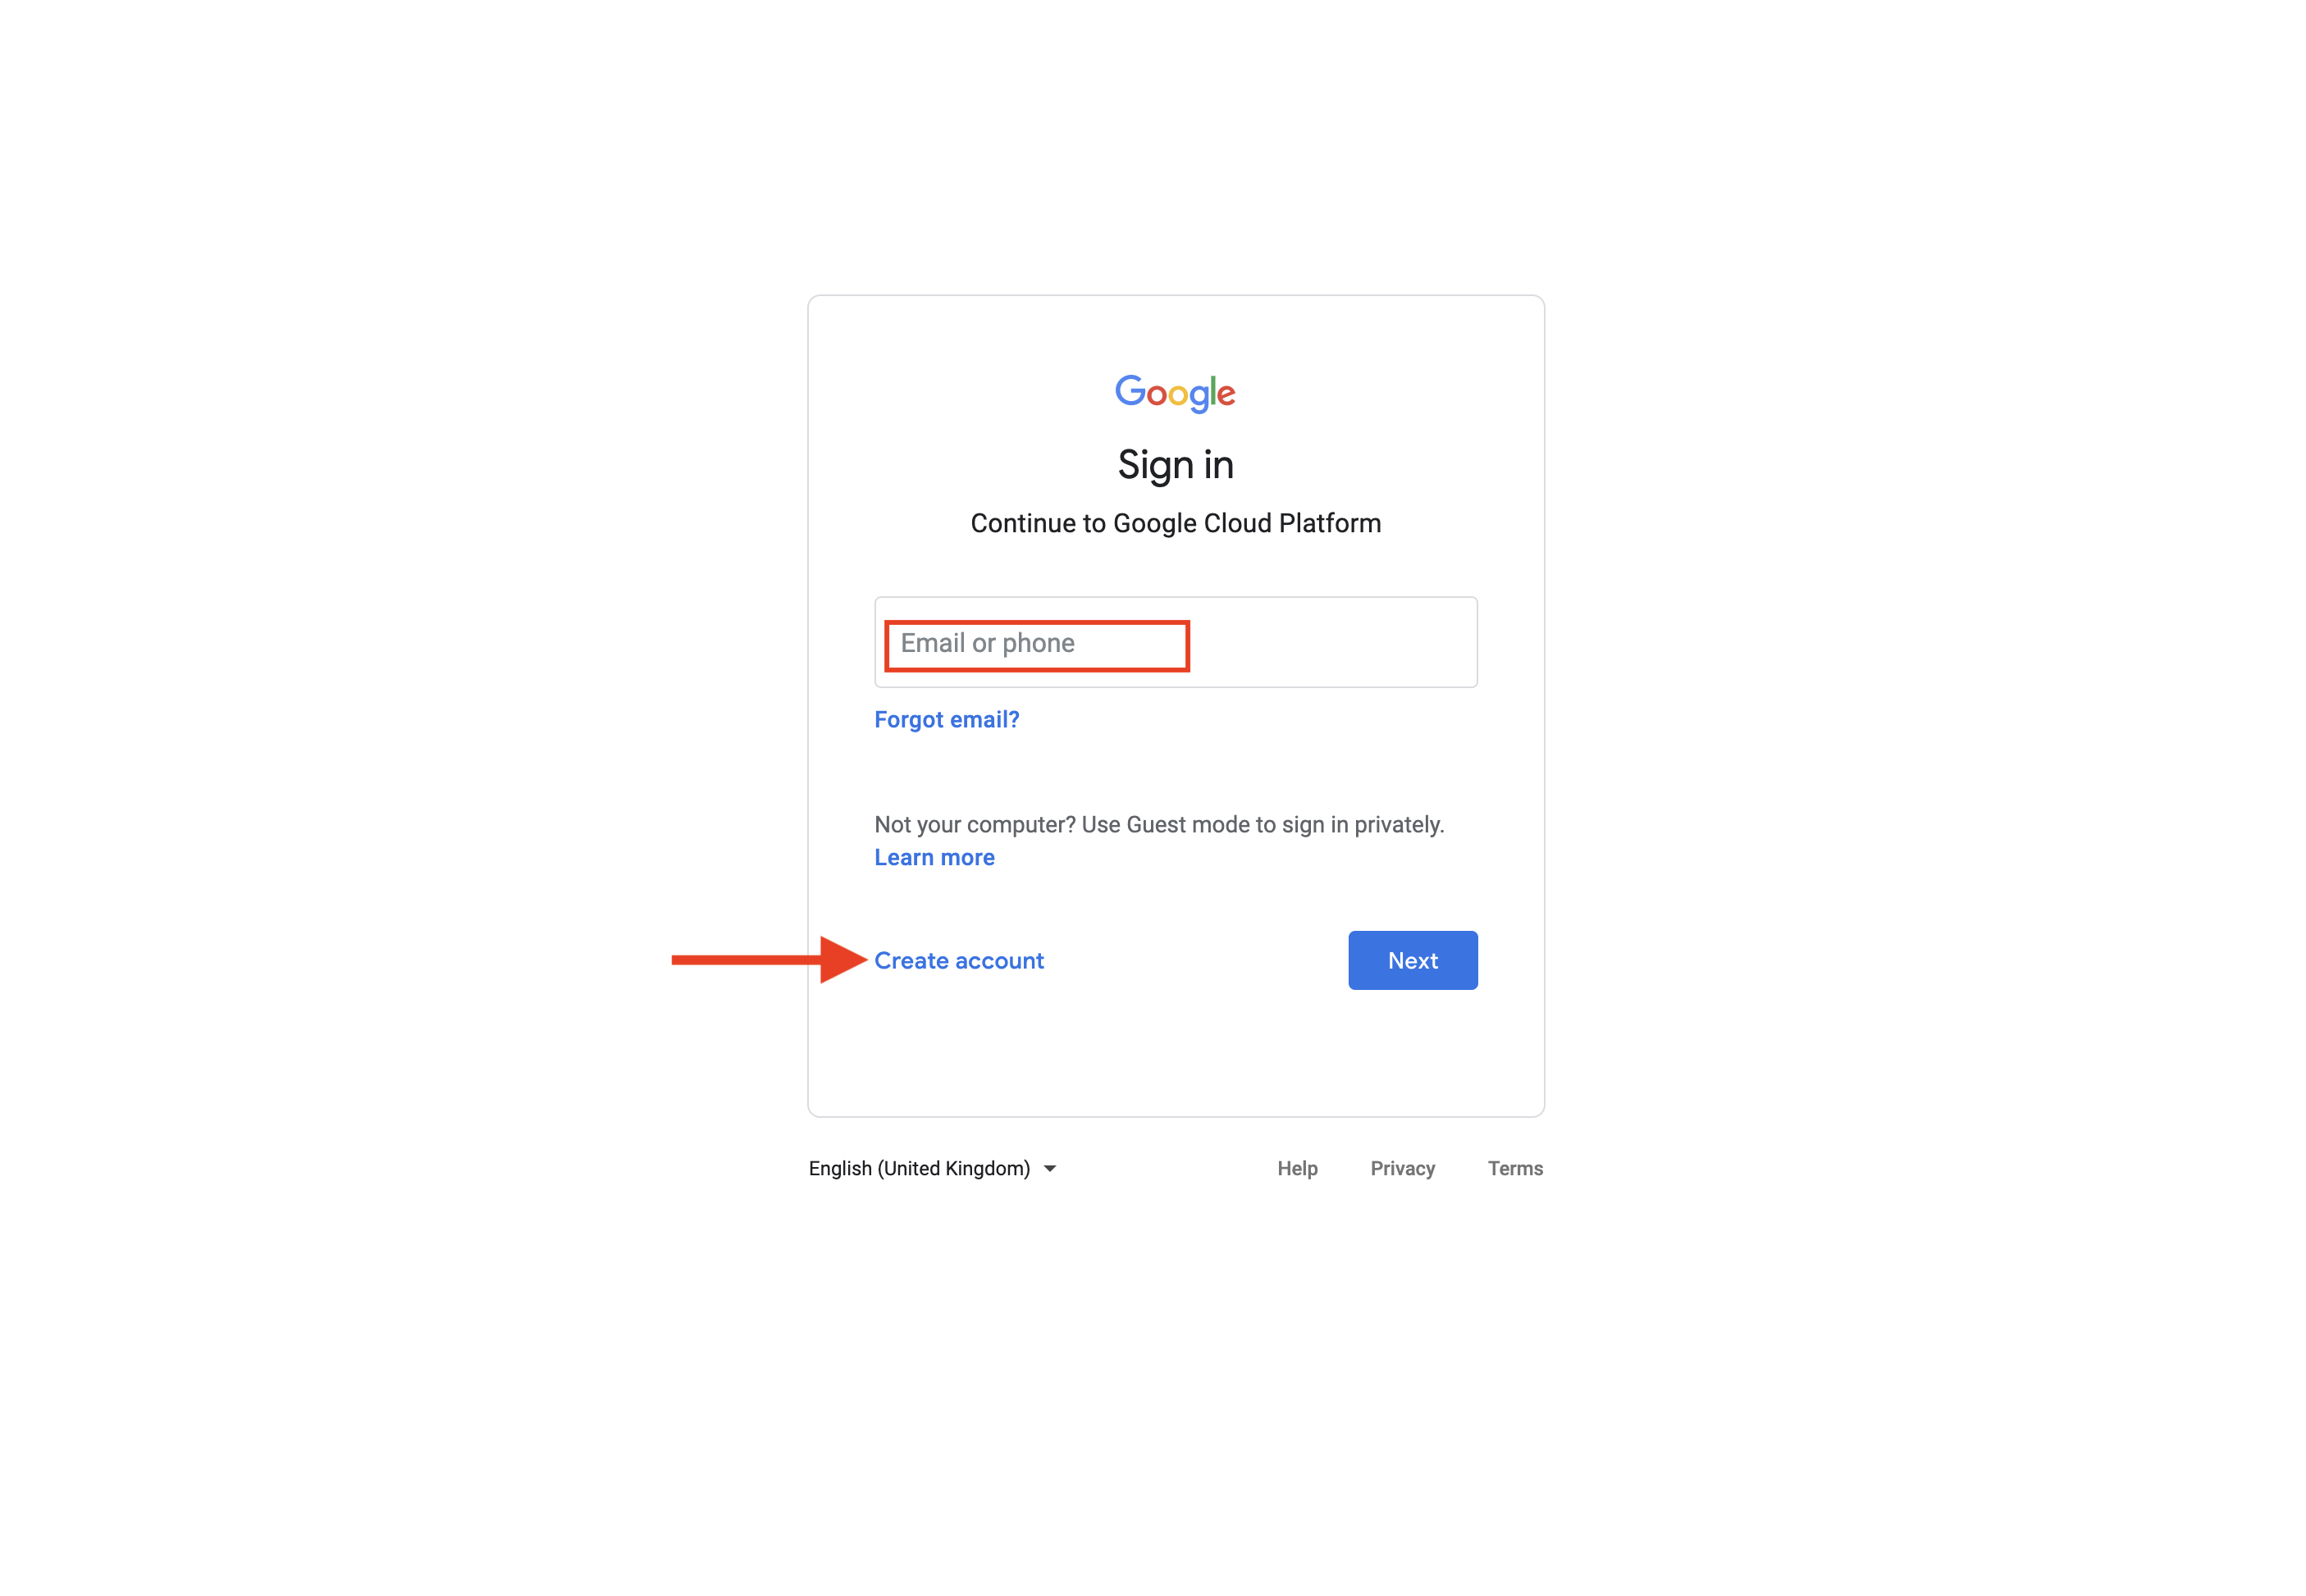
Step 1: Go to Google Developers Console. If you have a Google account, login, else Create an Account.
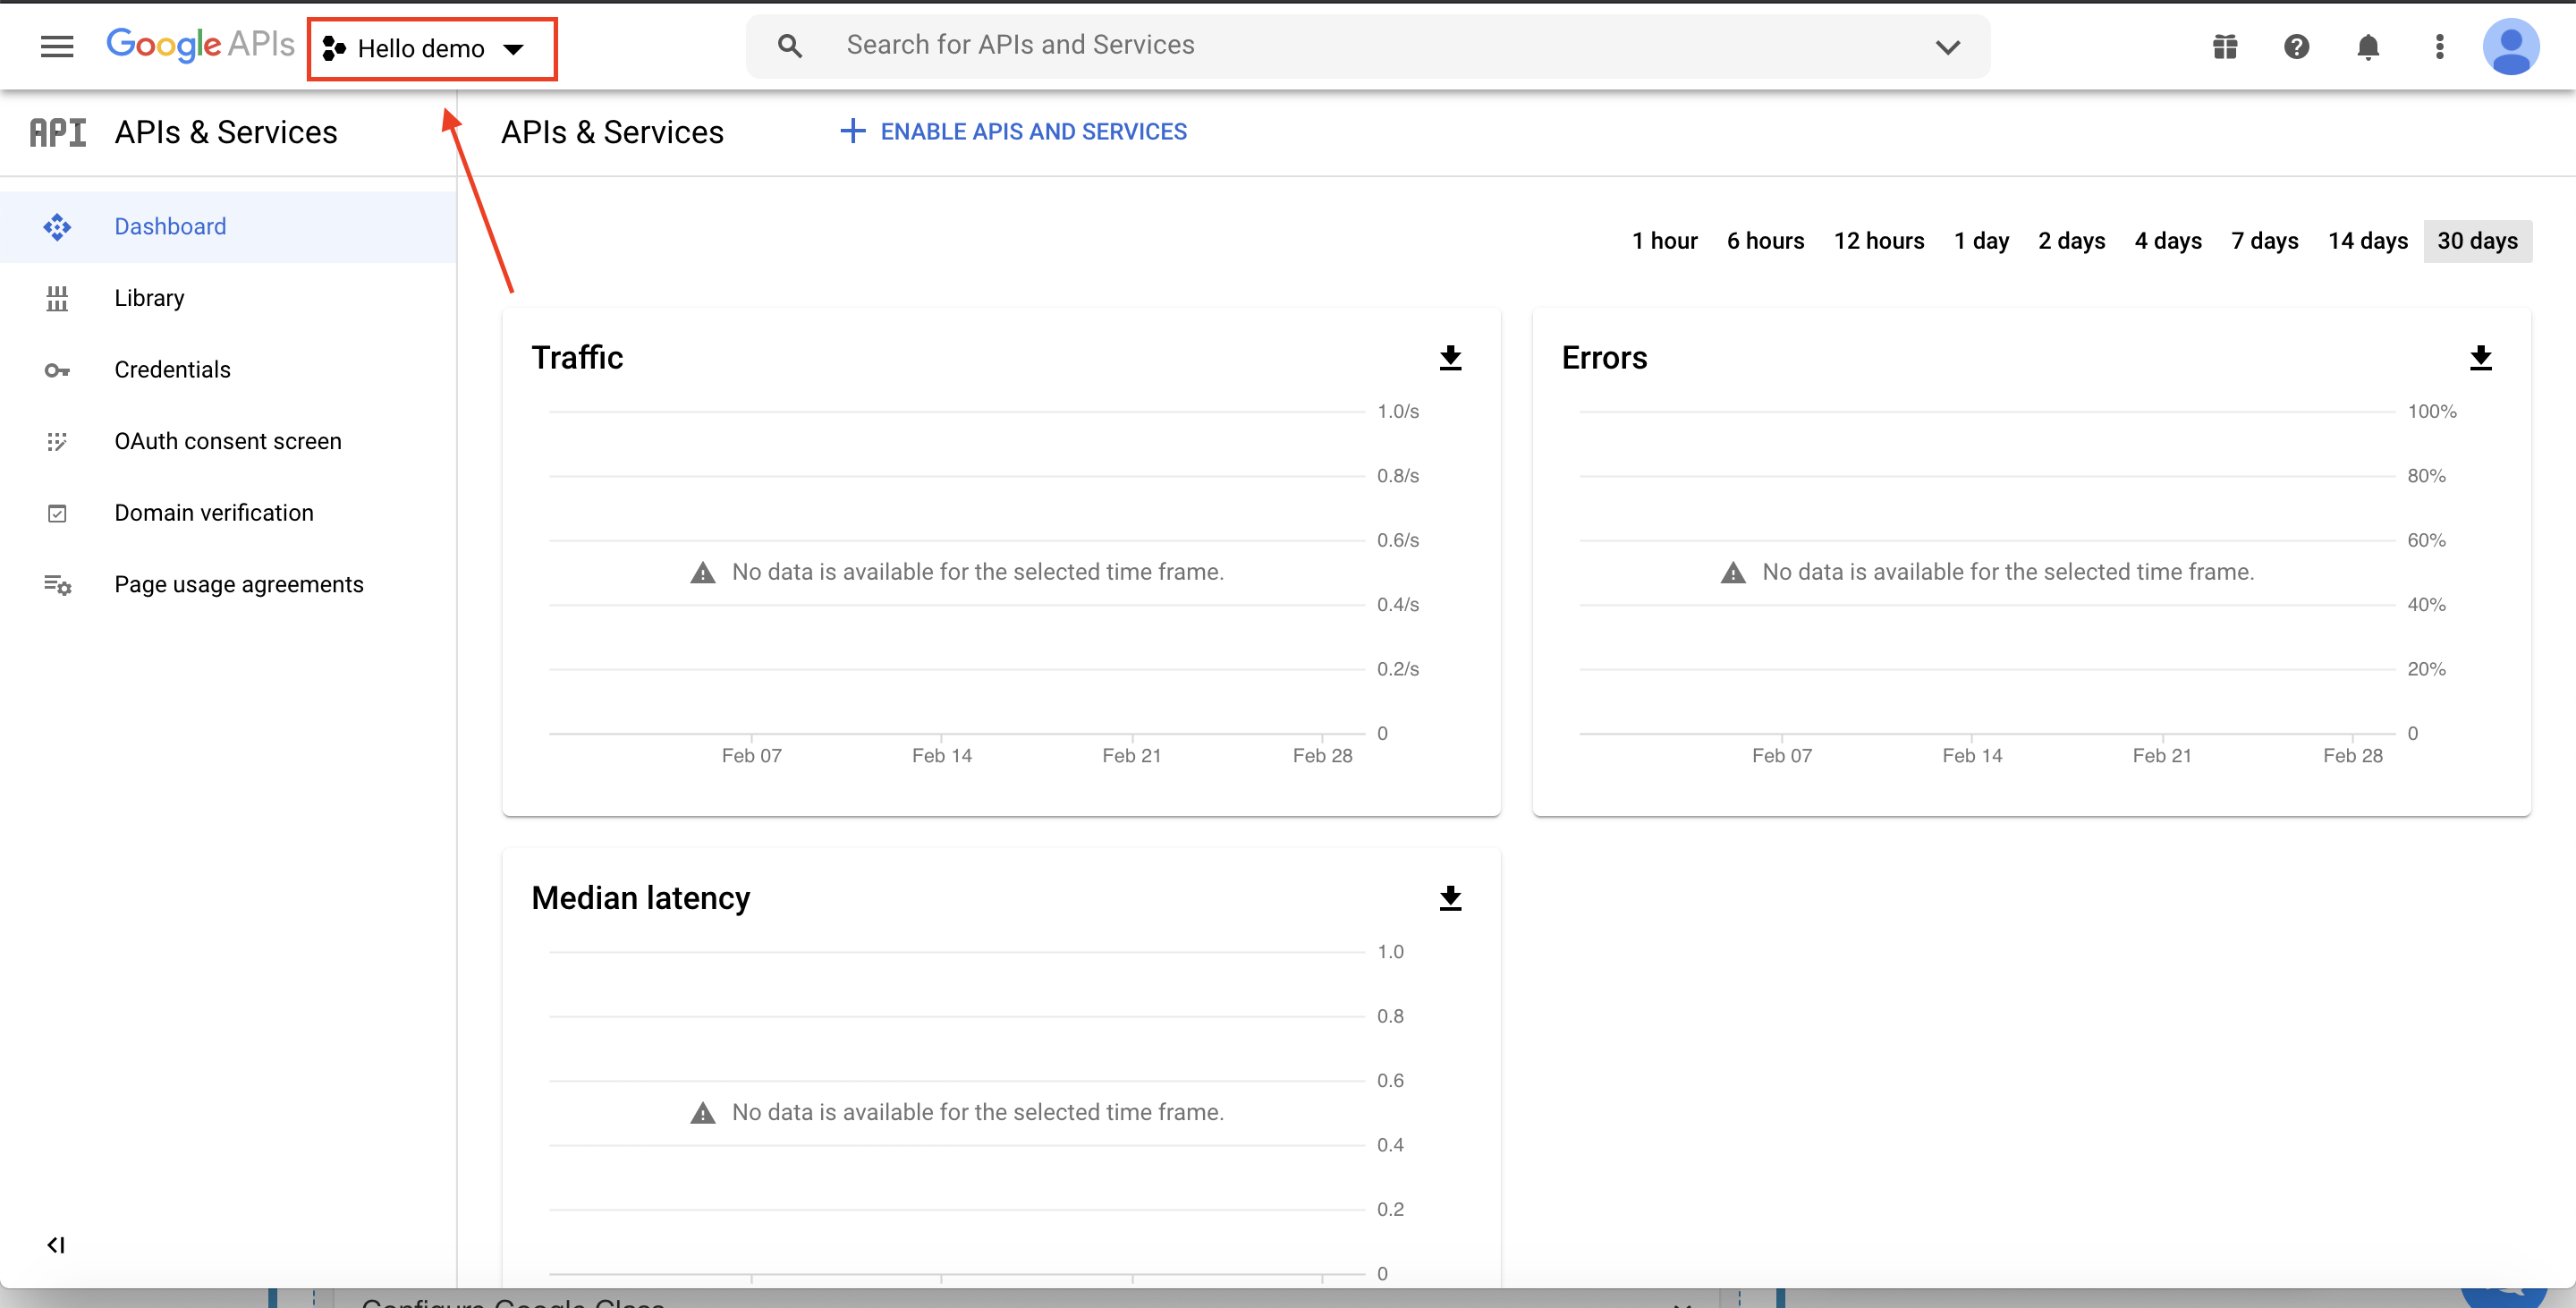
Step 2: On the dashboard, click on the Project dropdown menu.
Step 3: Select an existing Firebase project

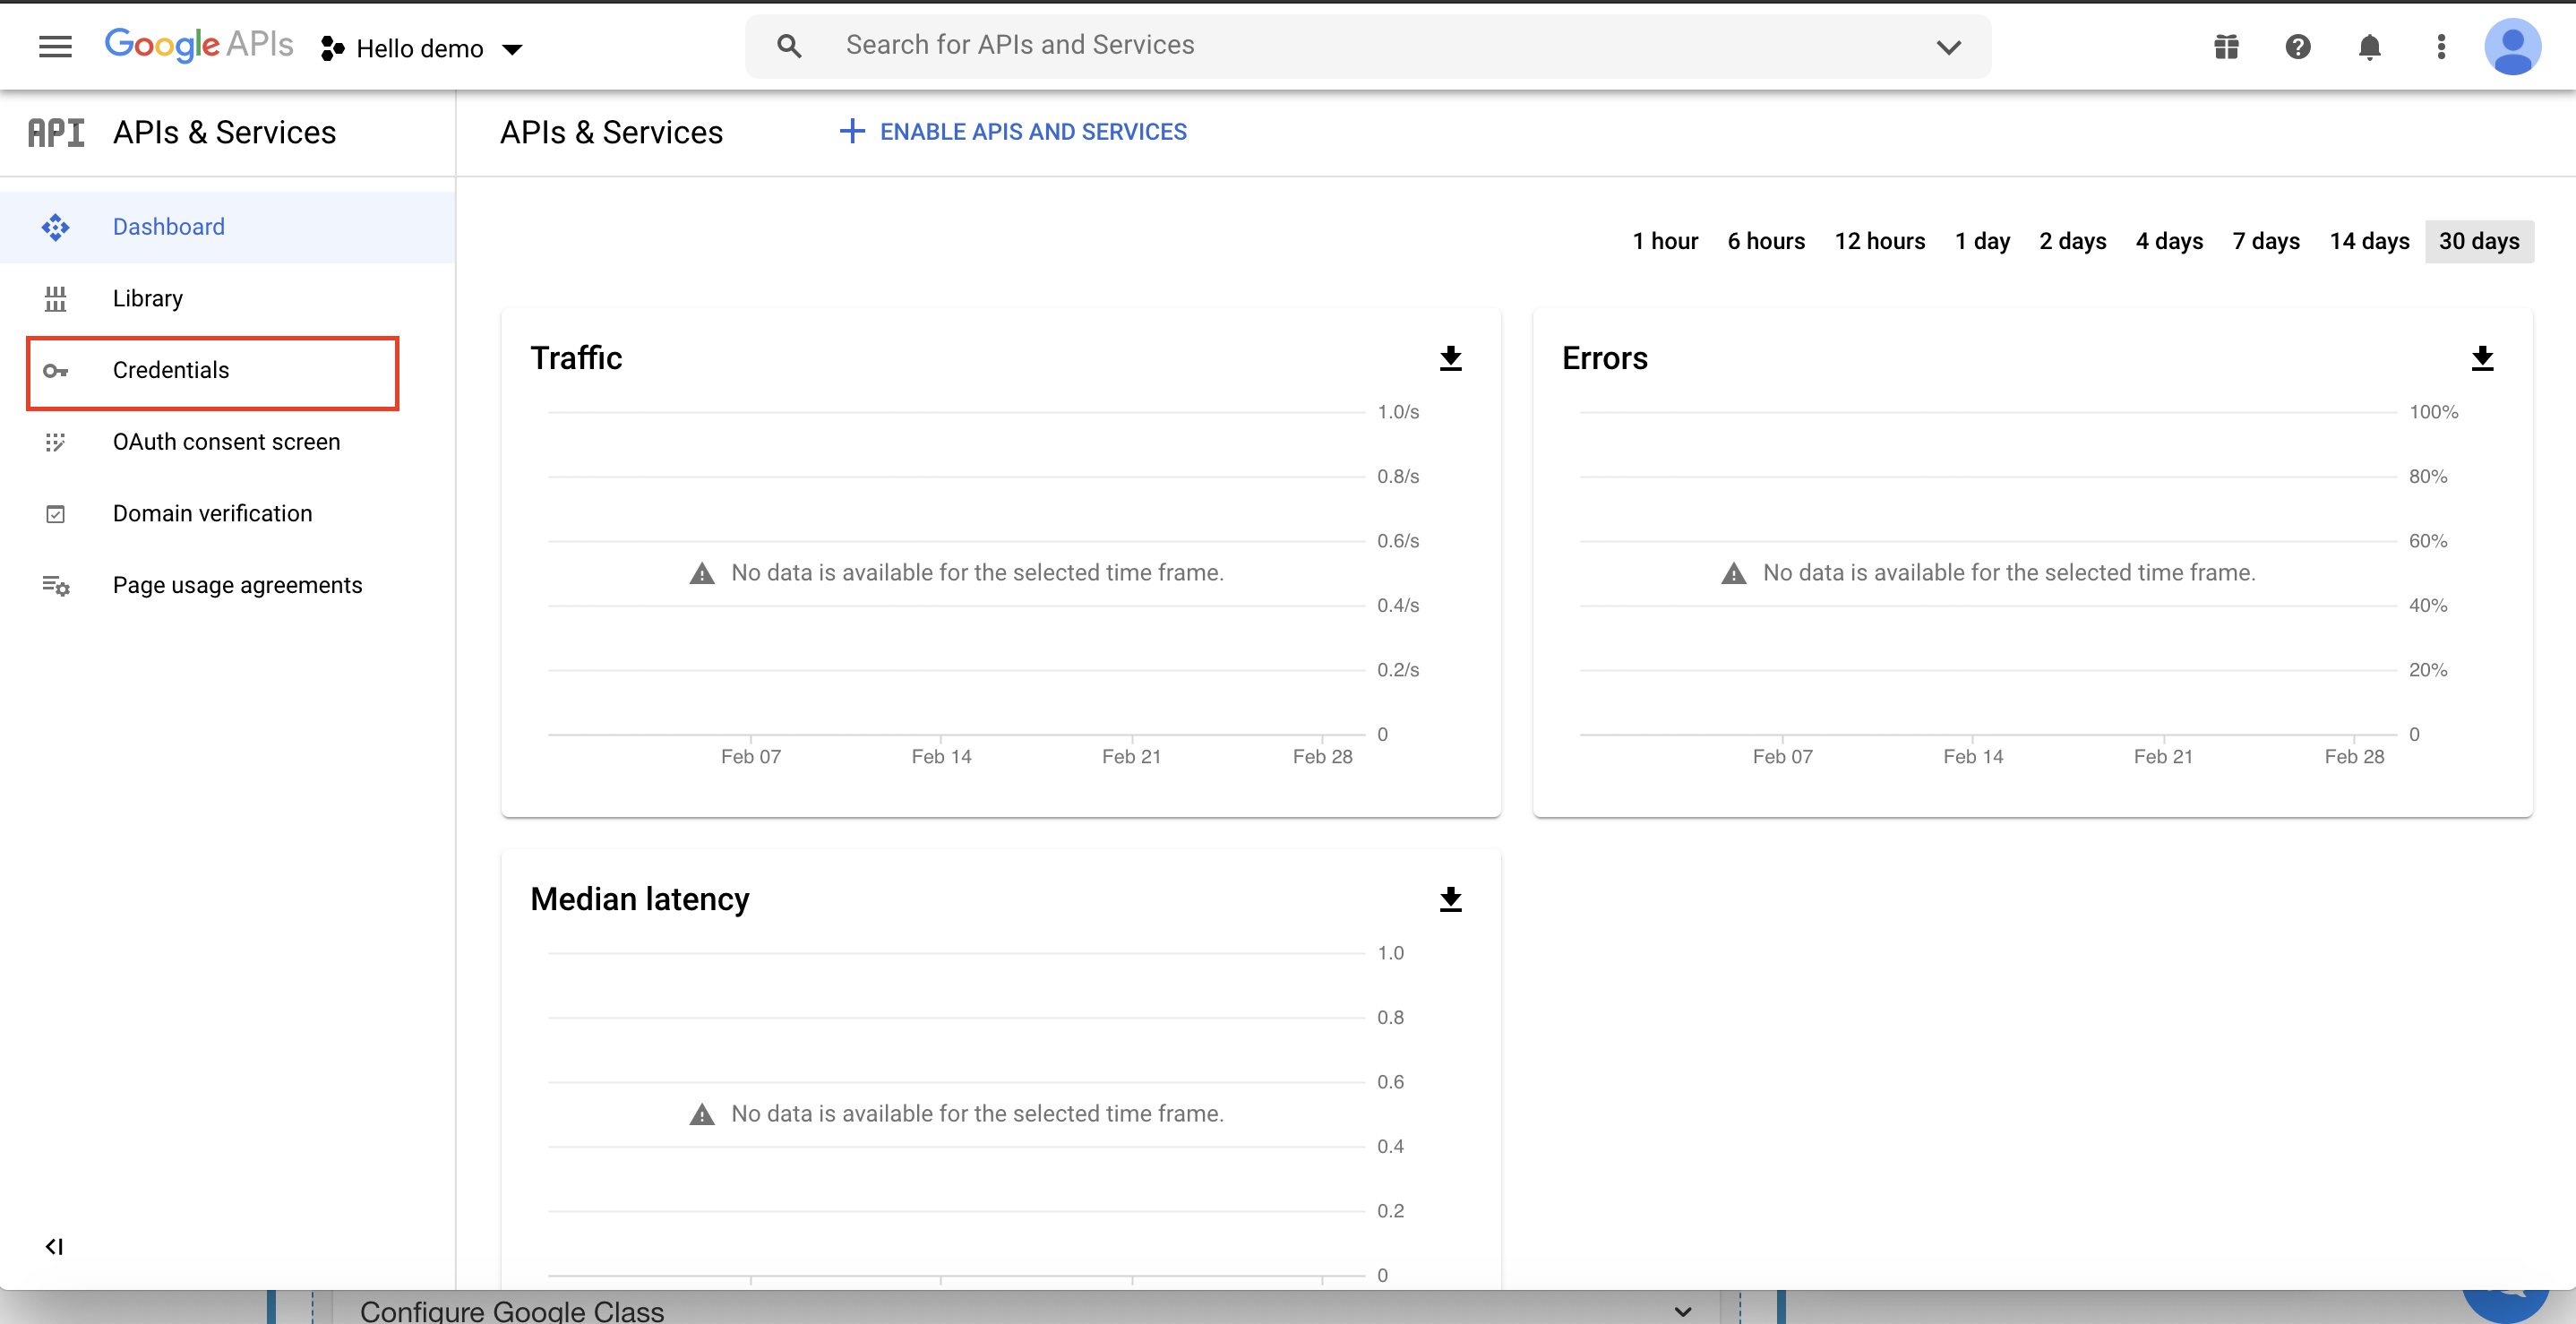
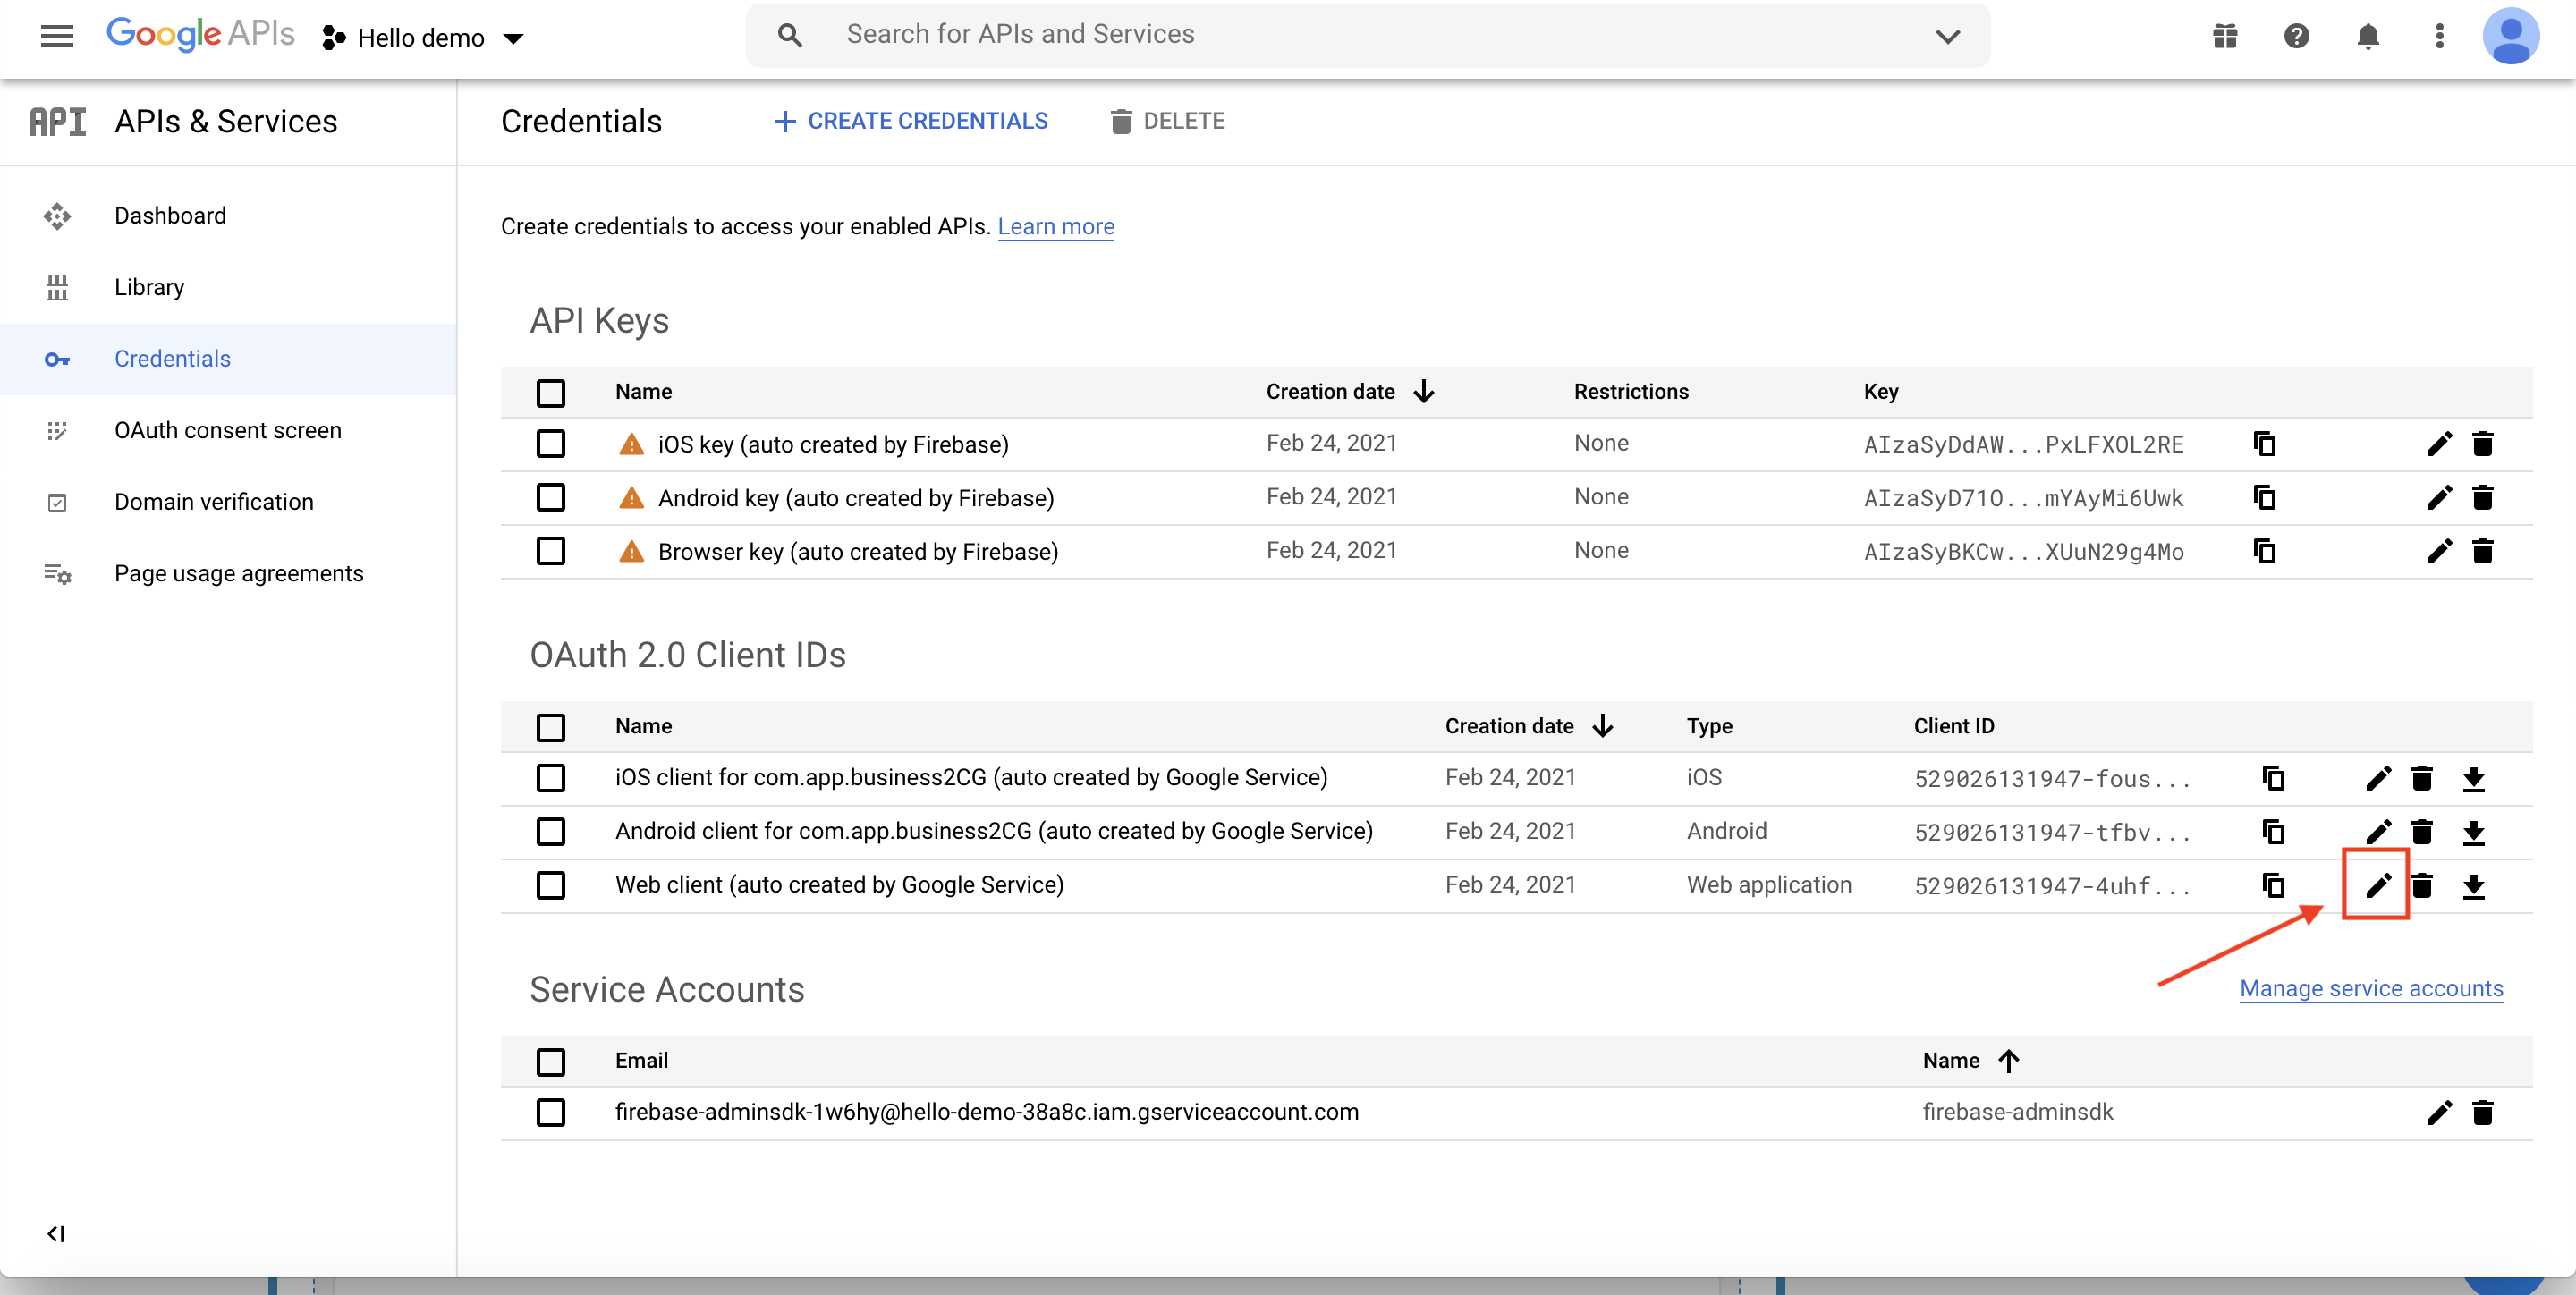
Step 4: Click on Credentials on the left side menu.
Step 5 : Under OAuth 2.0 Client IDs, click on the Edit icon in the Web client row.
Step 6 : Click on ADD URL, Copy https://snappy.appypie.com and enter in the Authorized JavaScript origins URIs field and click on save given below.
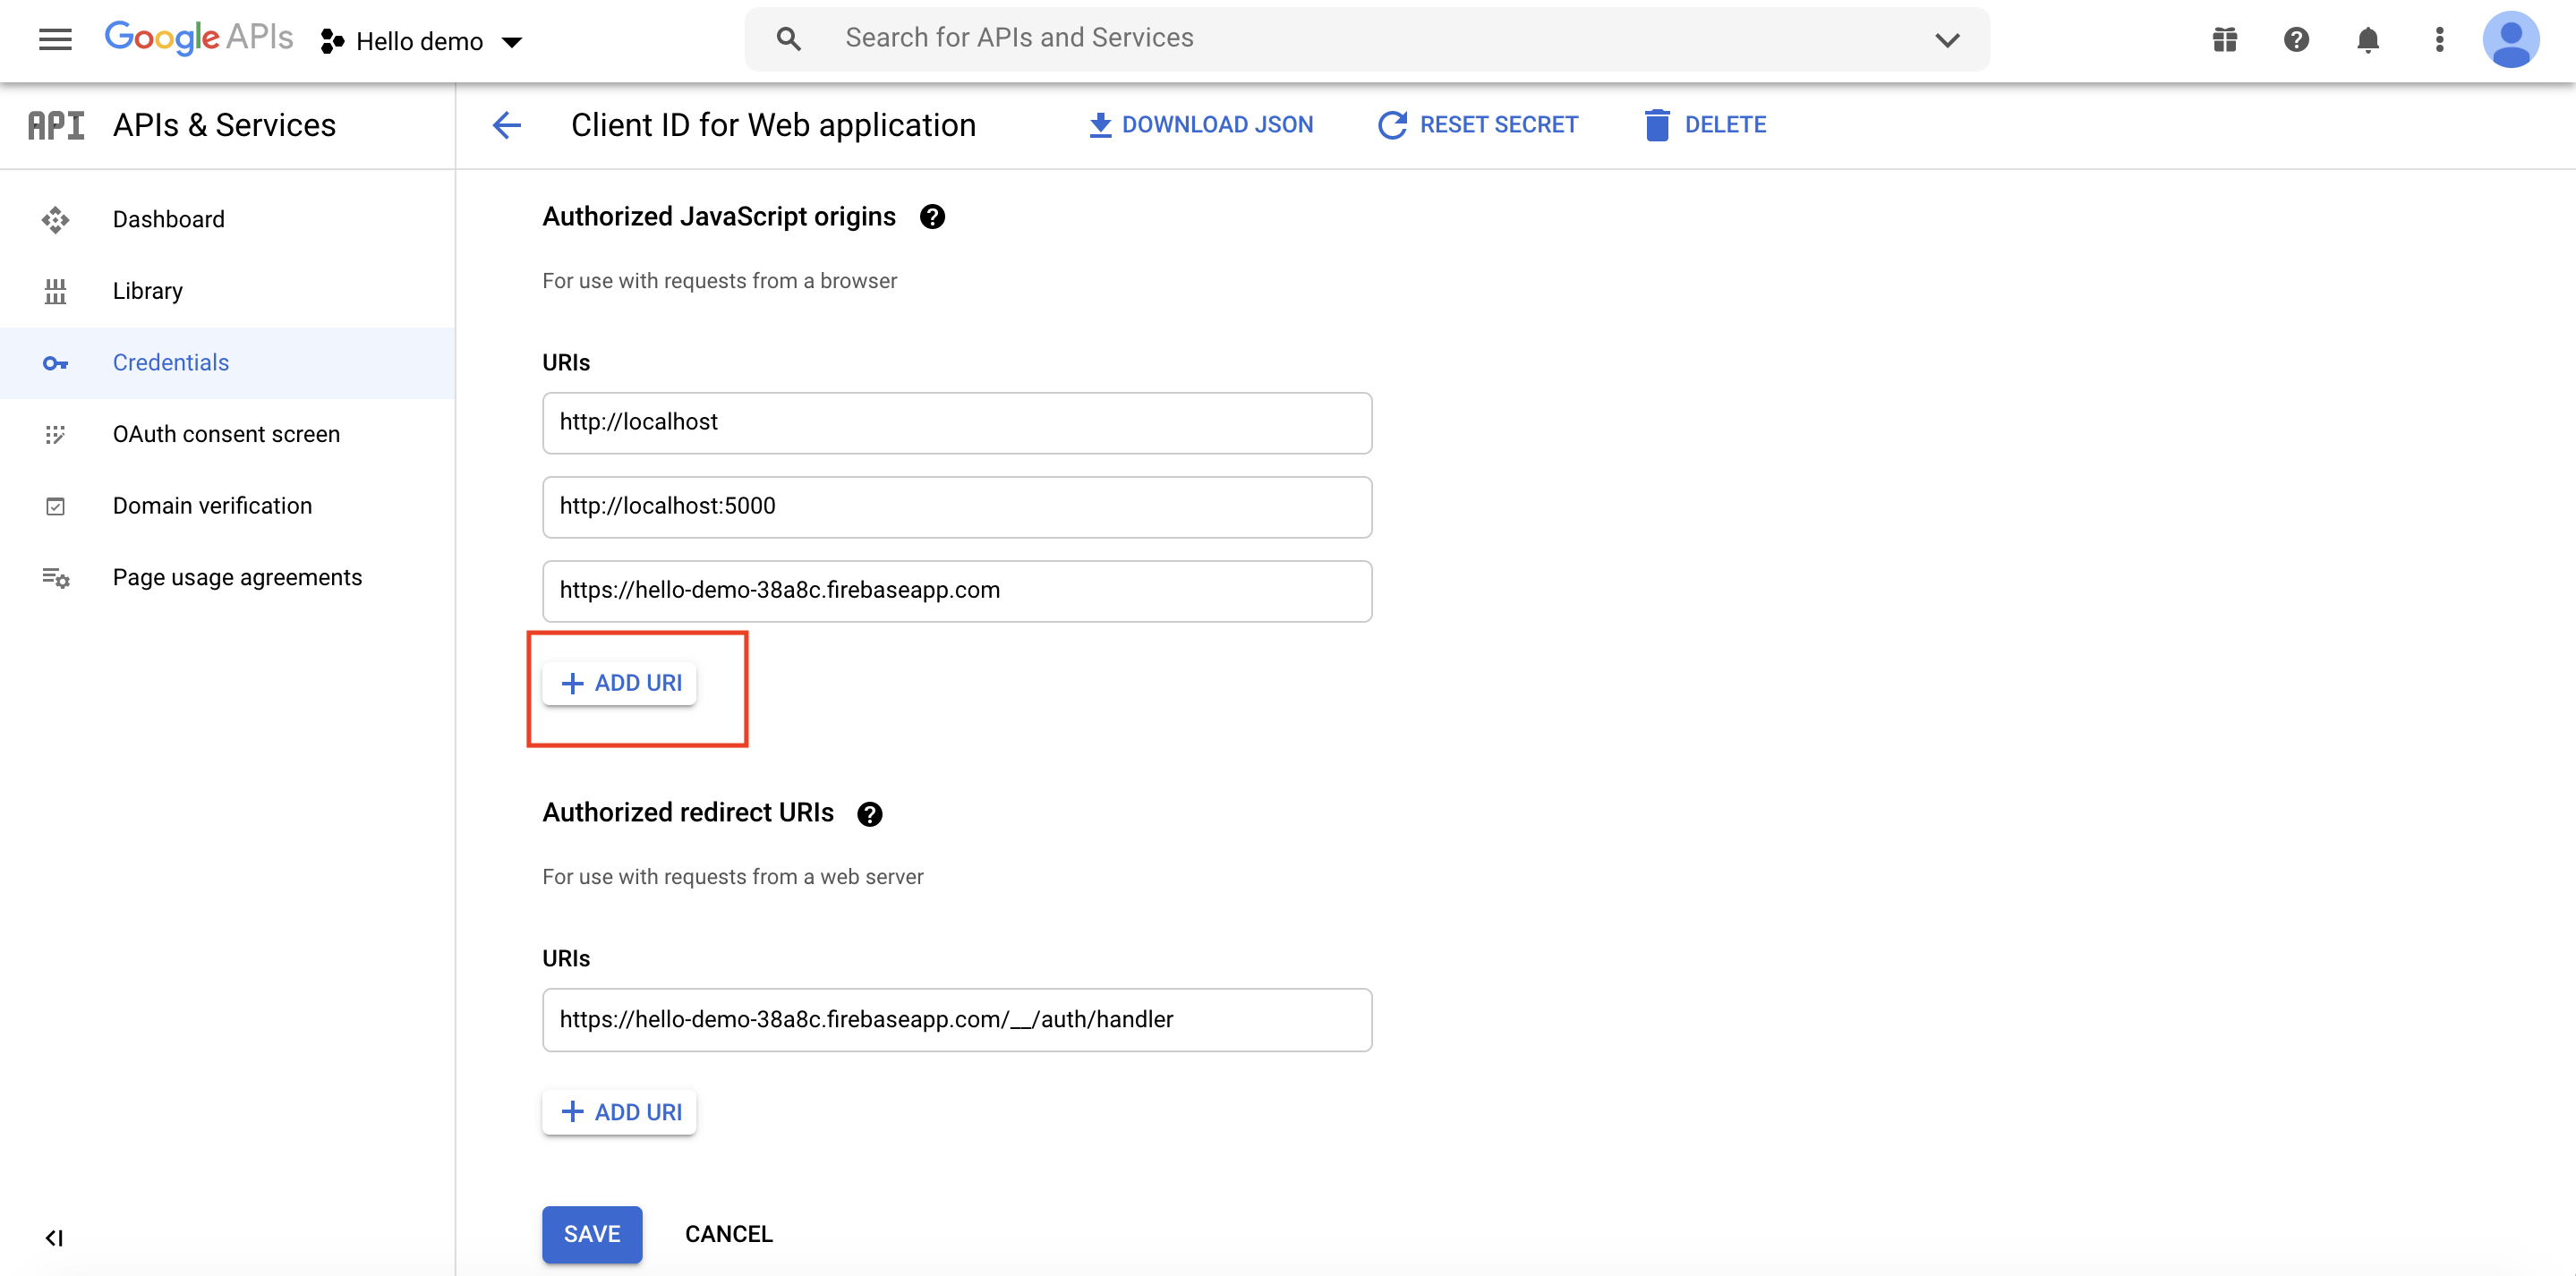

Step 7 : Click on ADD URL , Copy https://snappy.appypie.com/app/googleclass and enter in the Authorized redirect URIs field and click on Save.


Step 8 : Our web client id and secret key will be displayed on the right side. Copy both the keys.

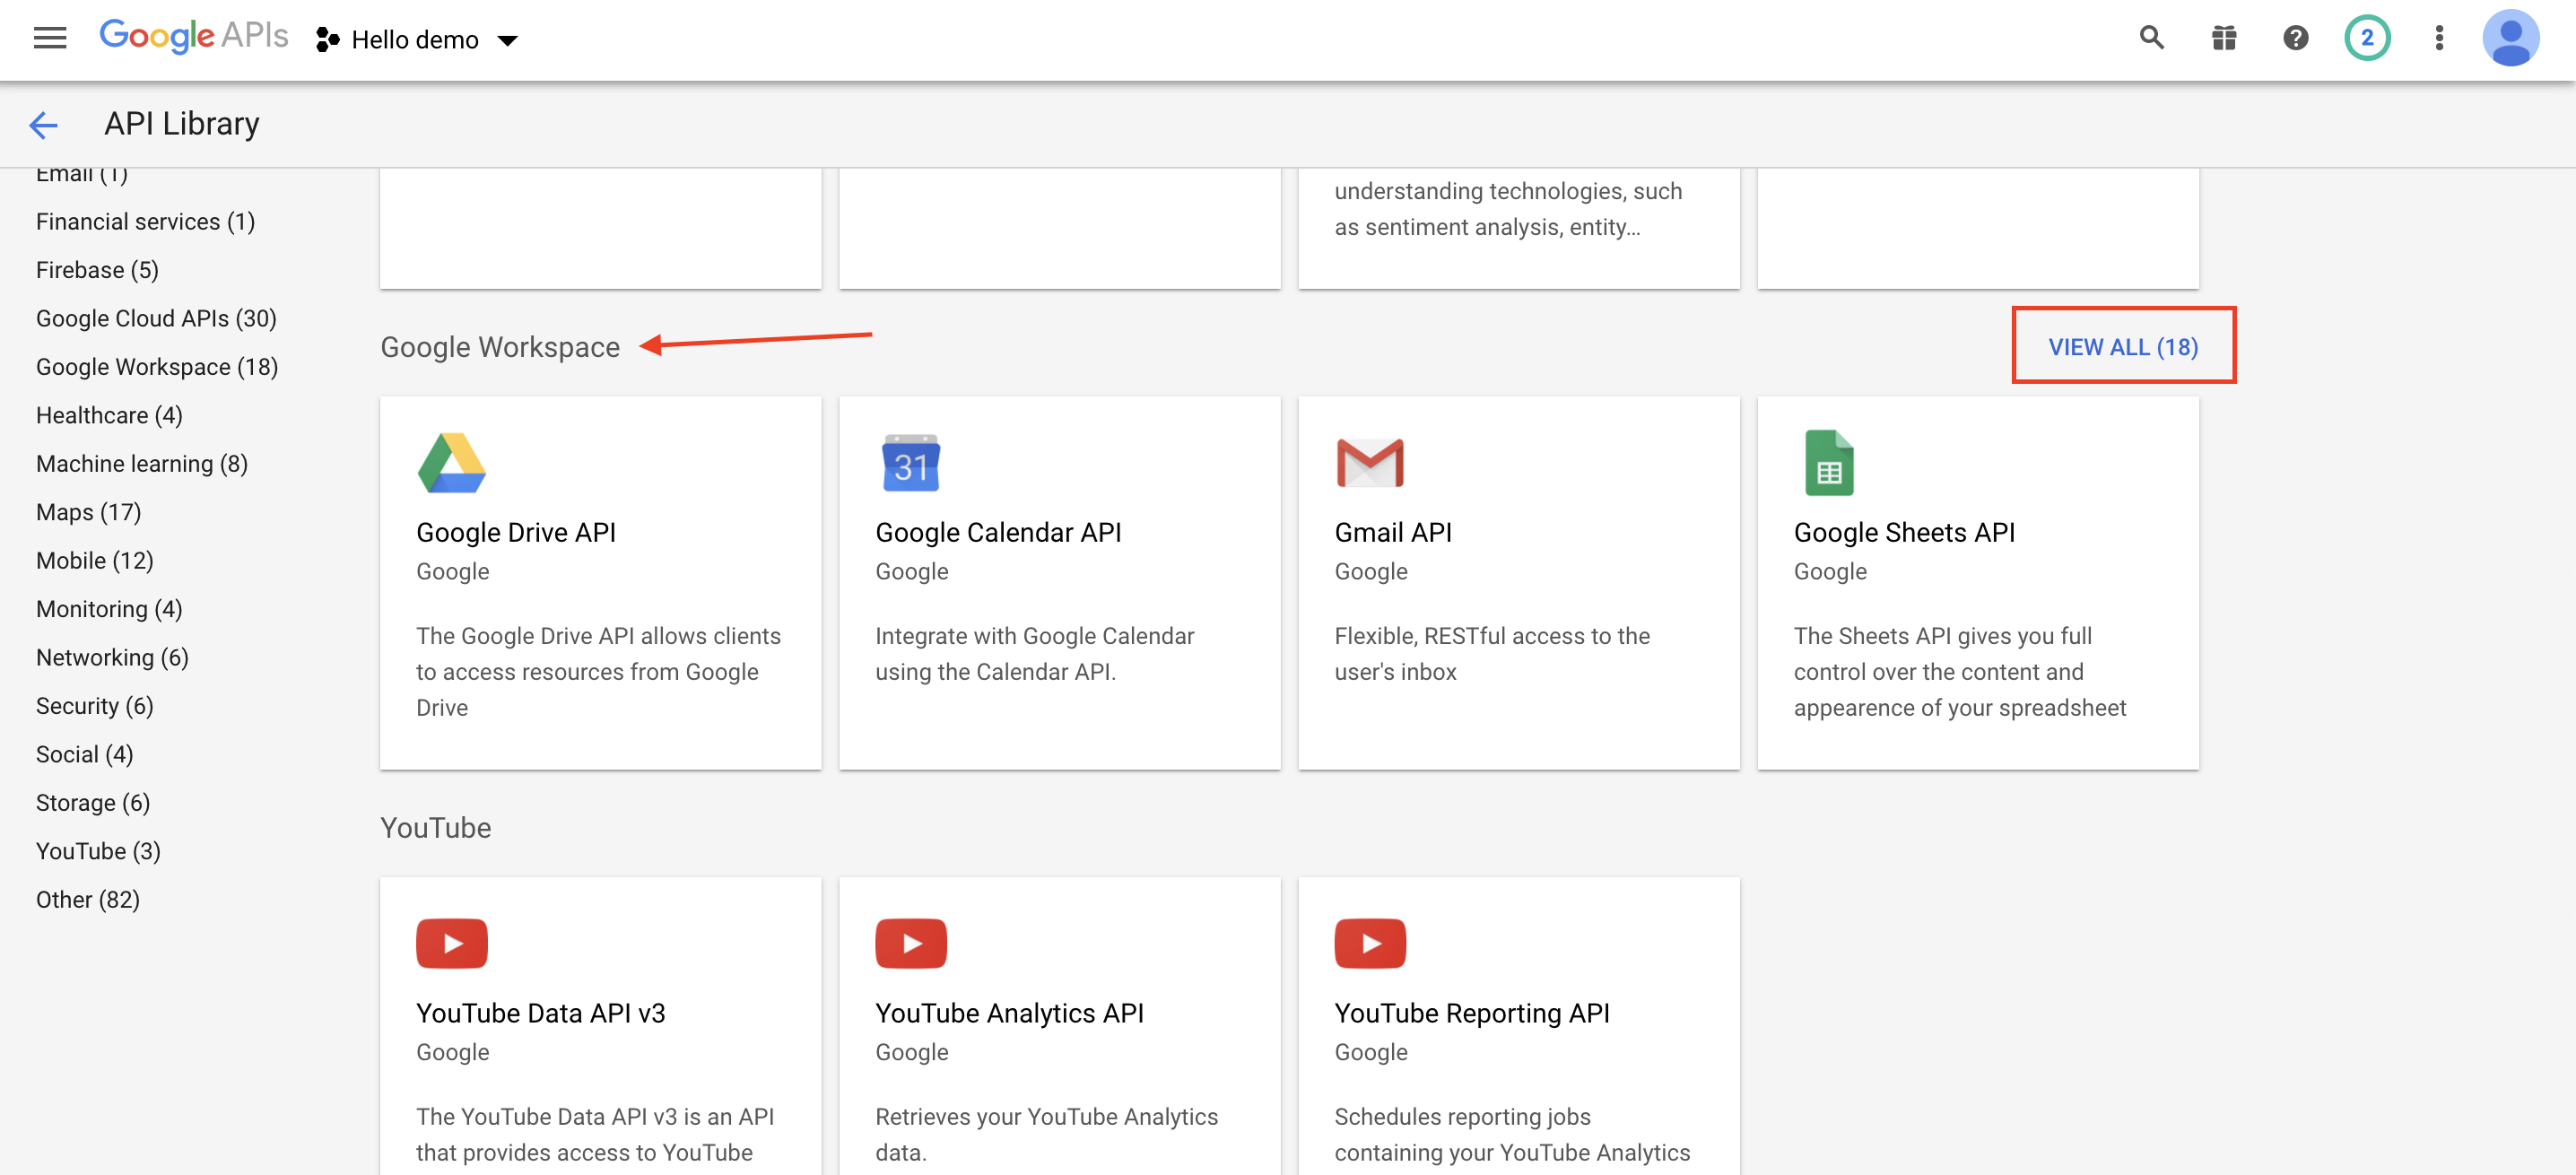
Step 9 : Click on Library on the left side menu.

Step 10 : Under Google Workspace, click on View all.
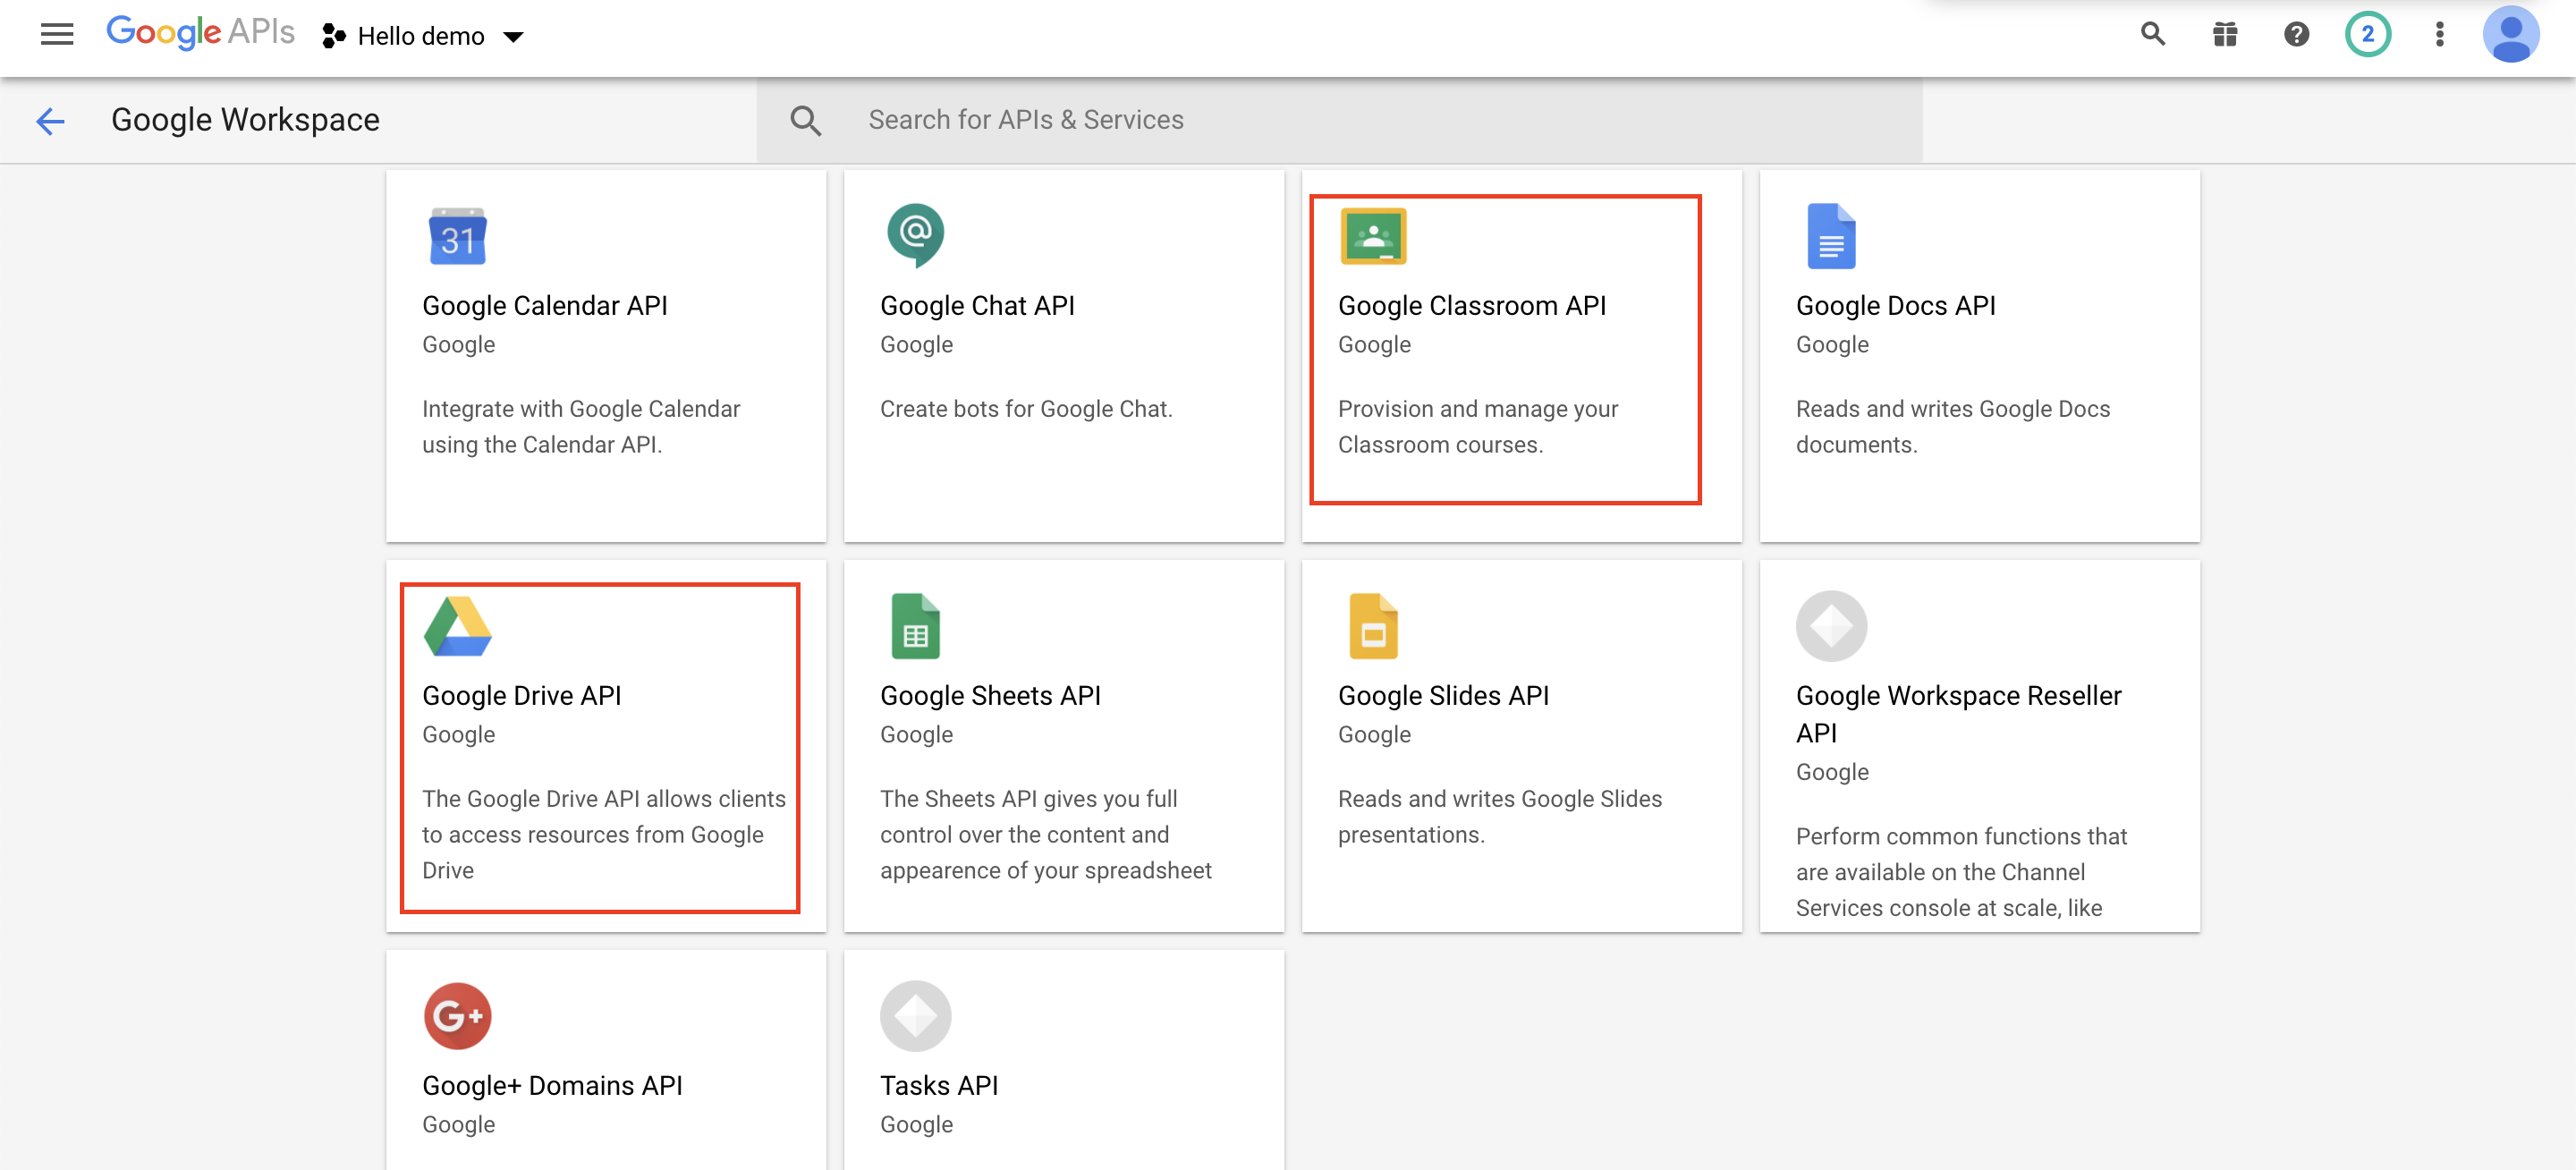
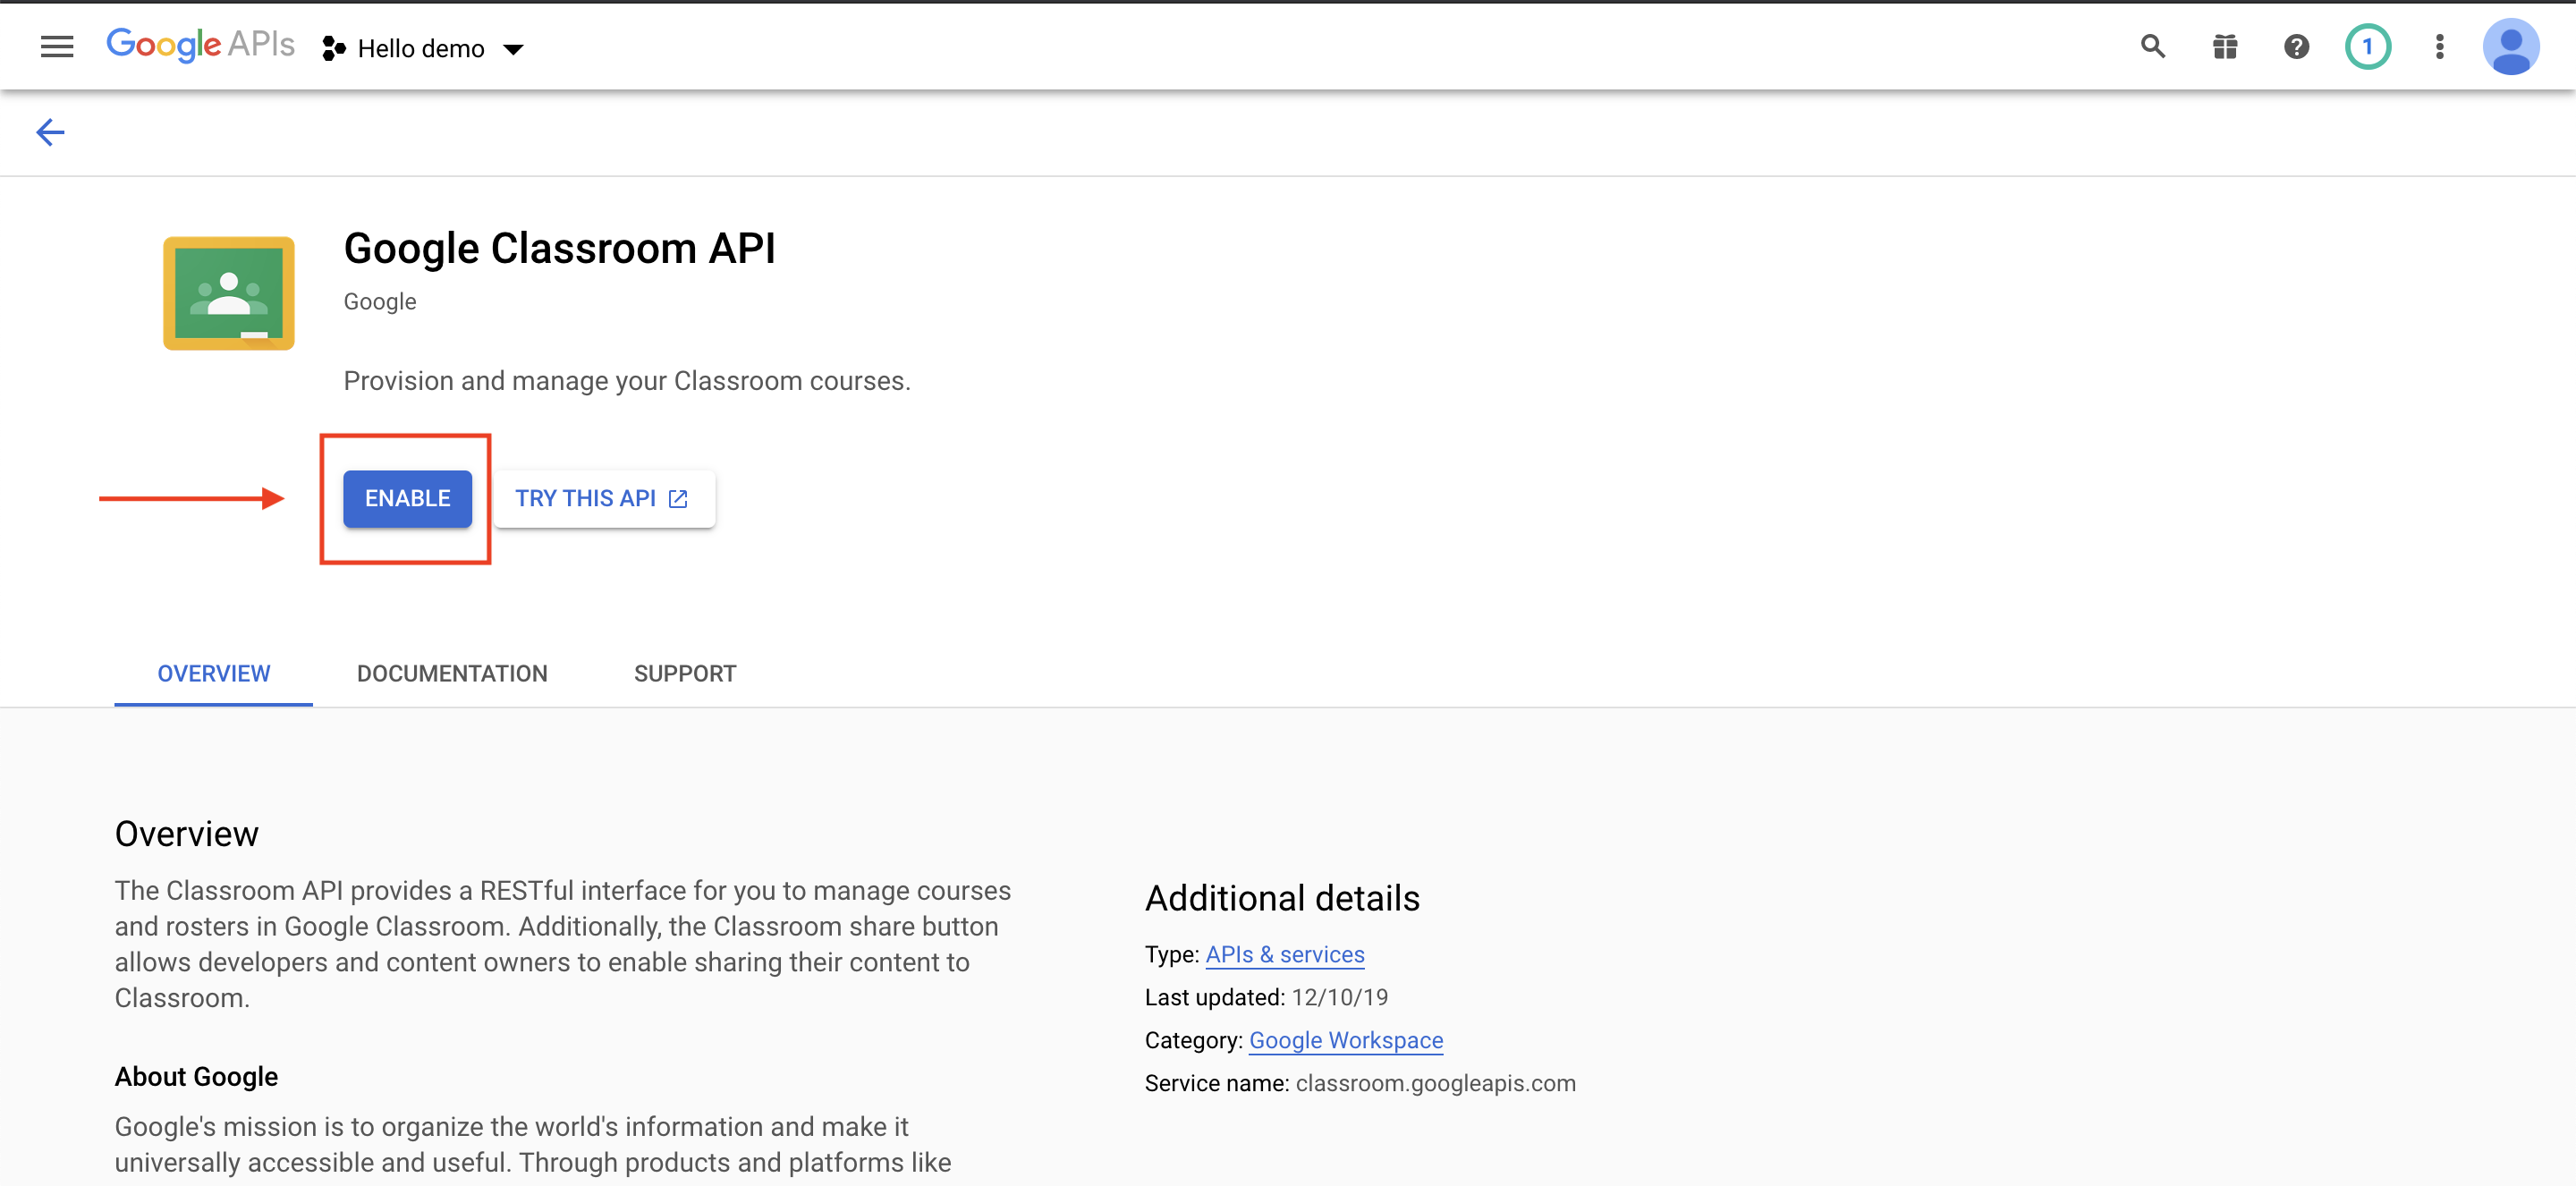
Step 11 : Now, enable the Google Classroom API and Google Drive API. Here, we are showing you the process to enable Google Classroom, follow the same process for Google Drive API.
Step 12 : Click on Enable to enable Google Classroom API.
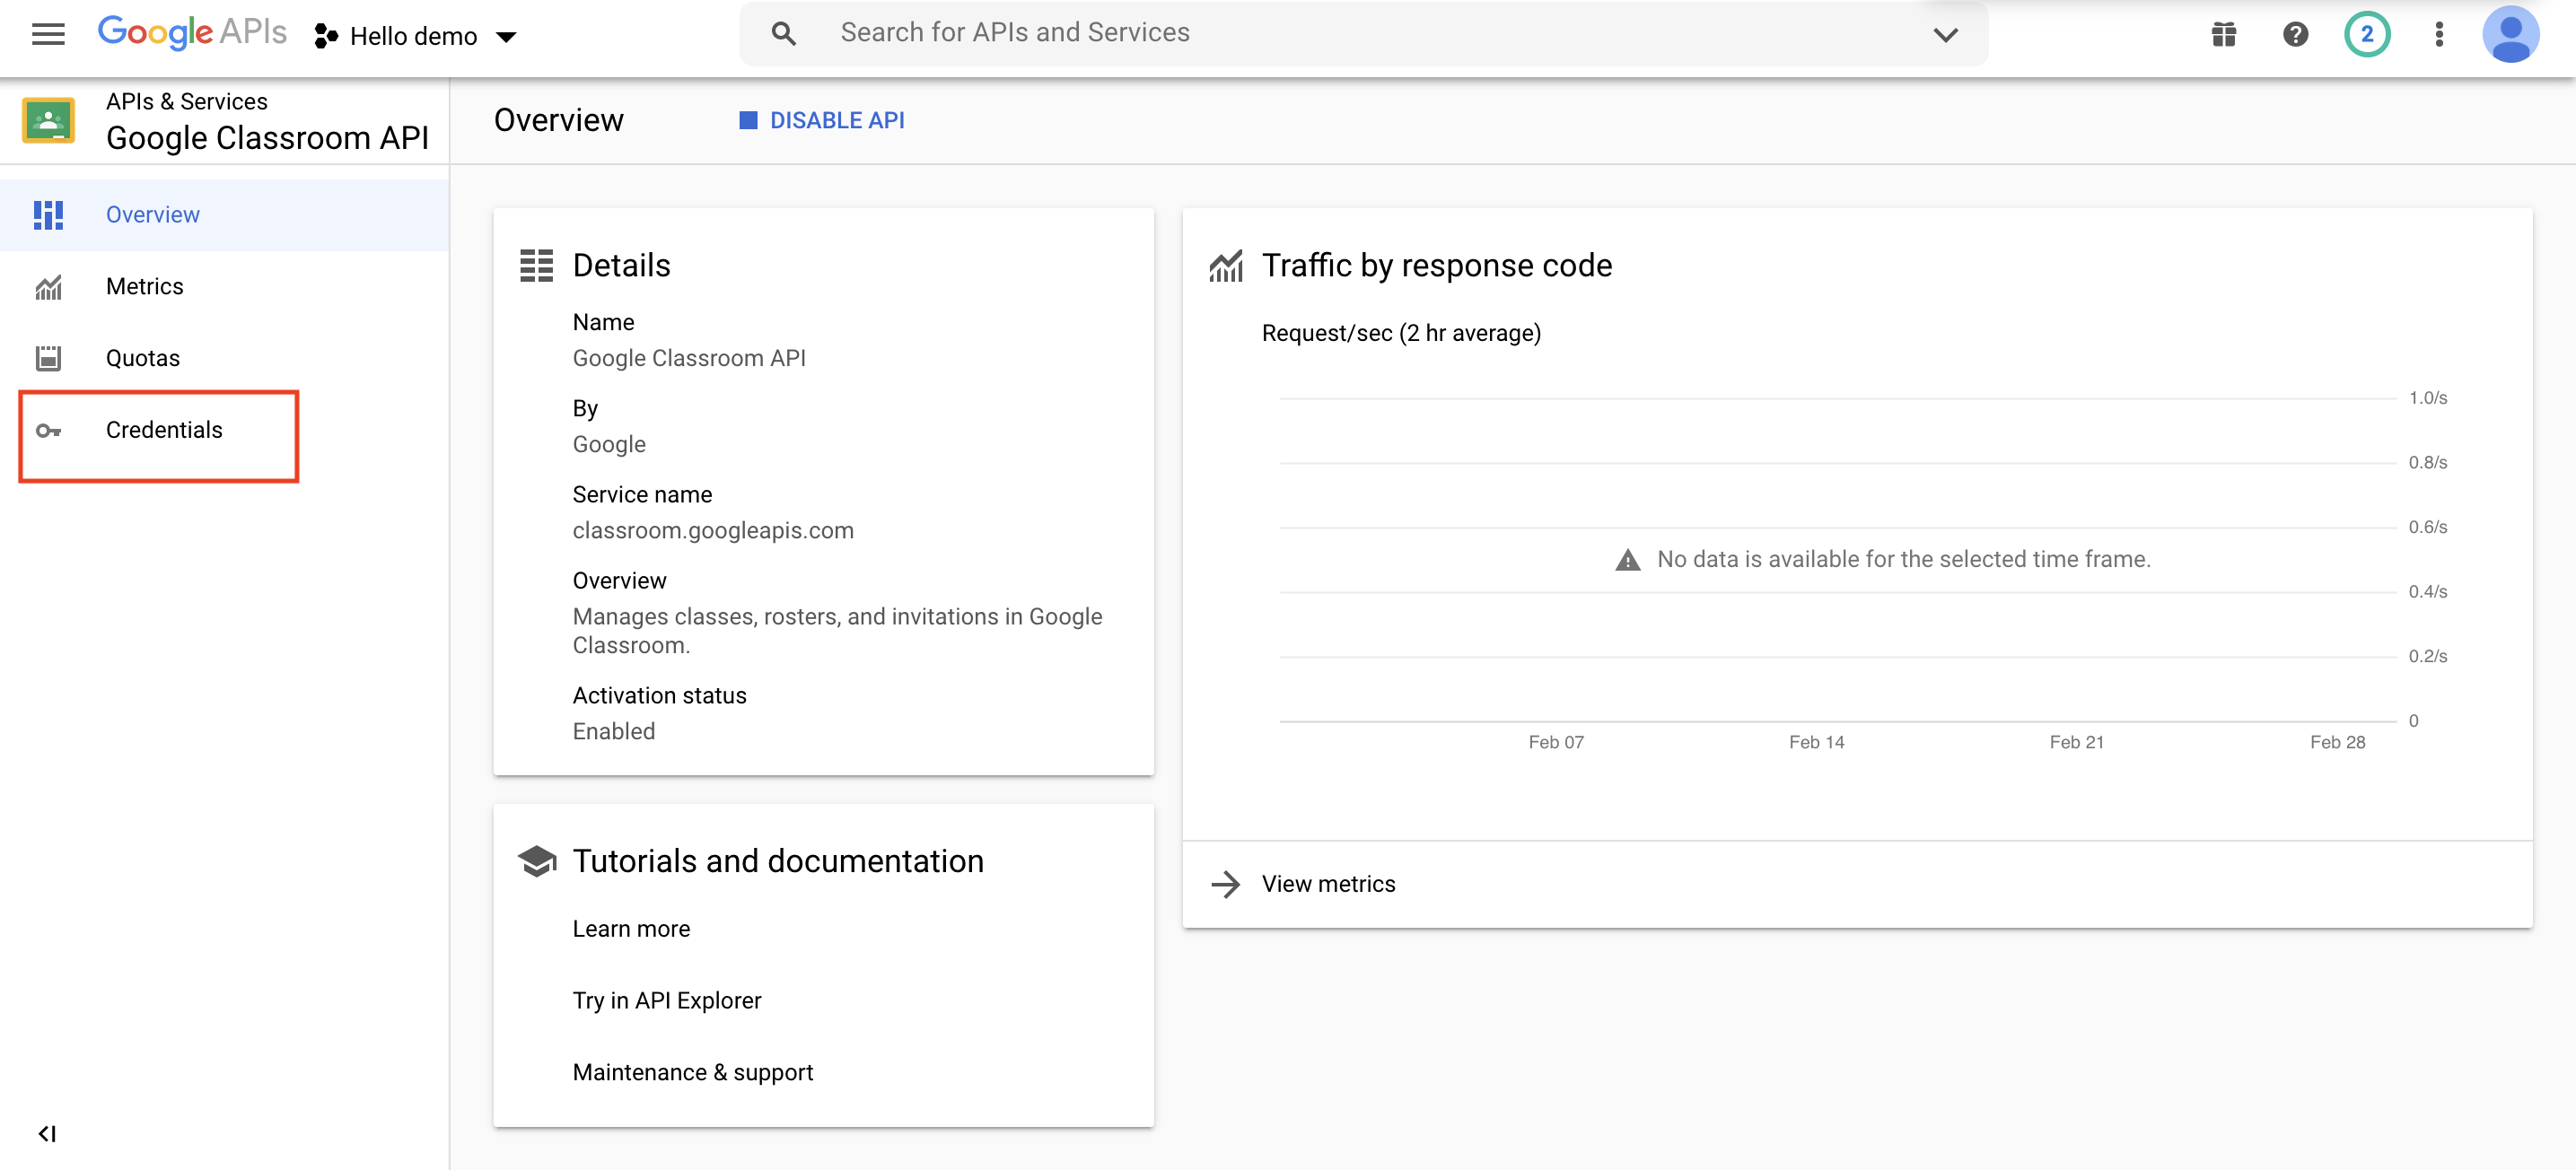
Step 13 : Click on Credentials on the left side menu.
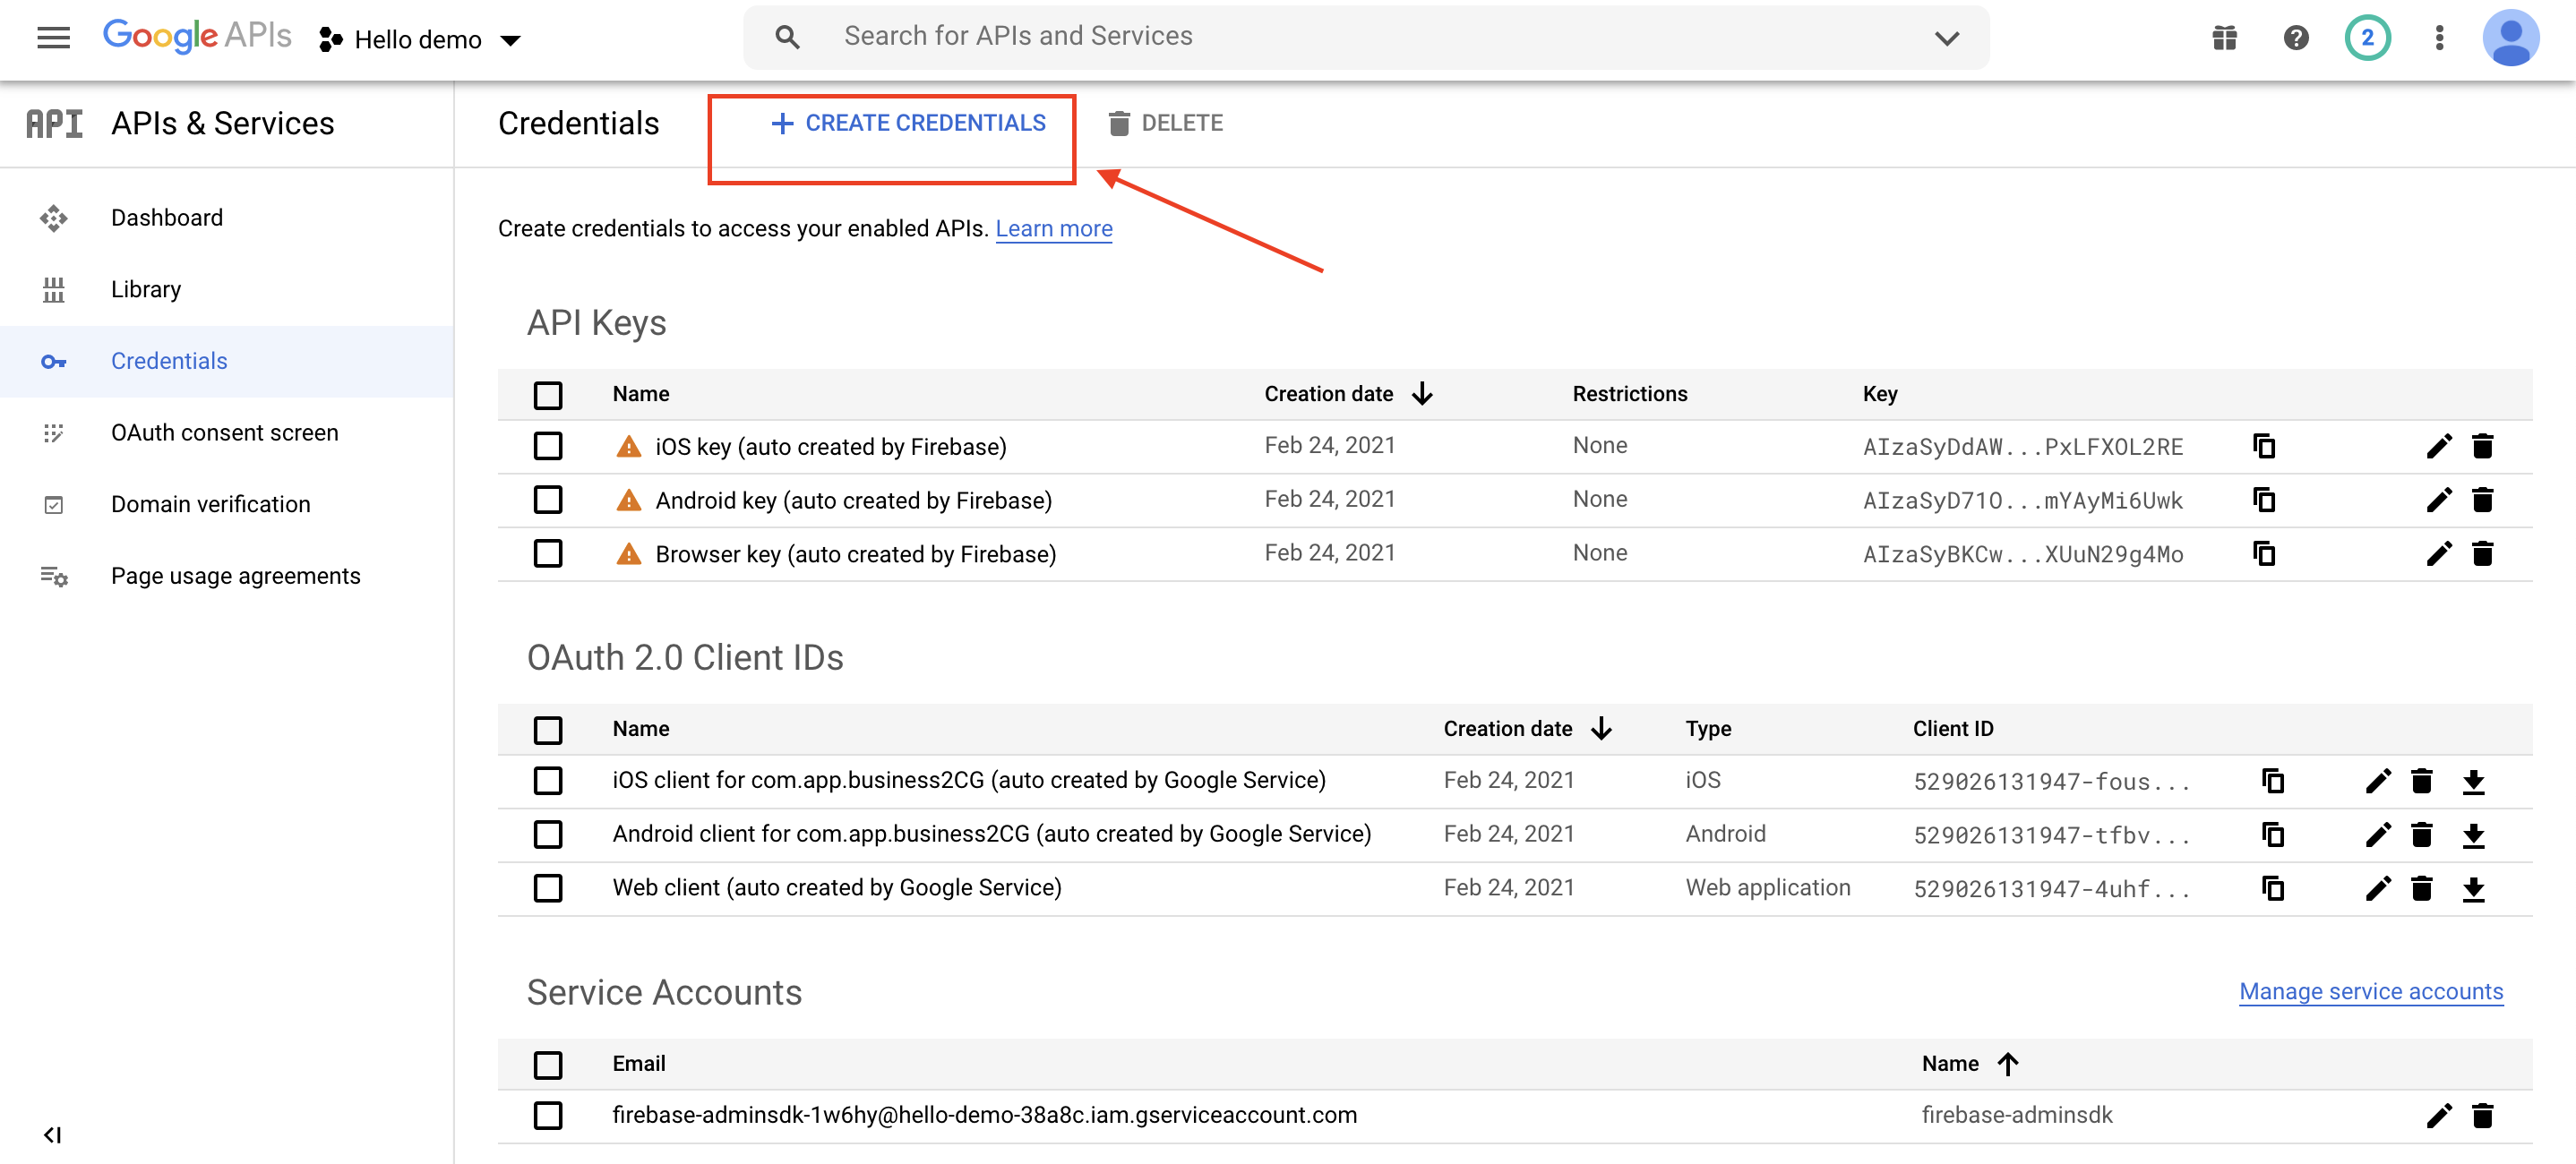
Step 14 : On the credentials page, click on Create Credentials.
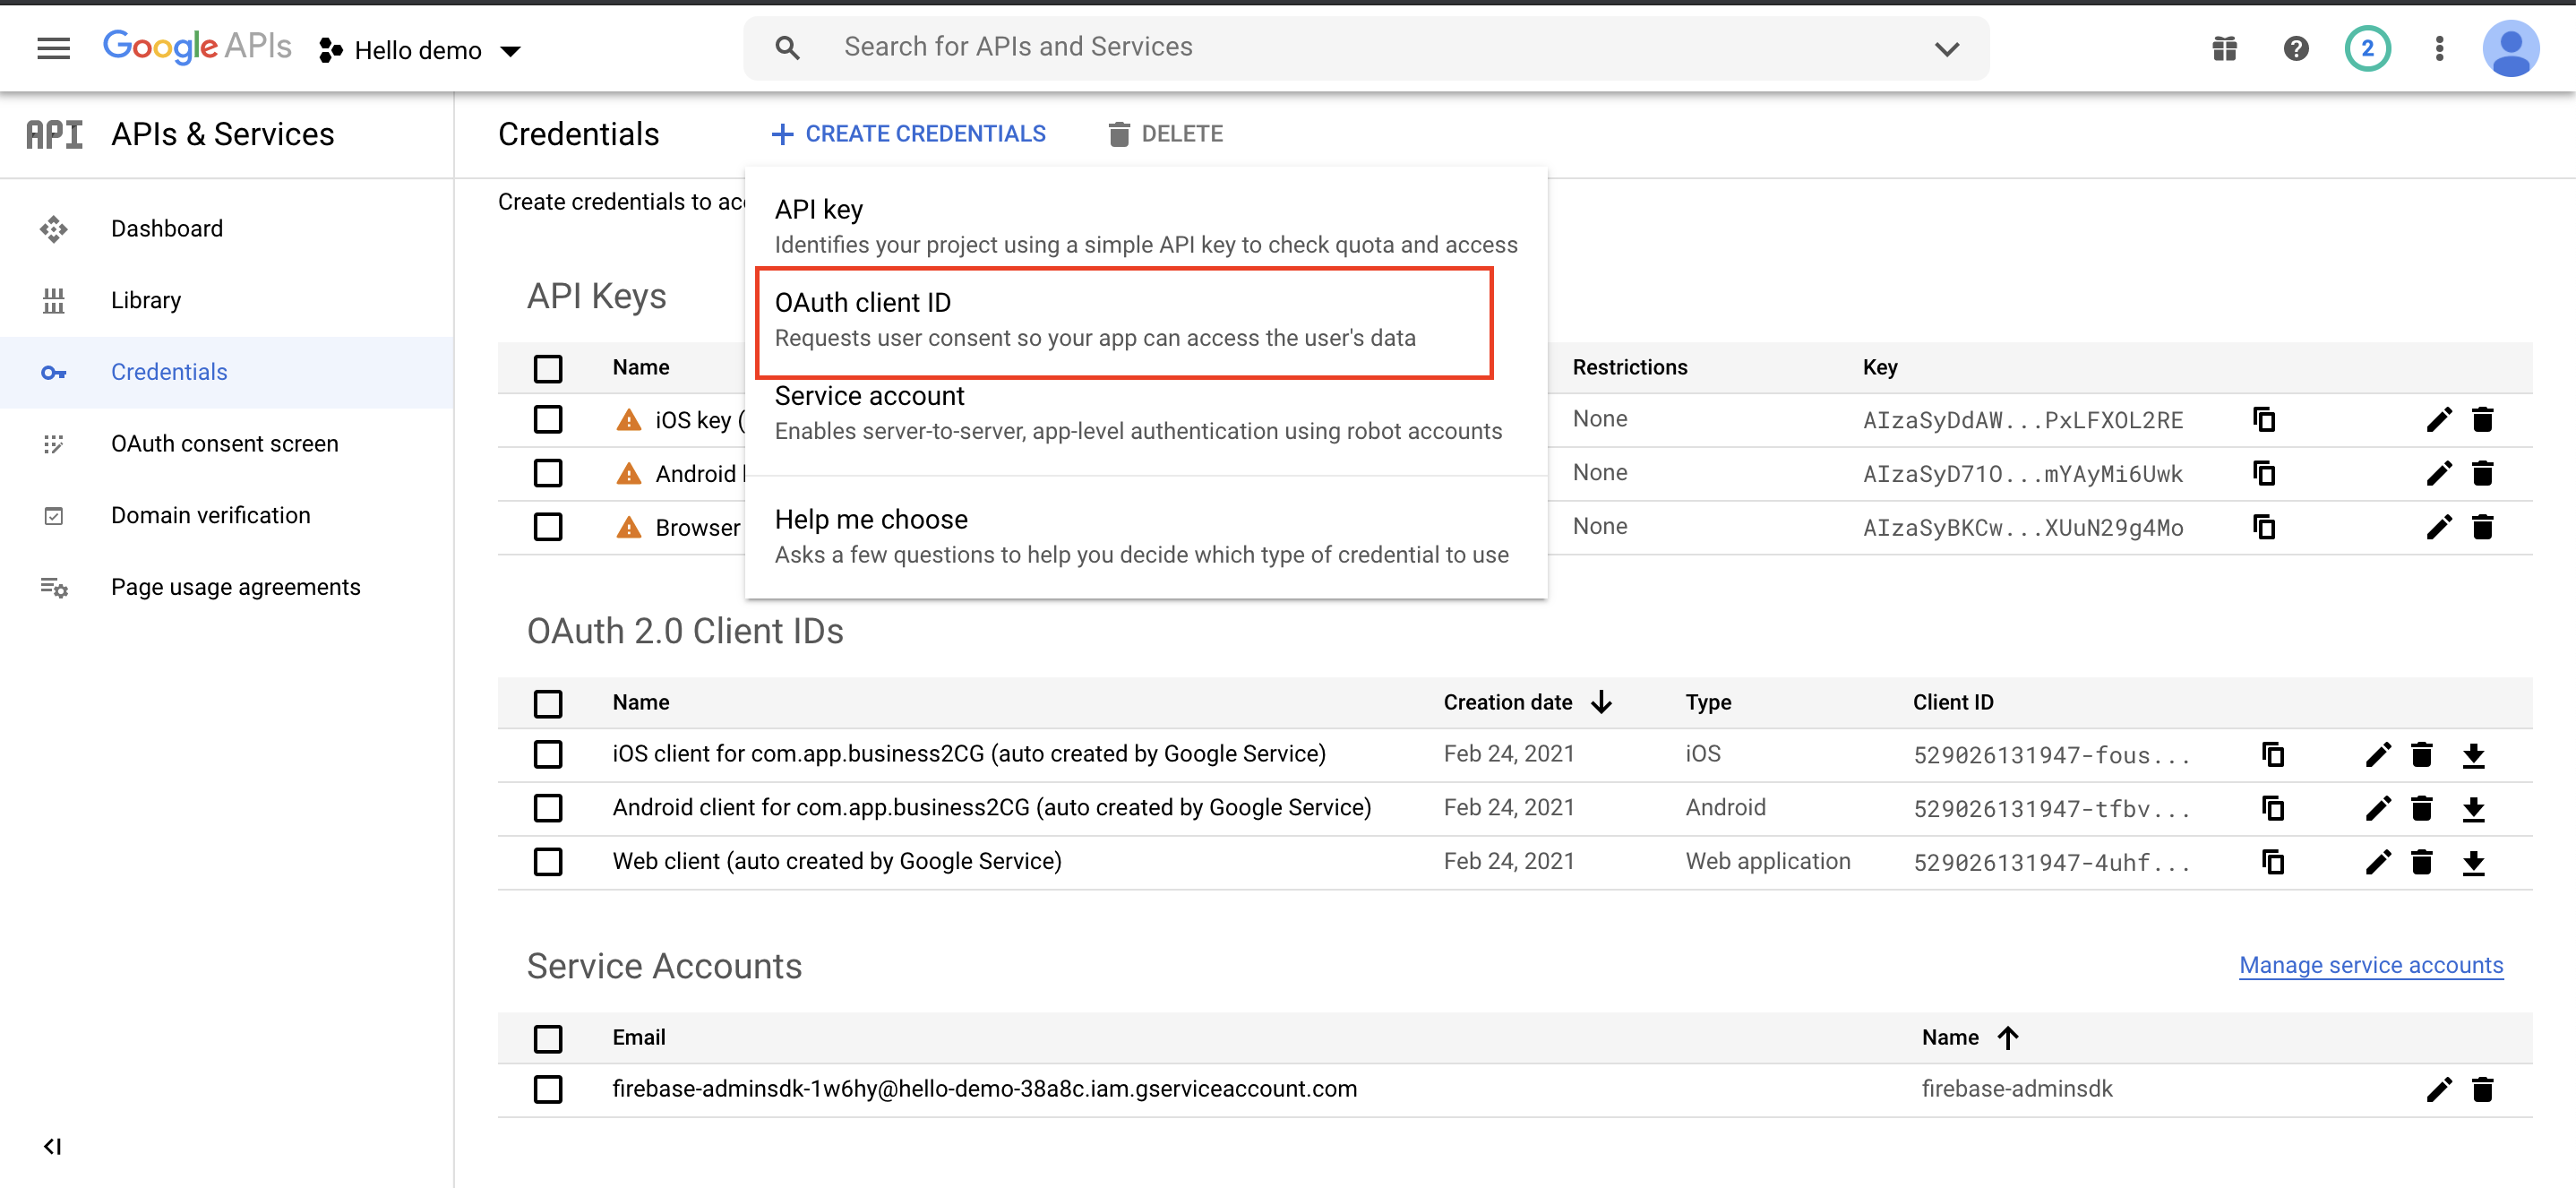
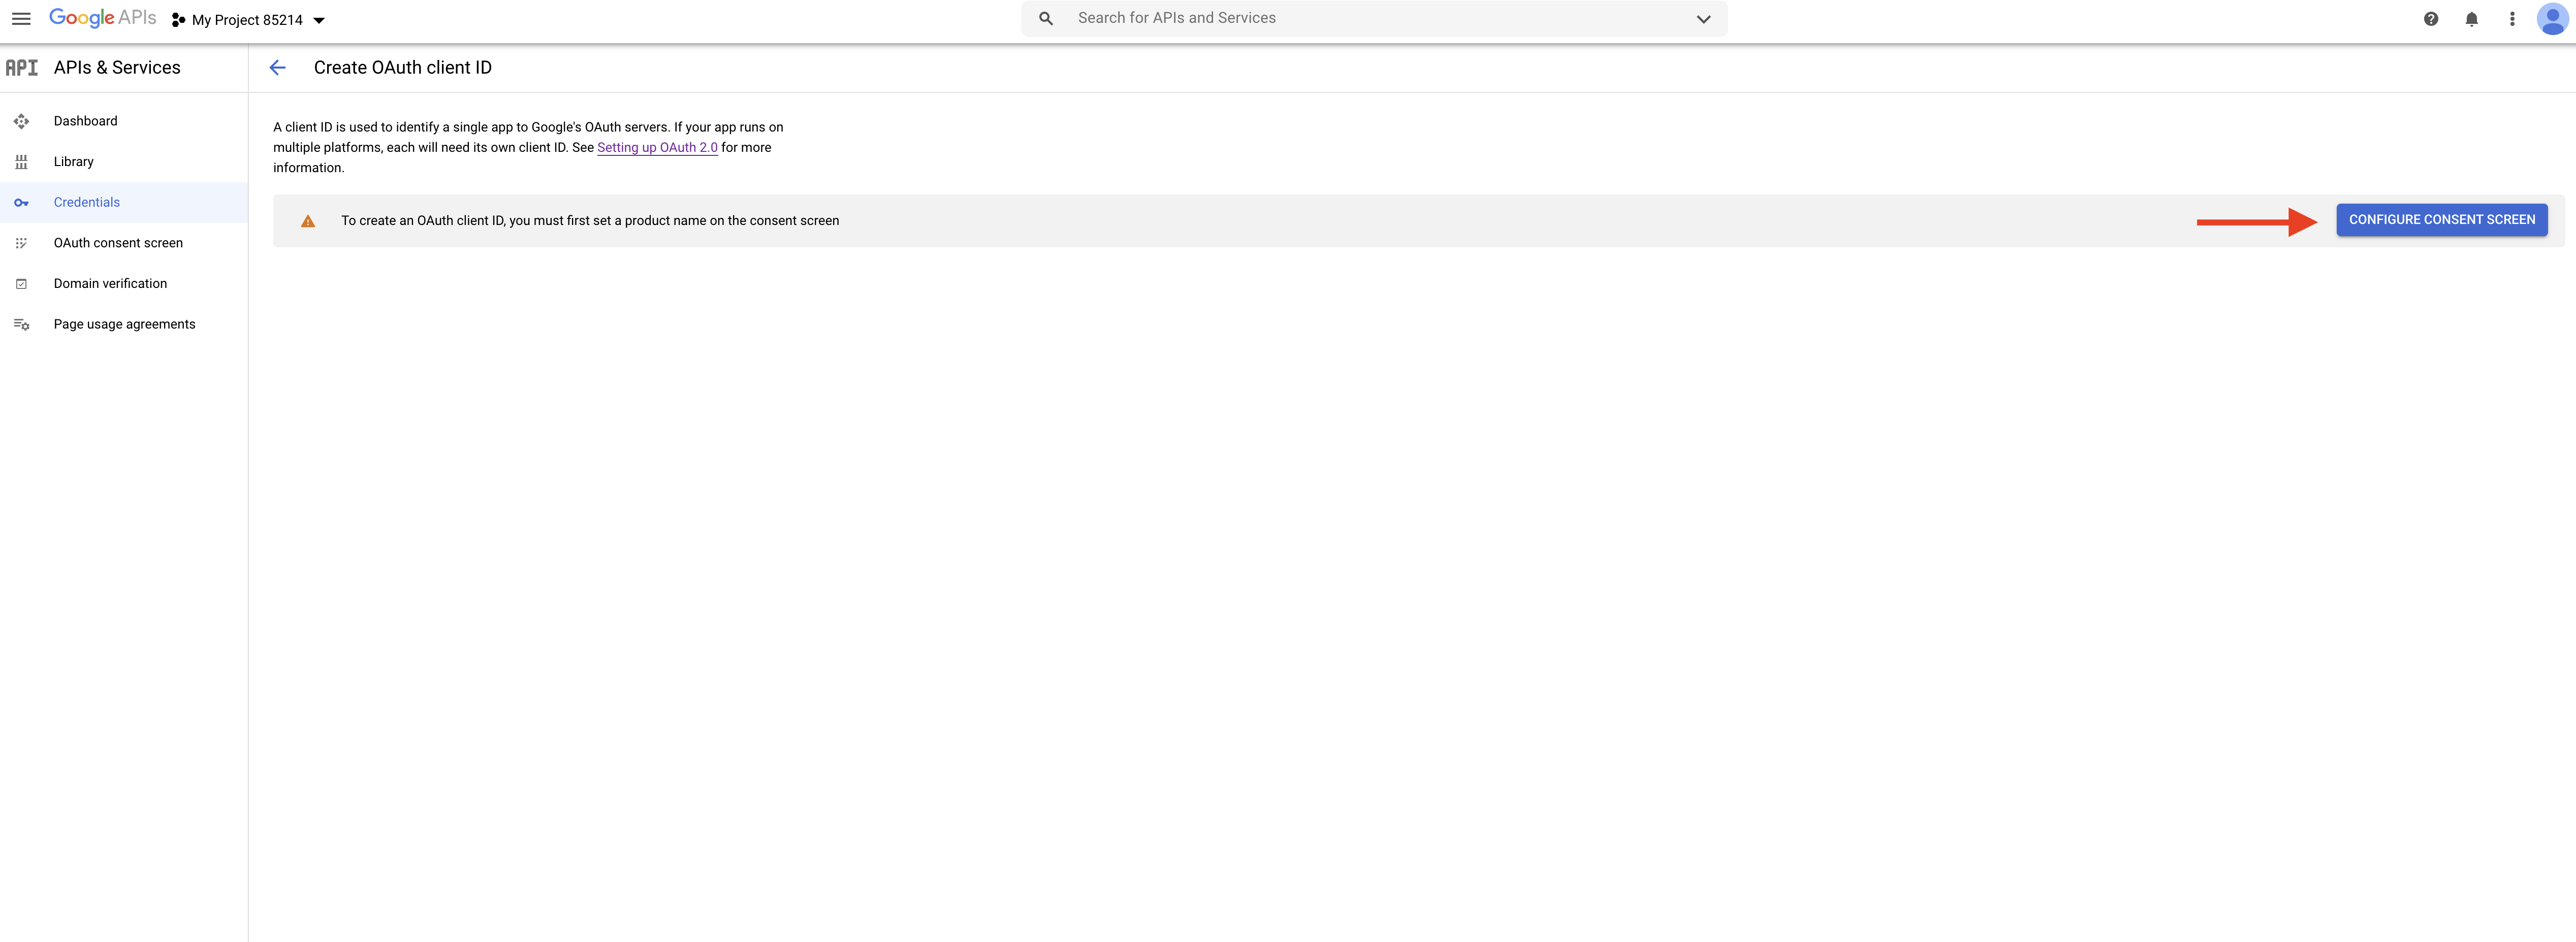
Step 15 : Click on OAuth client ID.
Step 16 : Click on Configure Consent Screen.
Step 17 : Select user type Internal and click on Create.

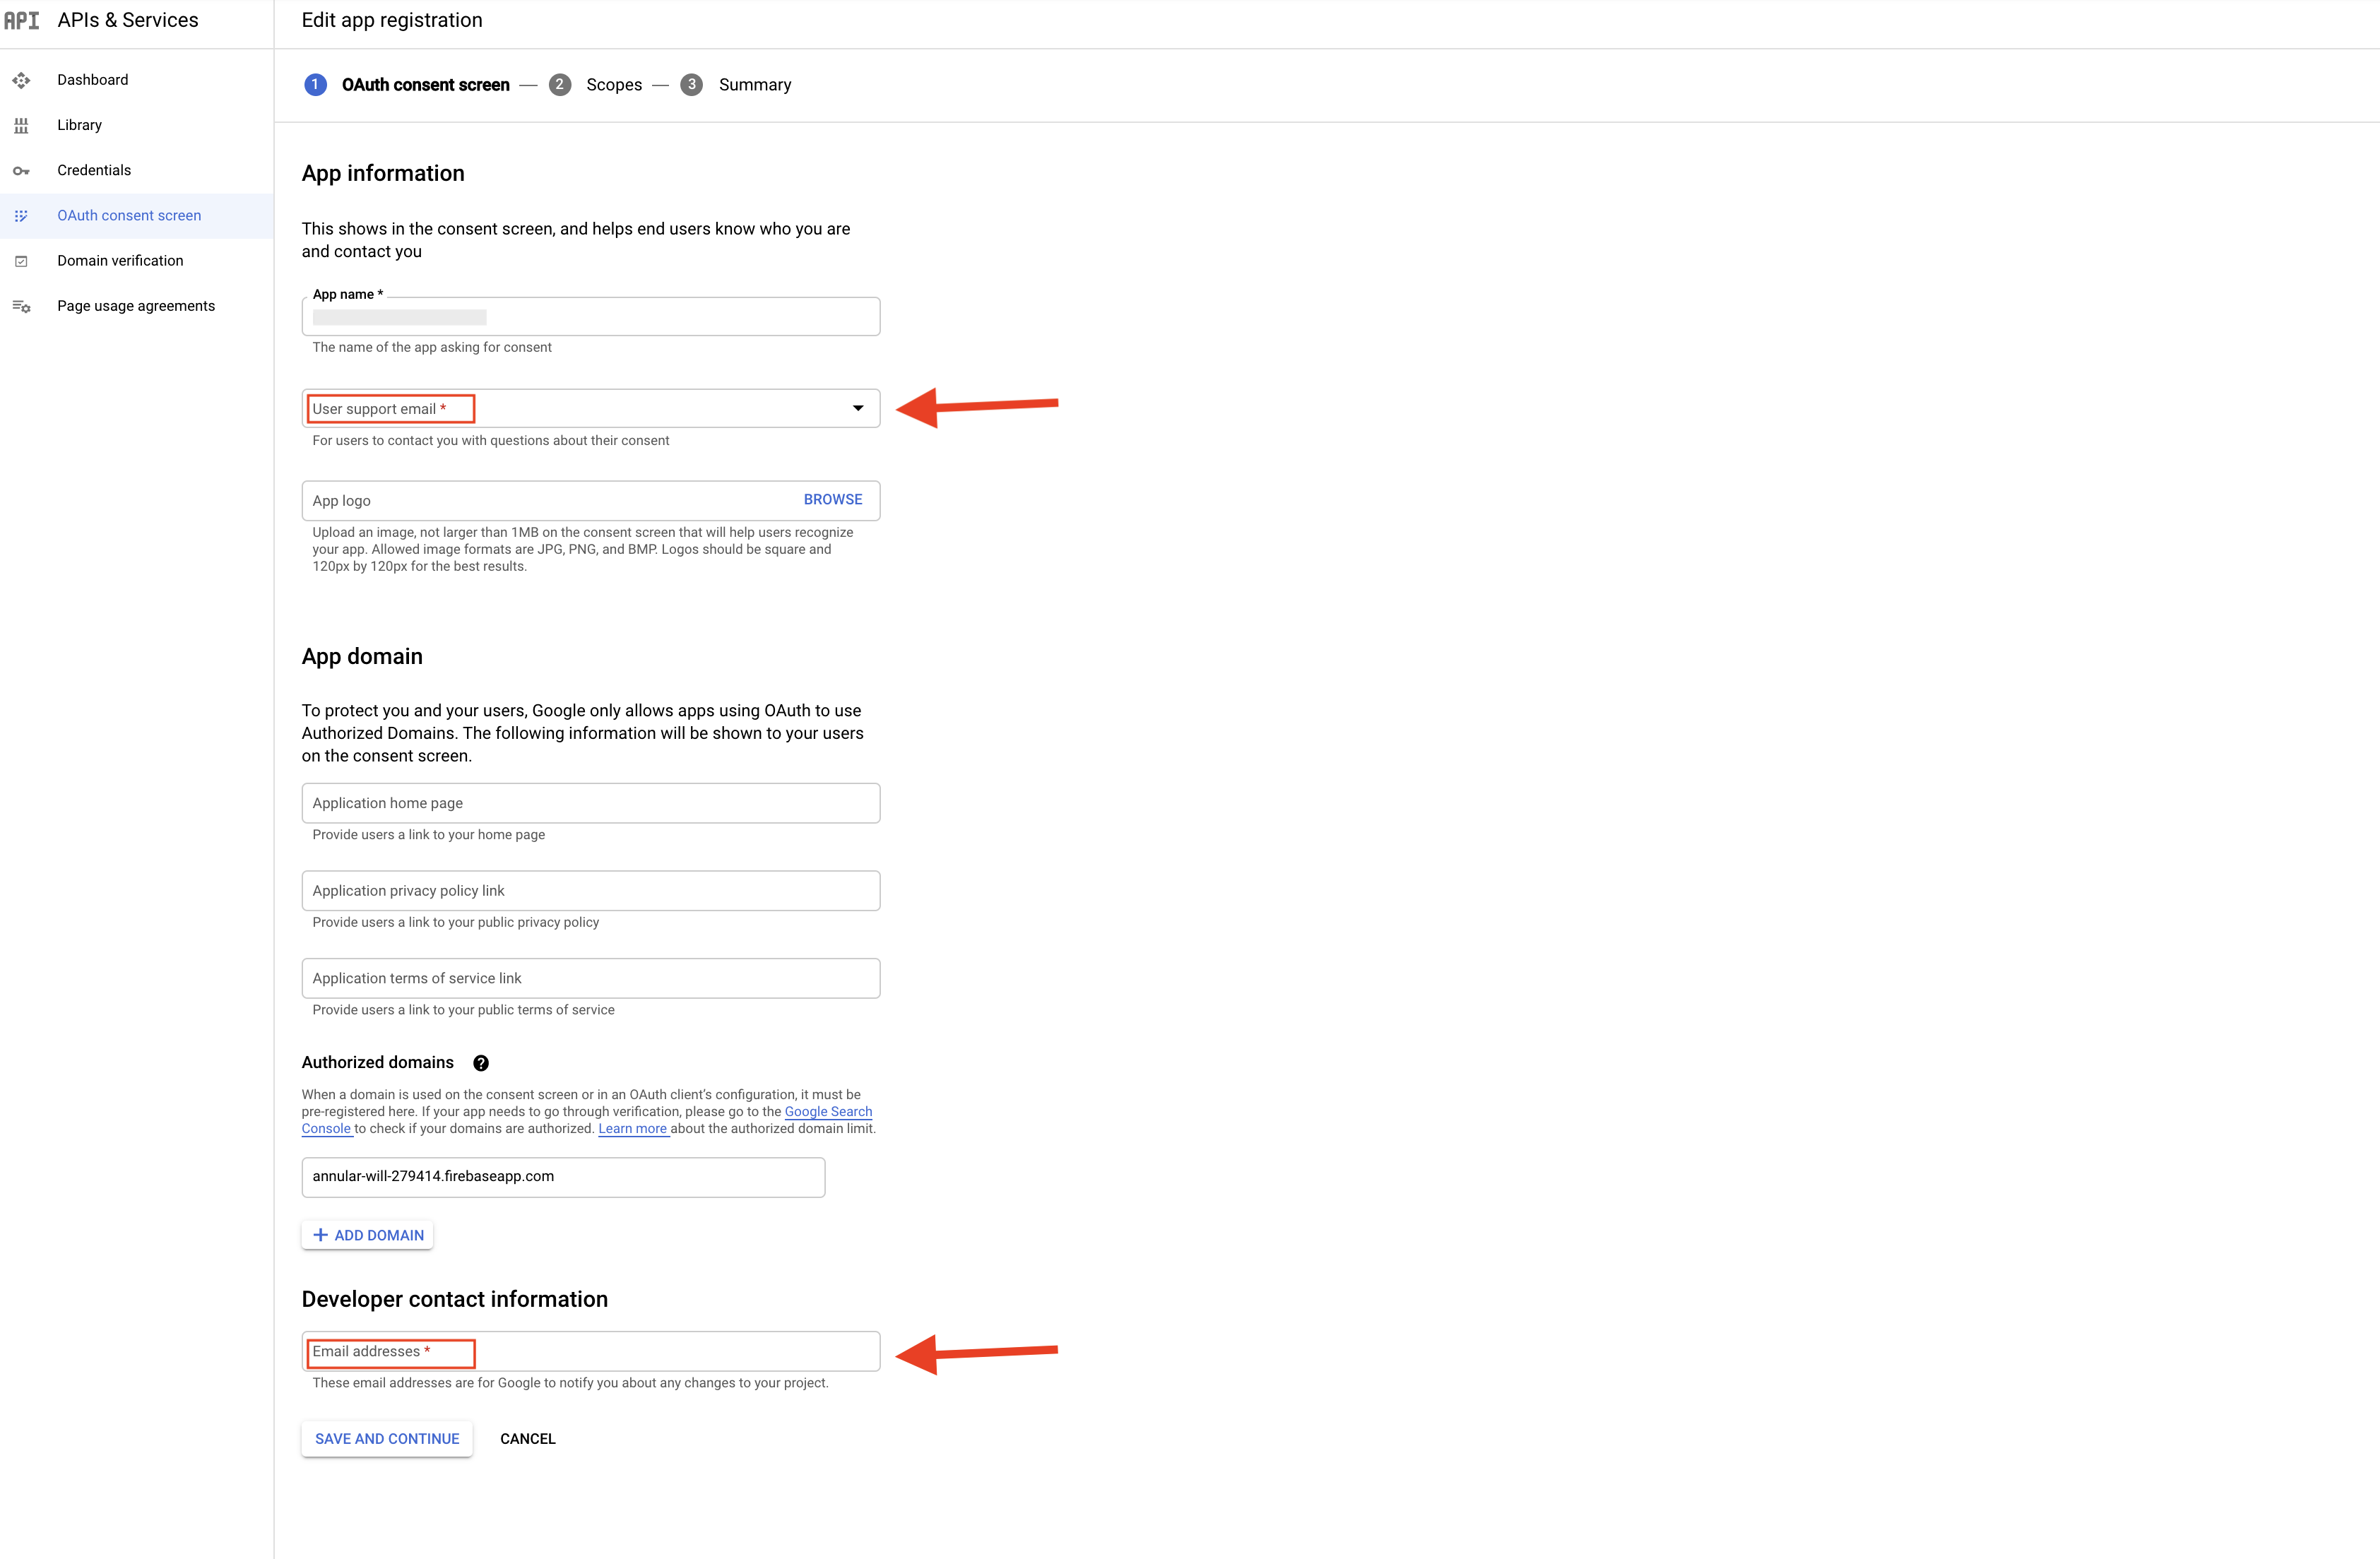
Step 18: Add required app information and developer contact information, then click on Save and Continue.
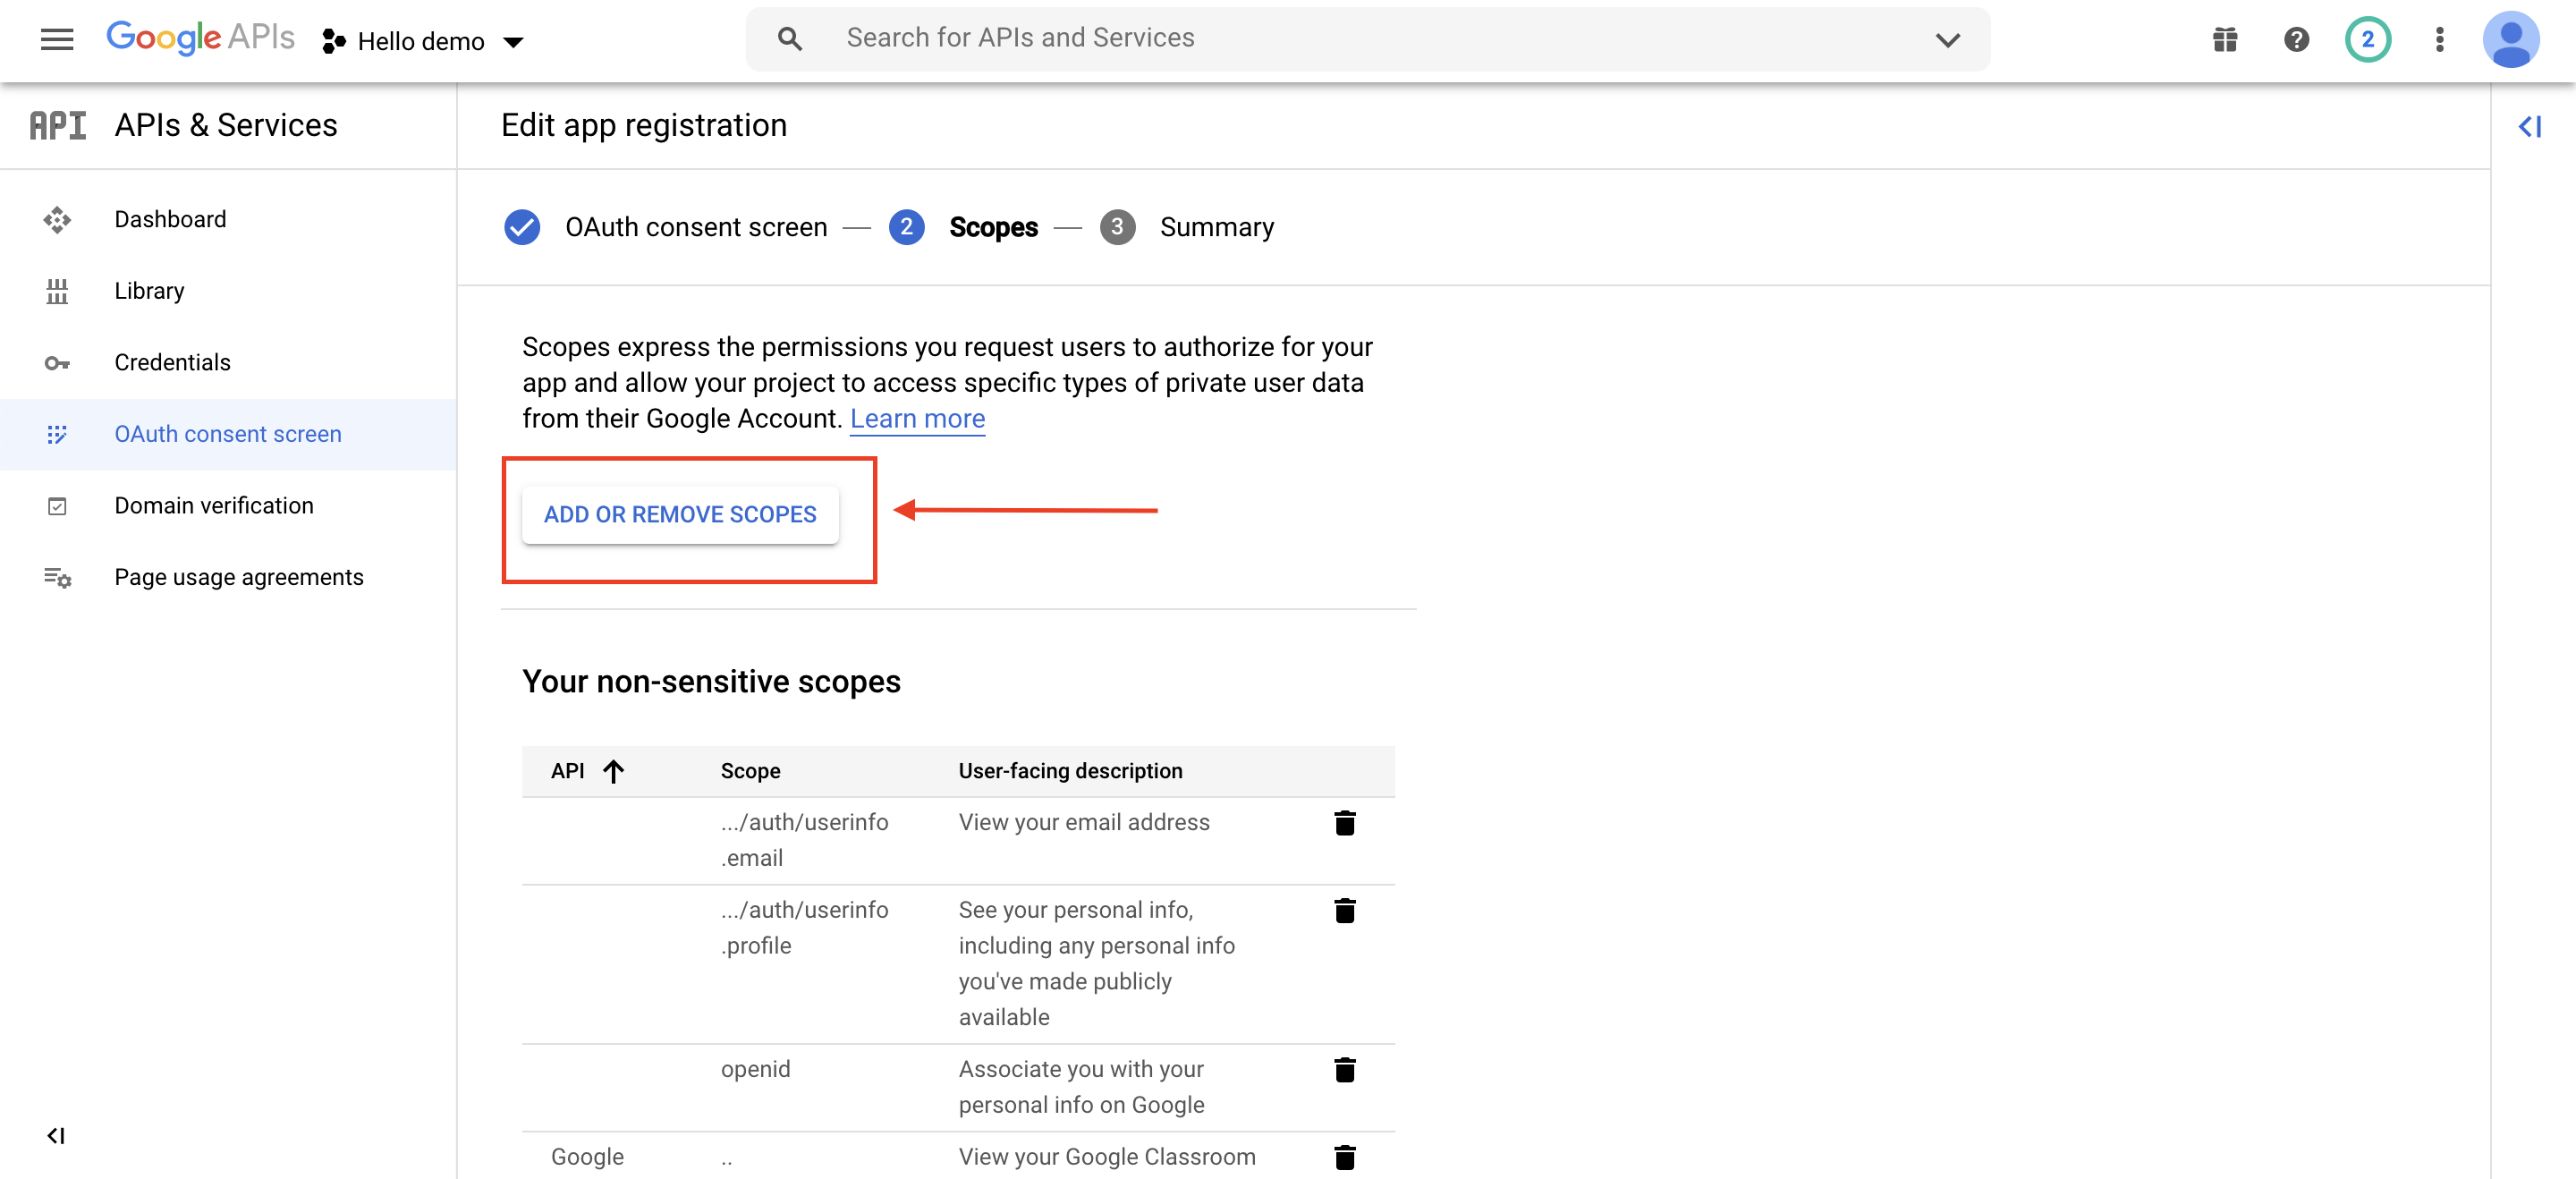
Step 19 : On the scopes screen, click on Add or Remove Option
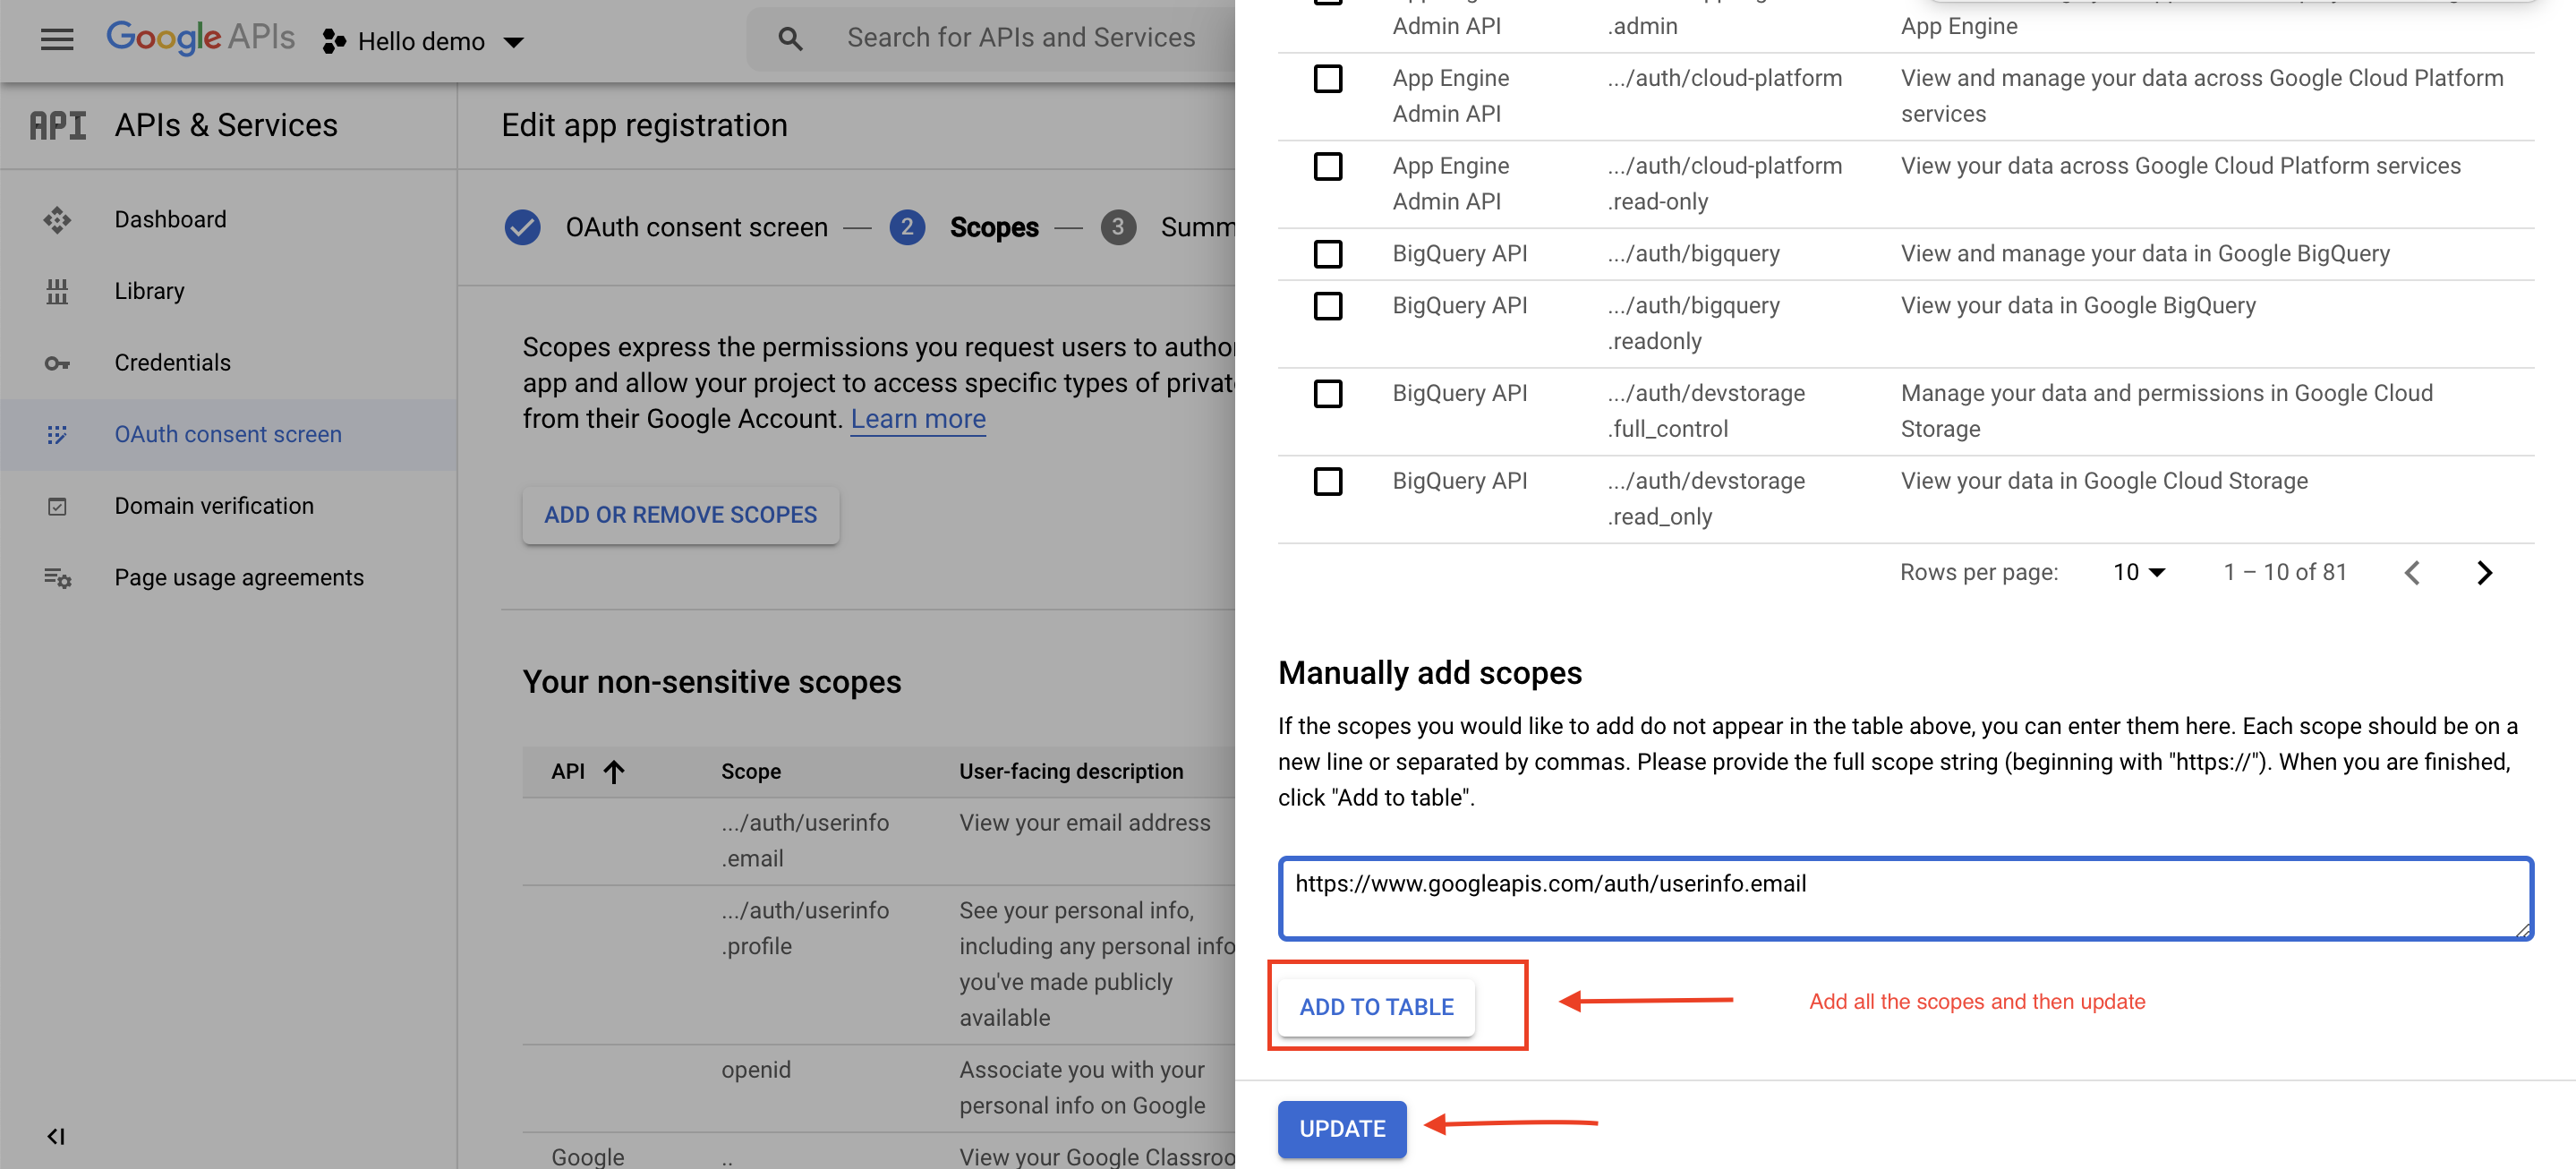
Step 20: Under the Manually add scopes section, copy and paste the following scopes in the required field. After pasting the scopes, click on Add to table and then click Update.
Note : Copy and paste the entire scopes provided below in the required field.
Step 21 : Click on Save and Continue.

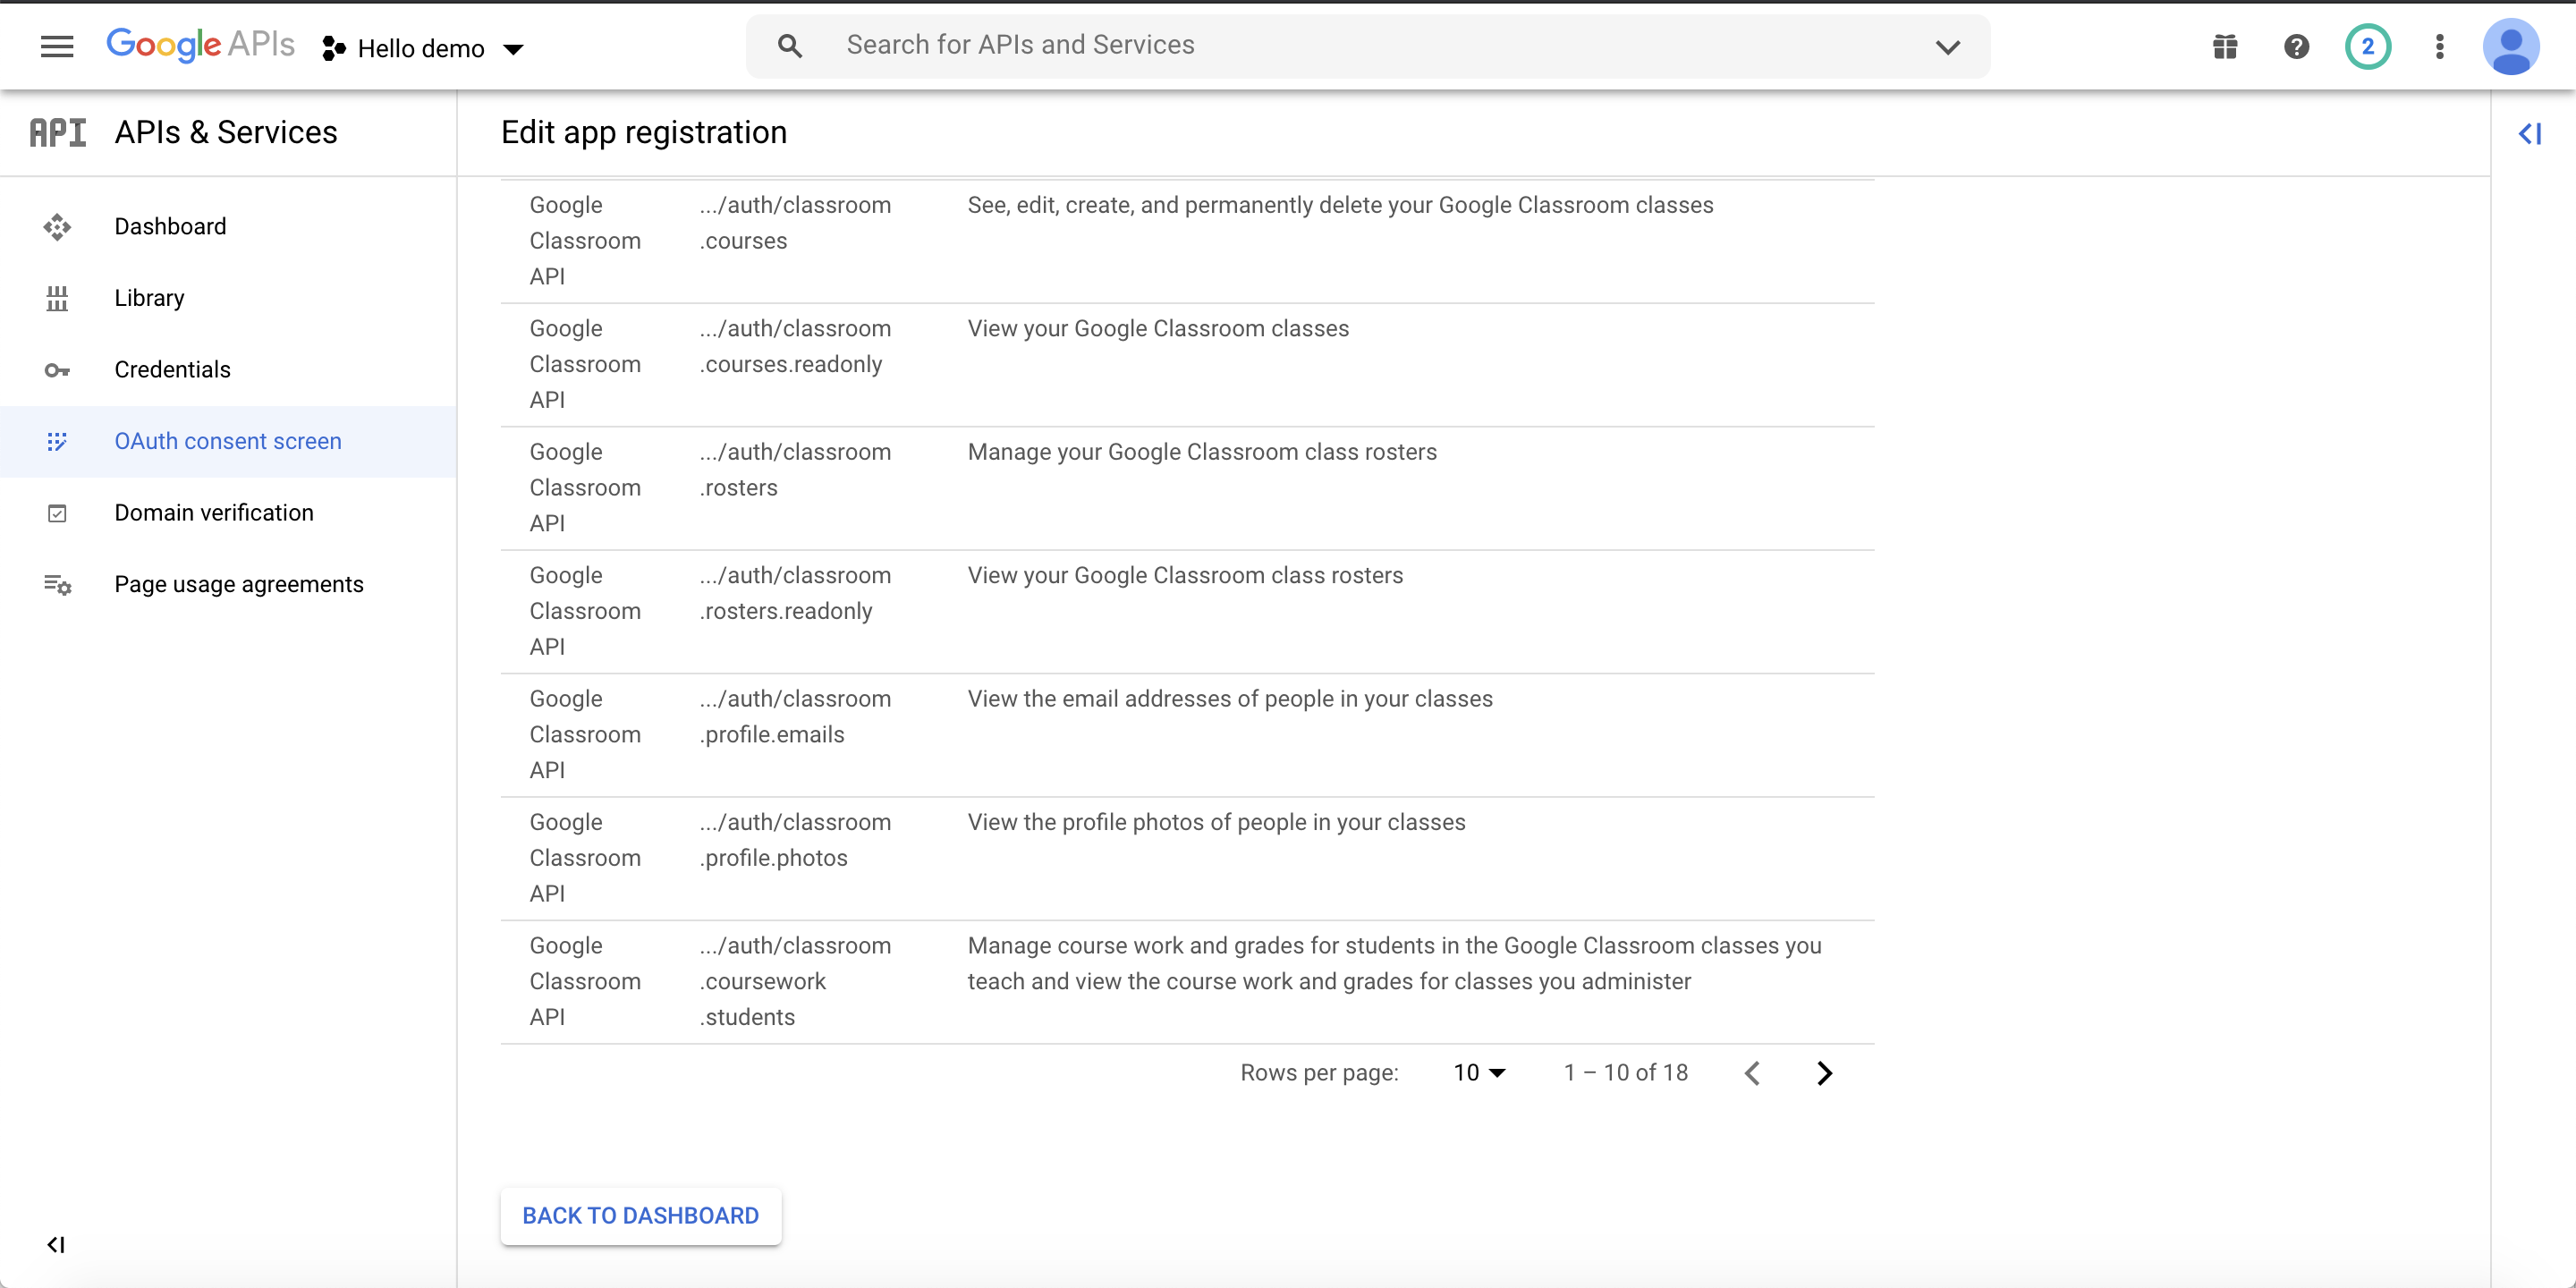
Step 22 : Check the OAuth consent screen and scopes summary and now you are done.
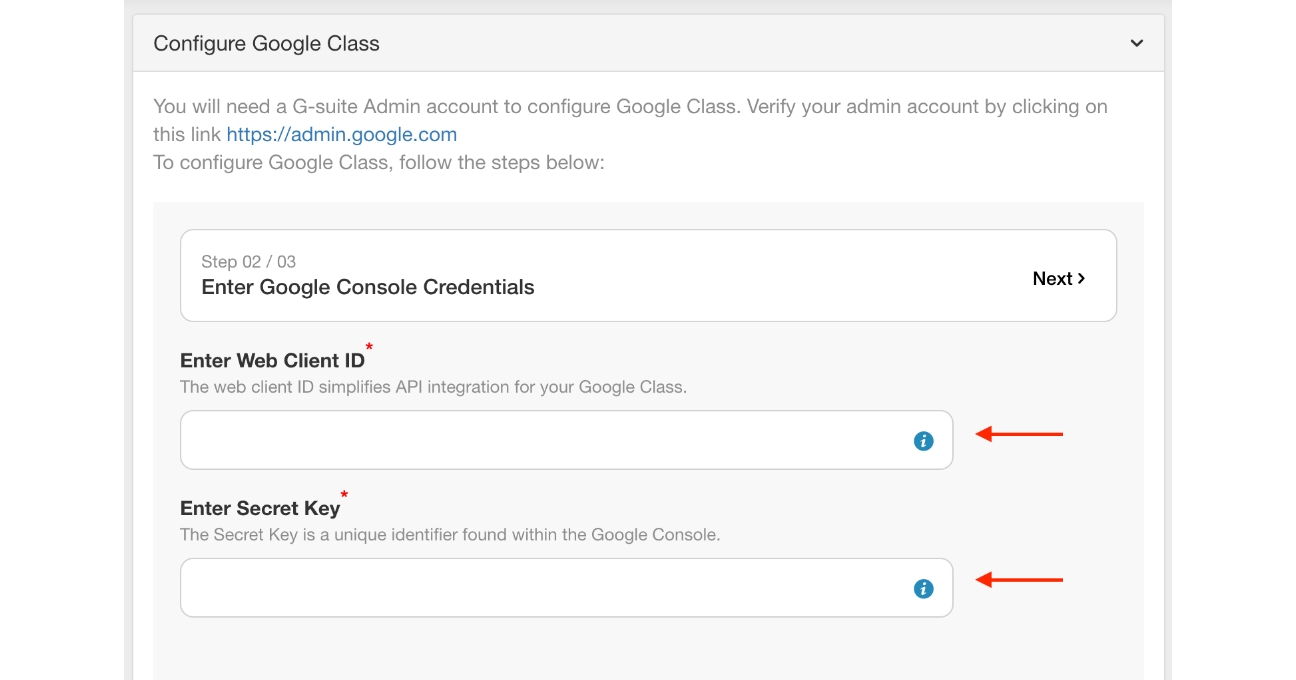
Step 23 : Now paste the copied web client id and secret key in their respective fields on creator software.