How to deploy Appy Pie Livechat's widget in wordpress
Following are the steps to deploy livechat’s widget in wordpress:
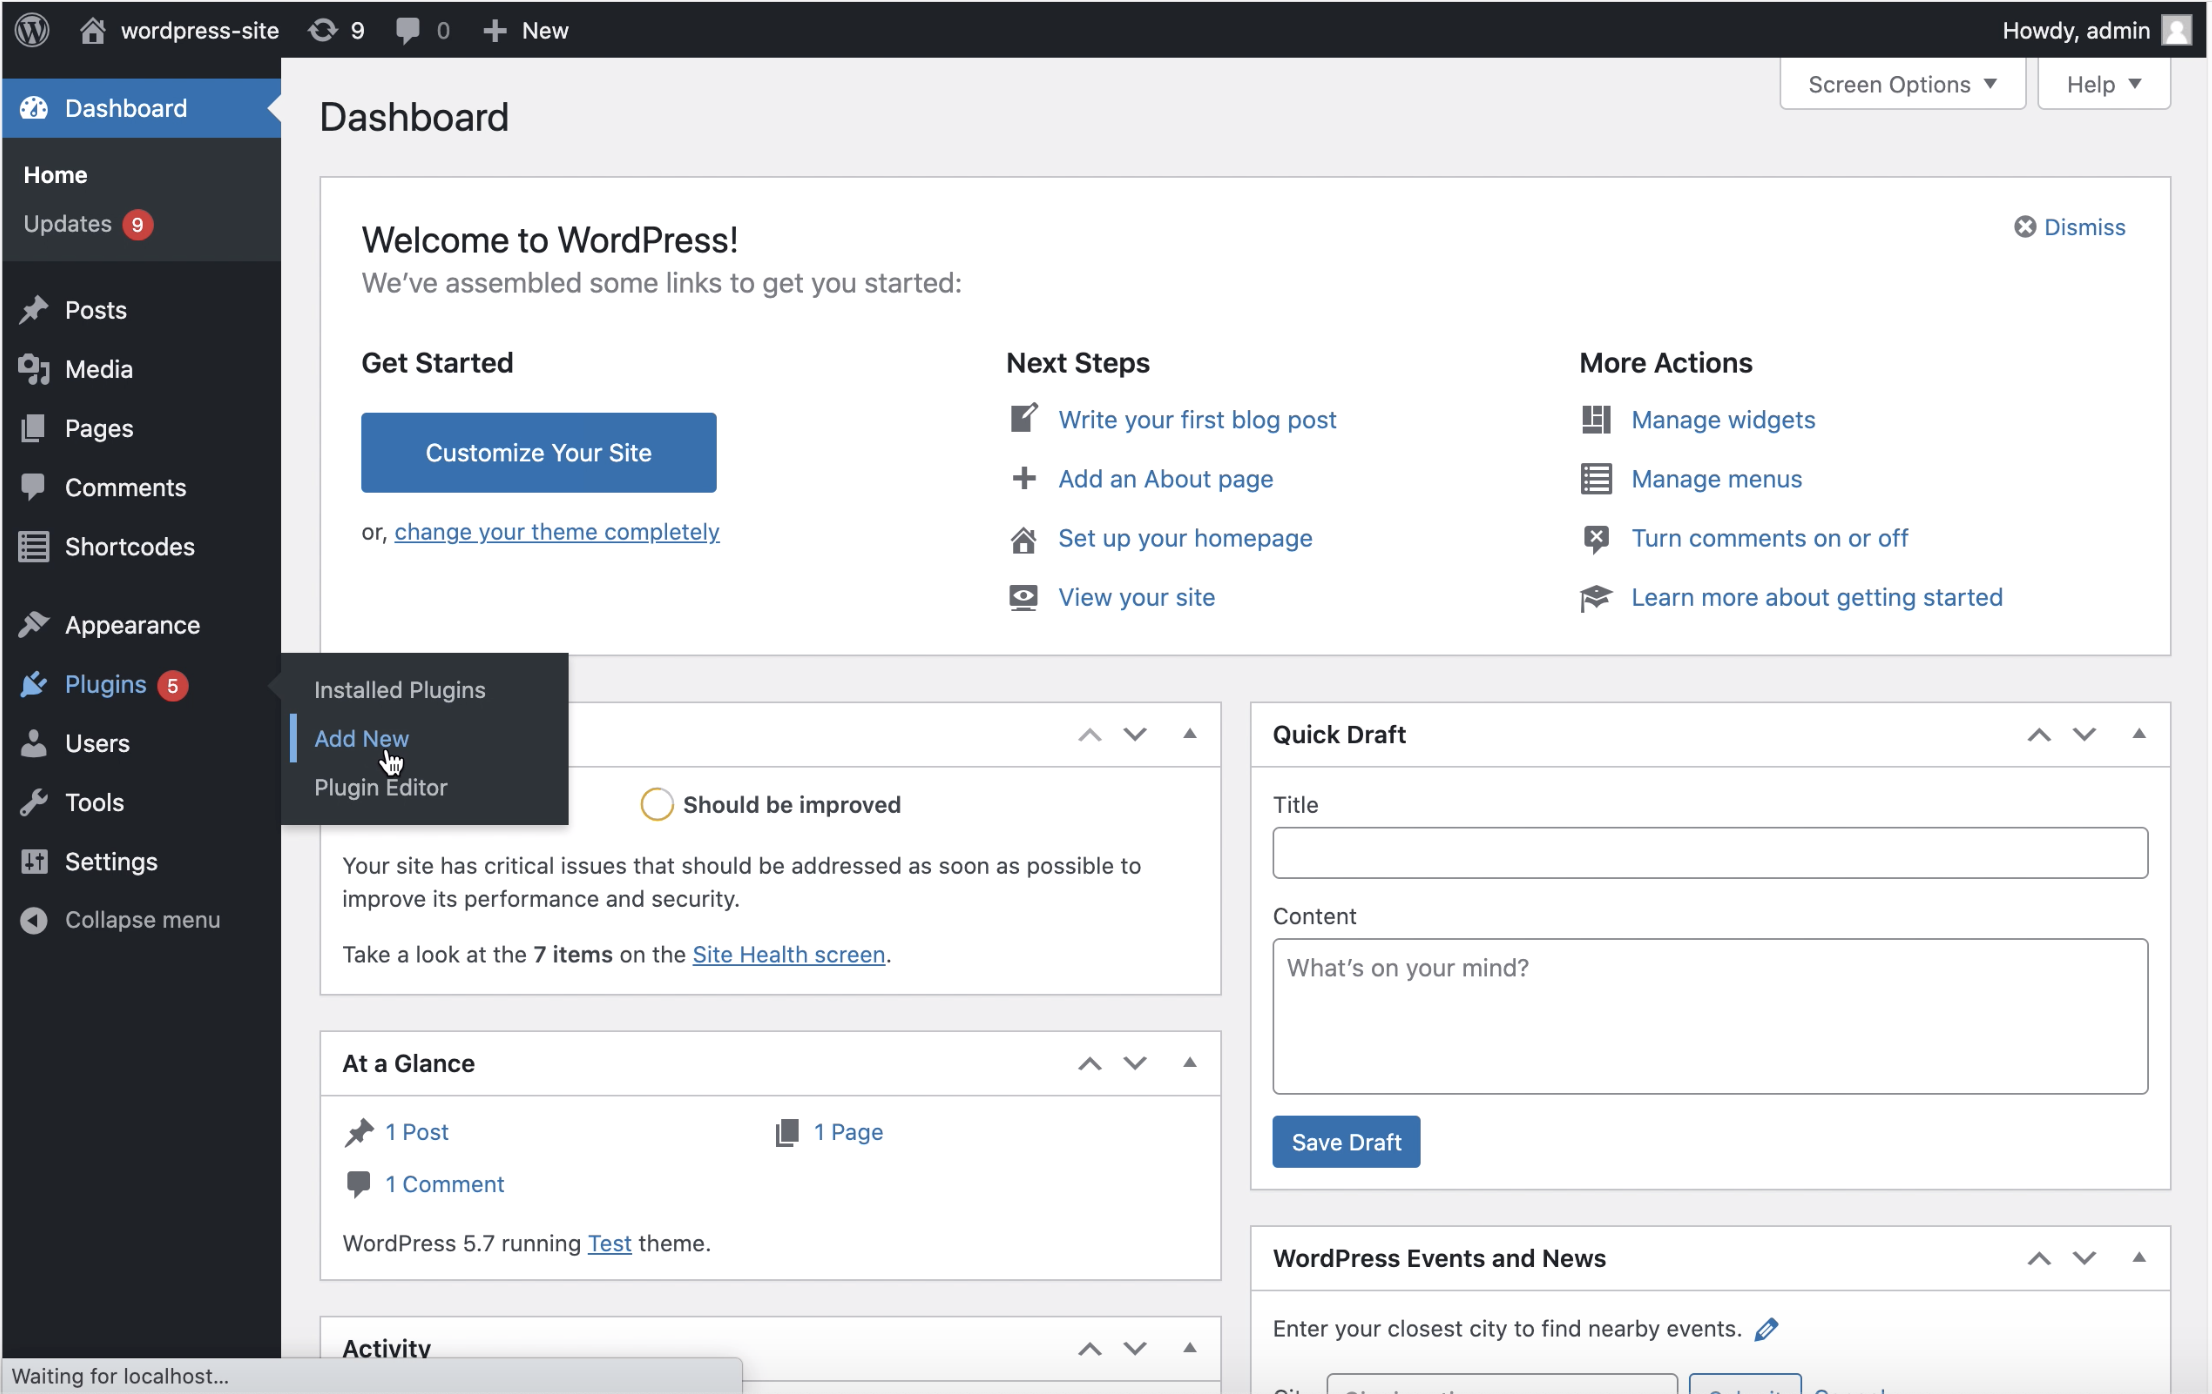
Step1
Login to your wordpress dashboard and click on “Plugins” option and select “Add new”
Step 2
In the “Plugins” section search for “Insert headers and footers” plugin.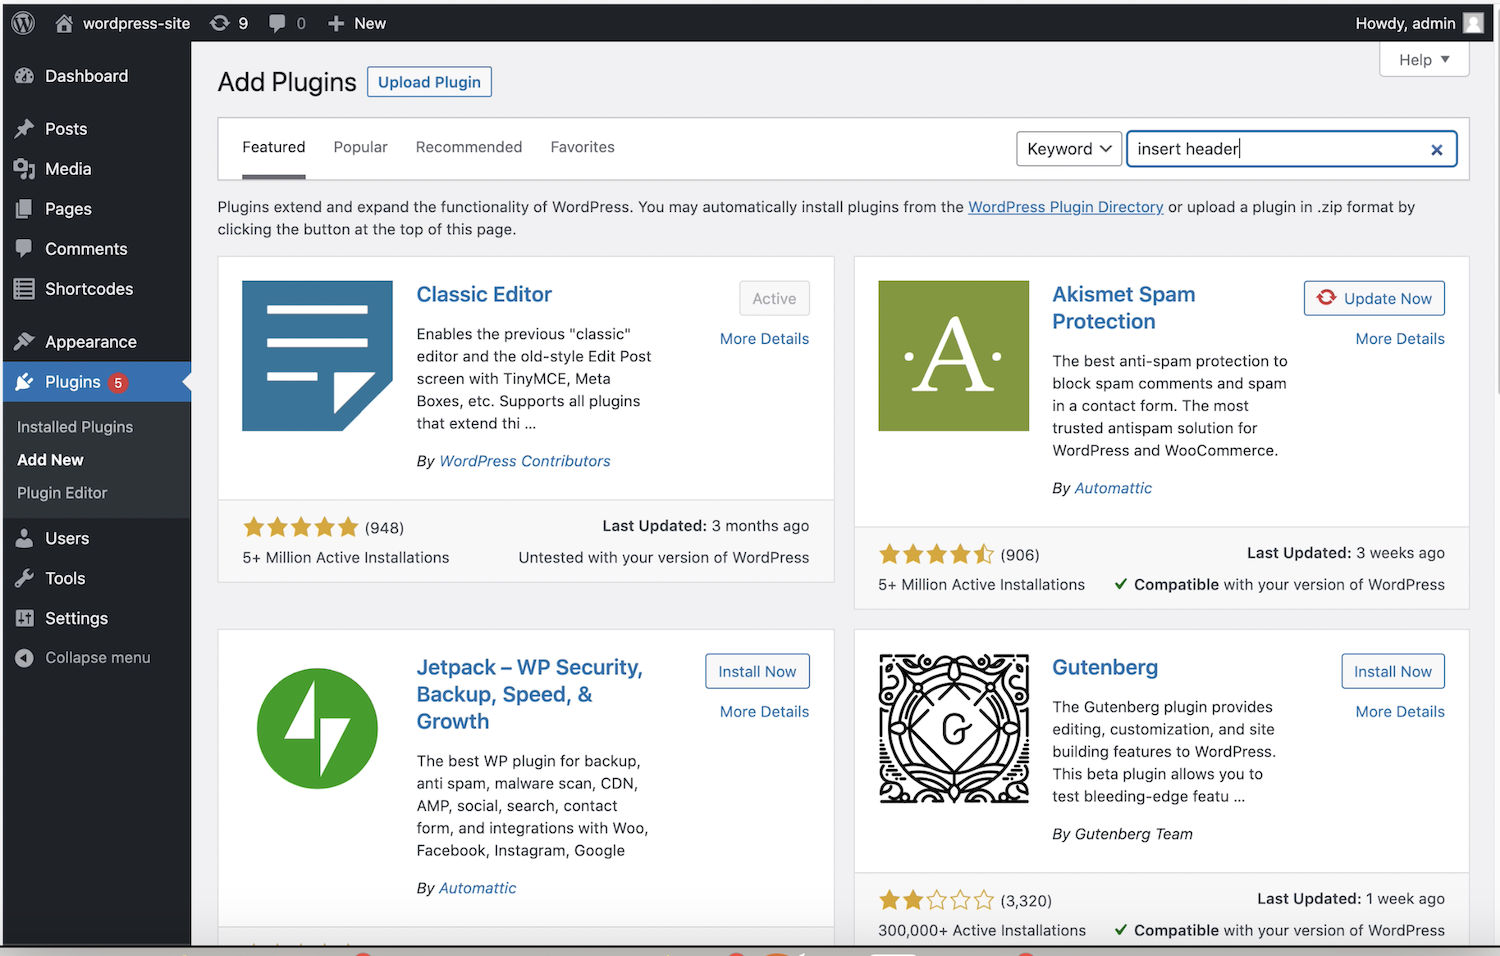
Step 3
Once you’ve found the plugin, click on the “Install now” button to install the plugin.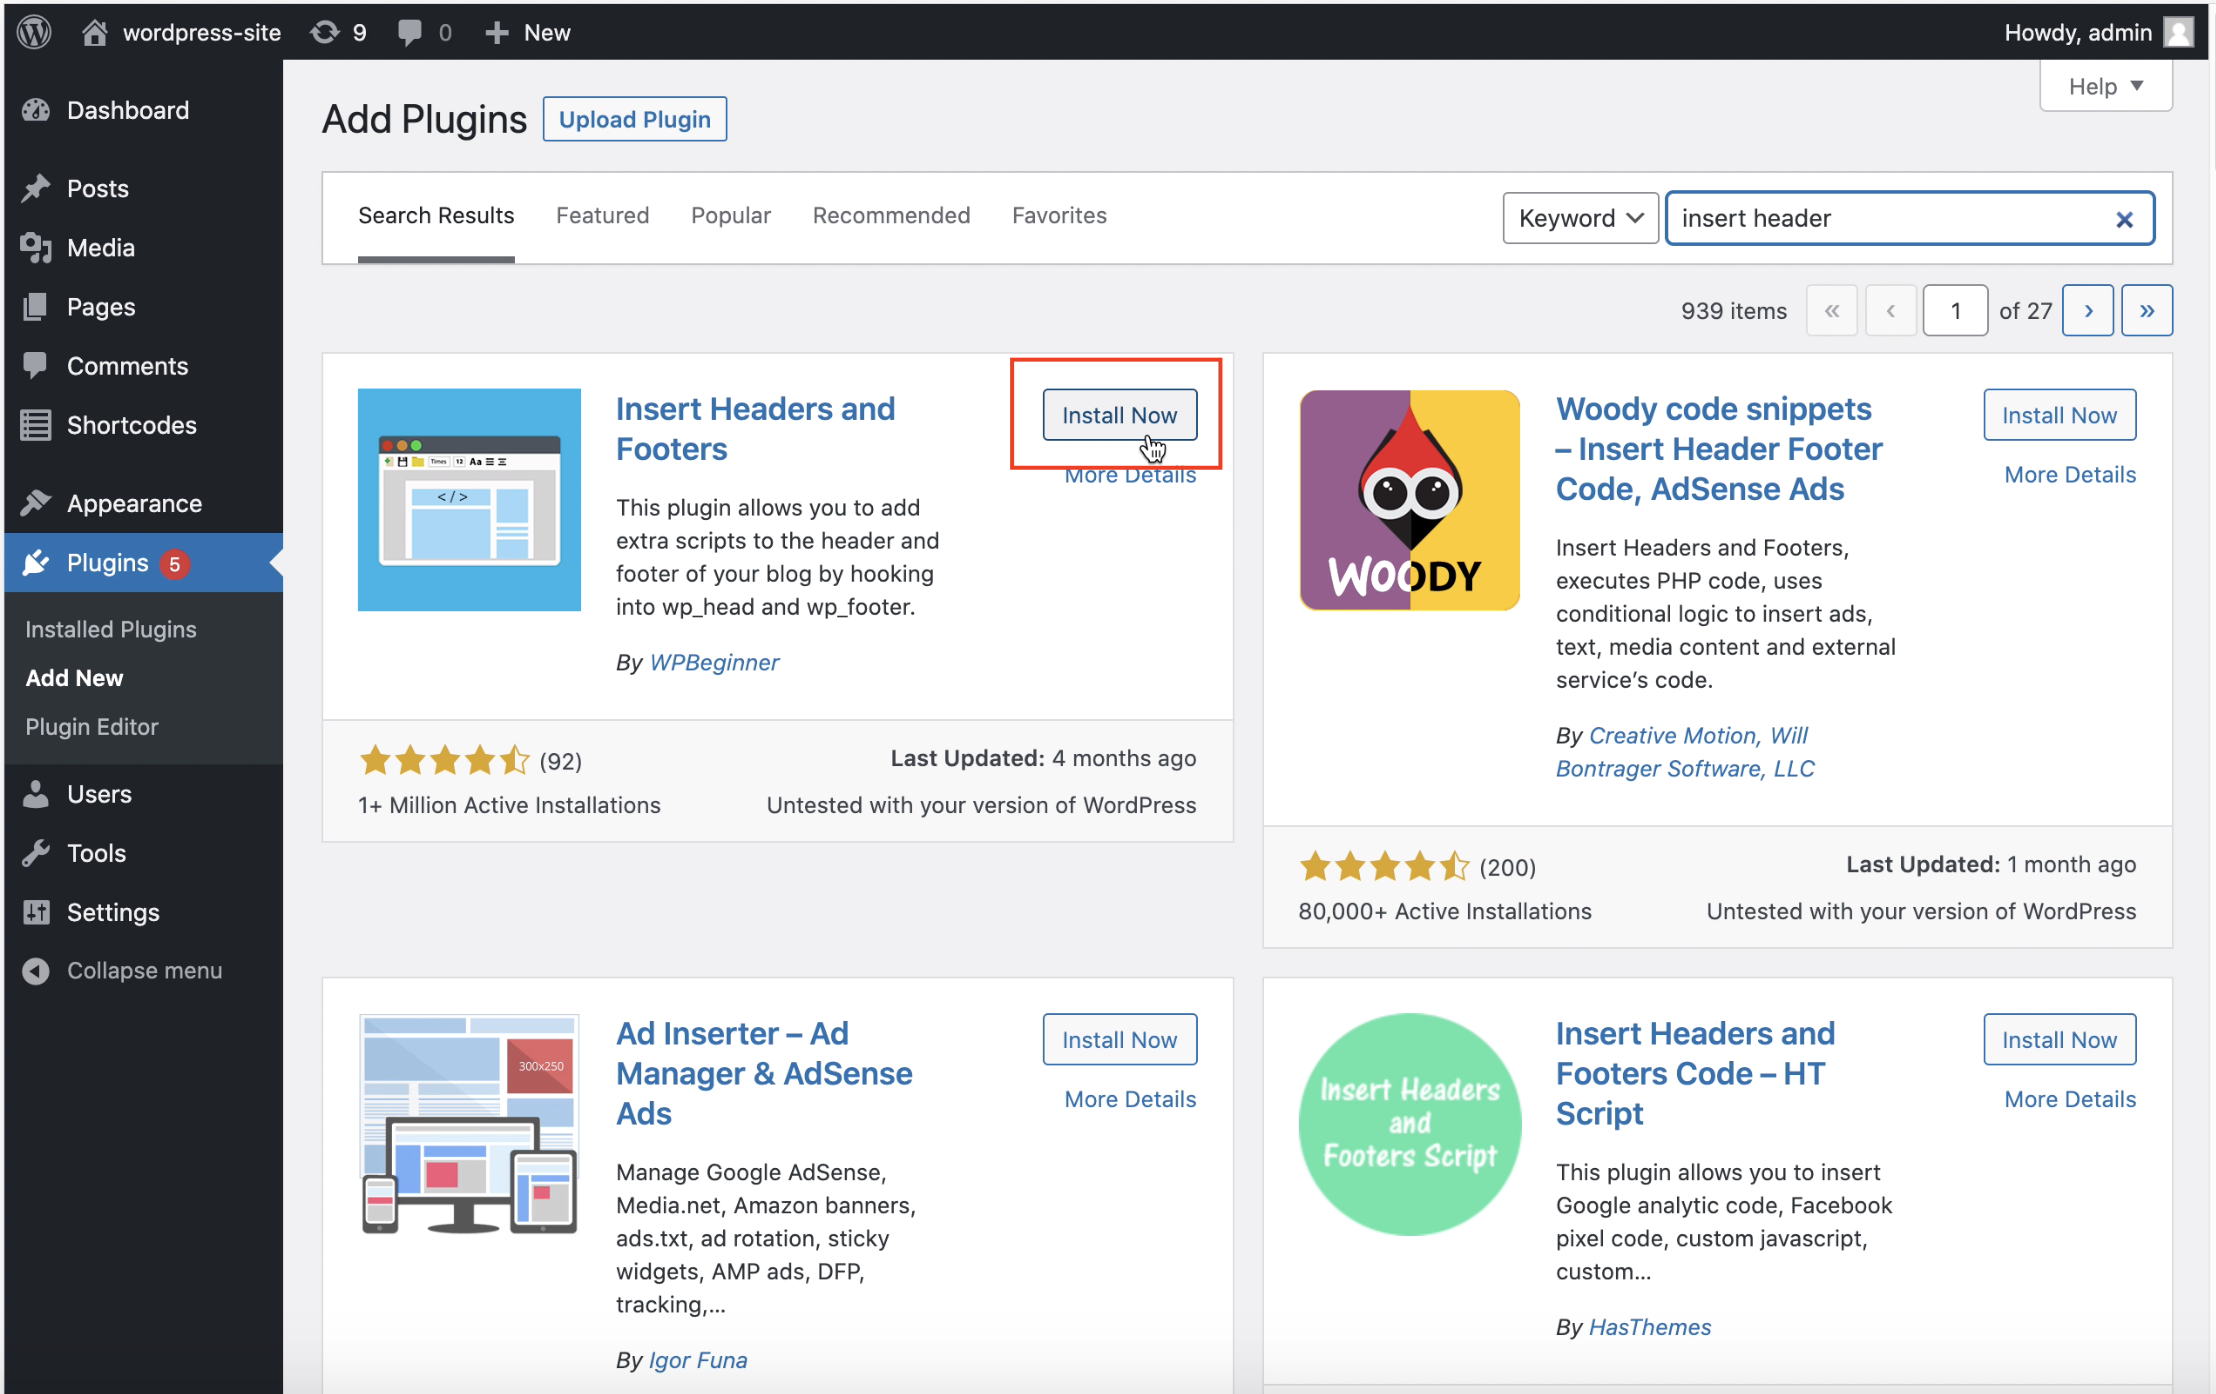
Step 4
After installing the plugin you need to click on the “Activate” button to activate the plugin.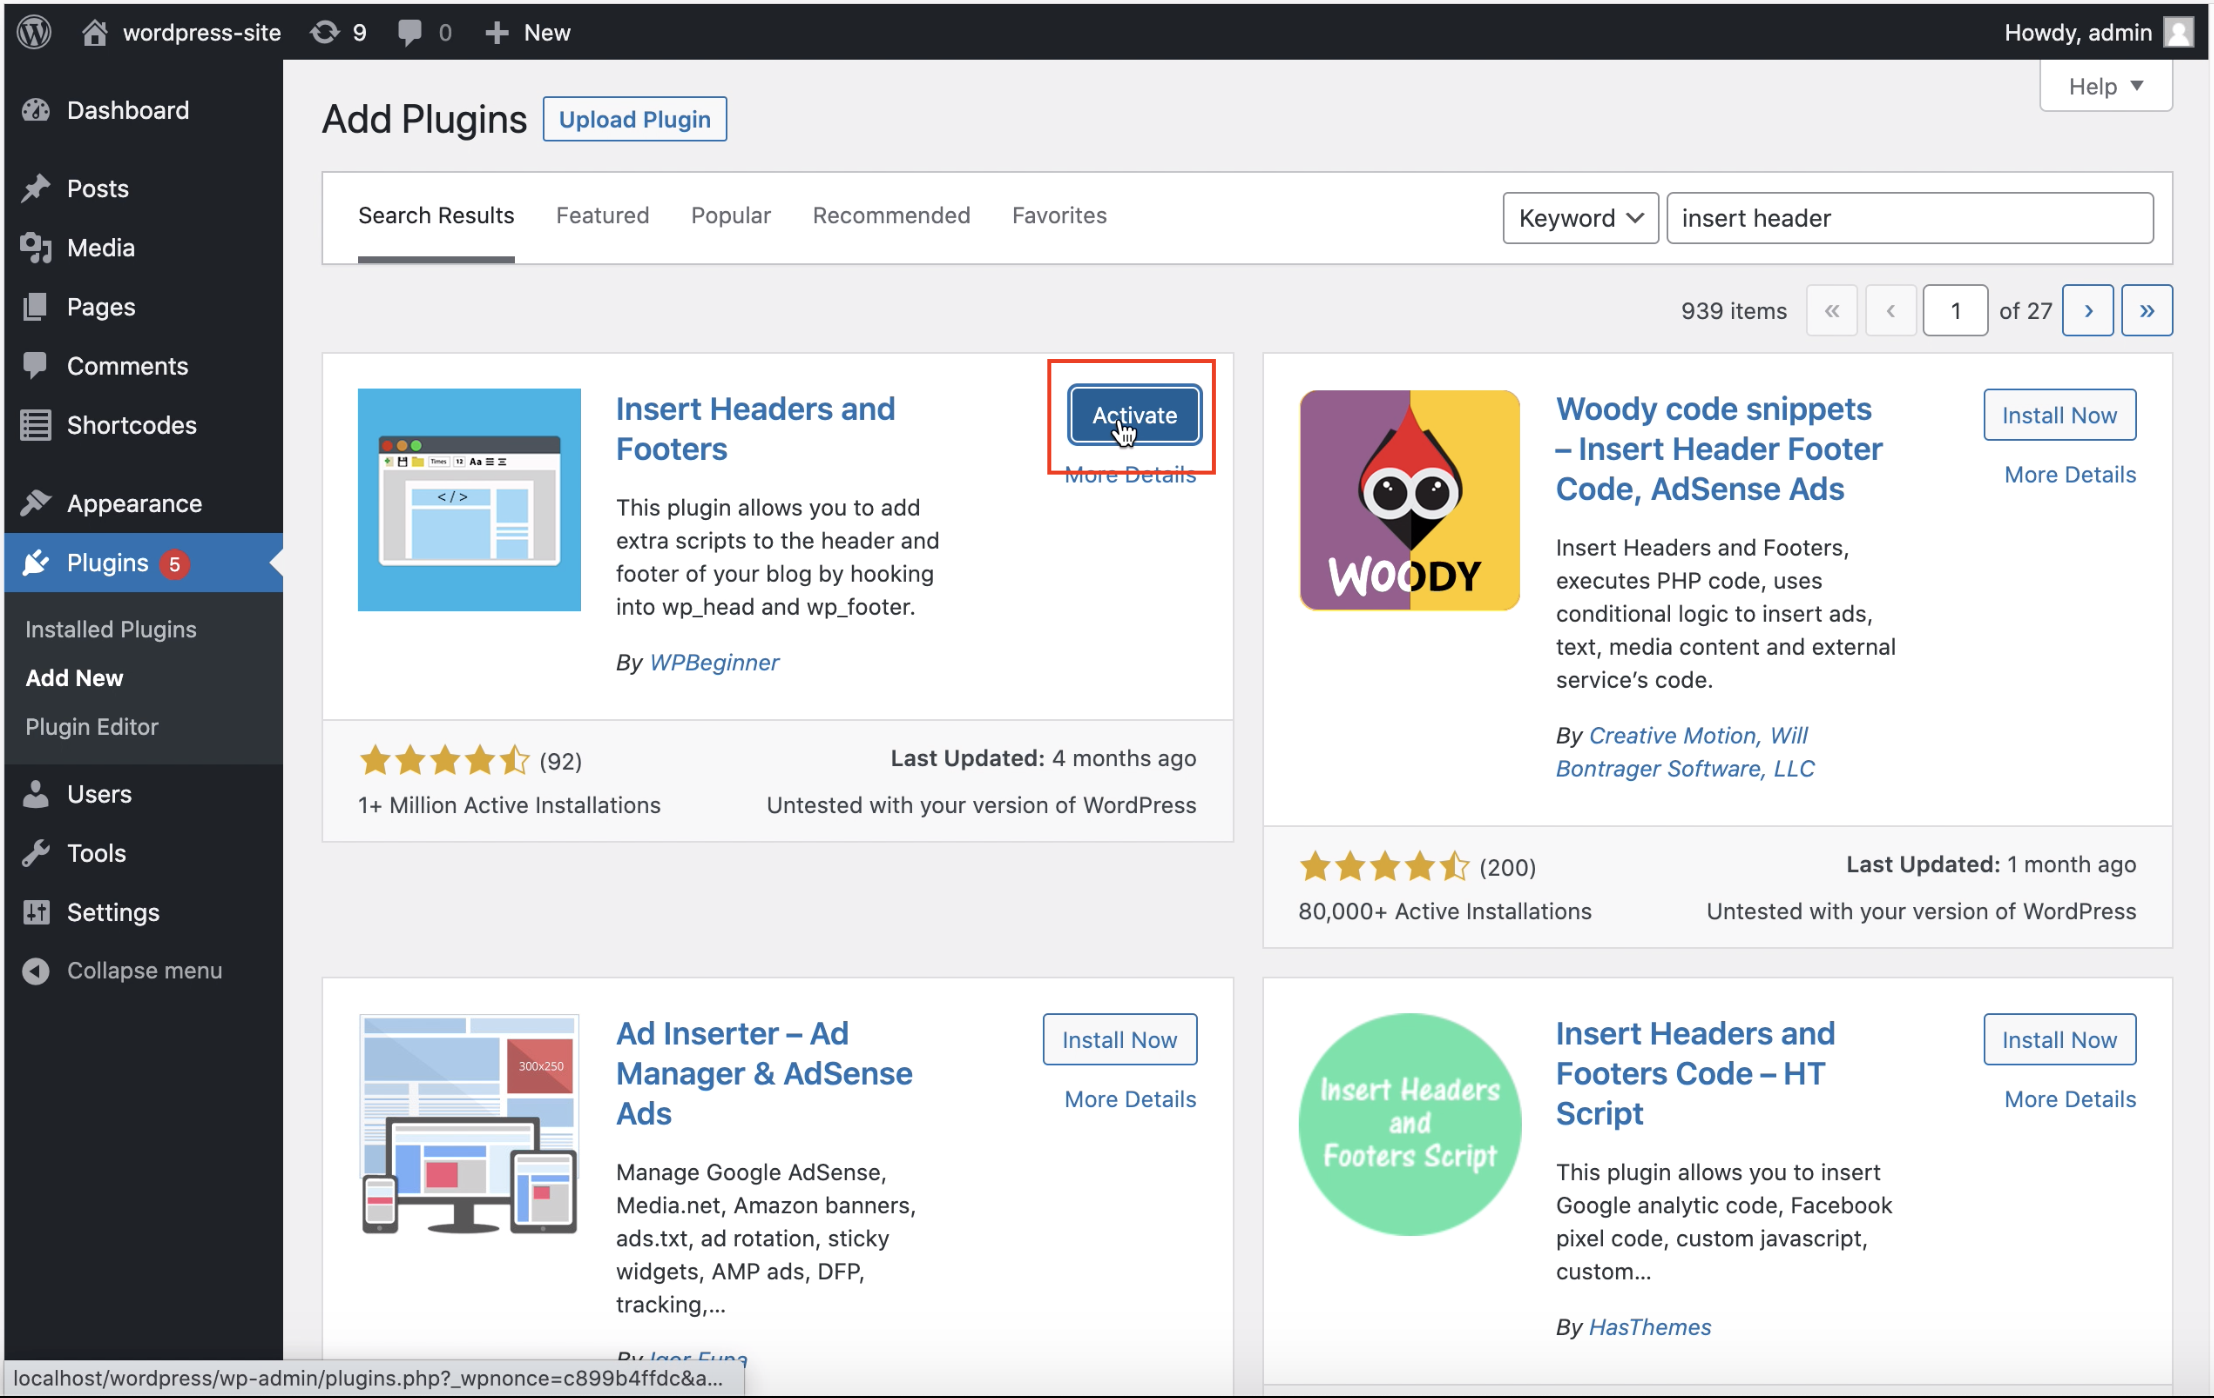
Step 5
After activating the plugin now you need to click on “Settings” option and select “Insert headers and footers” 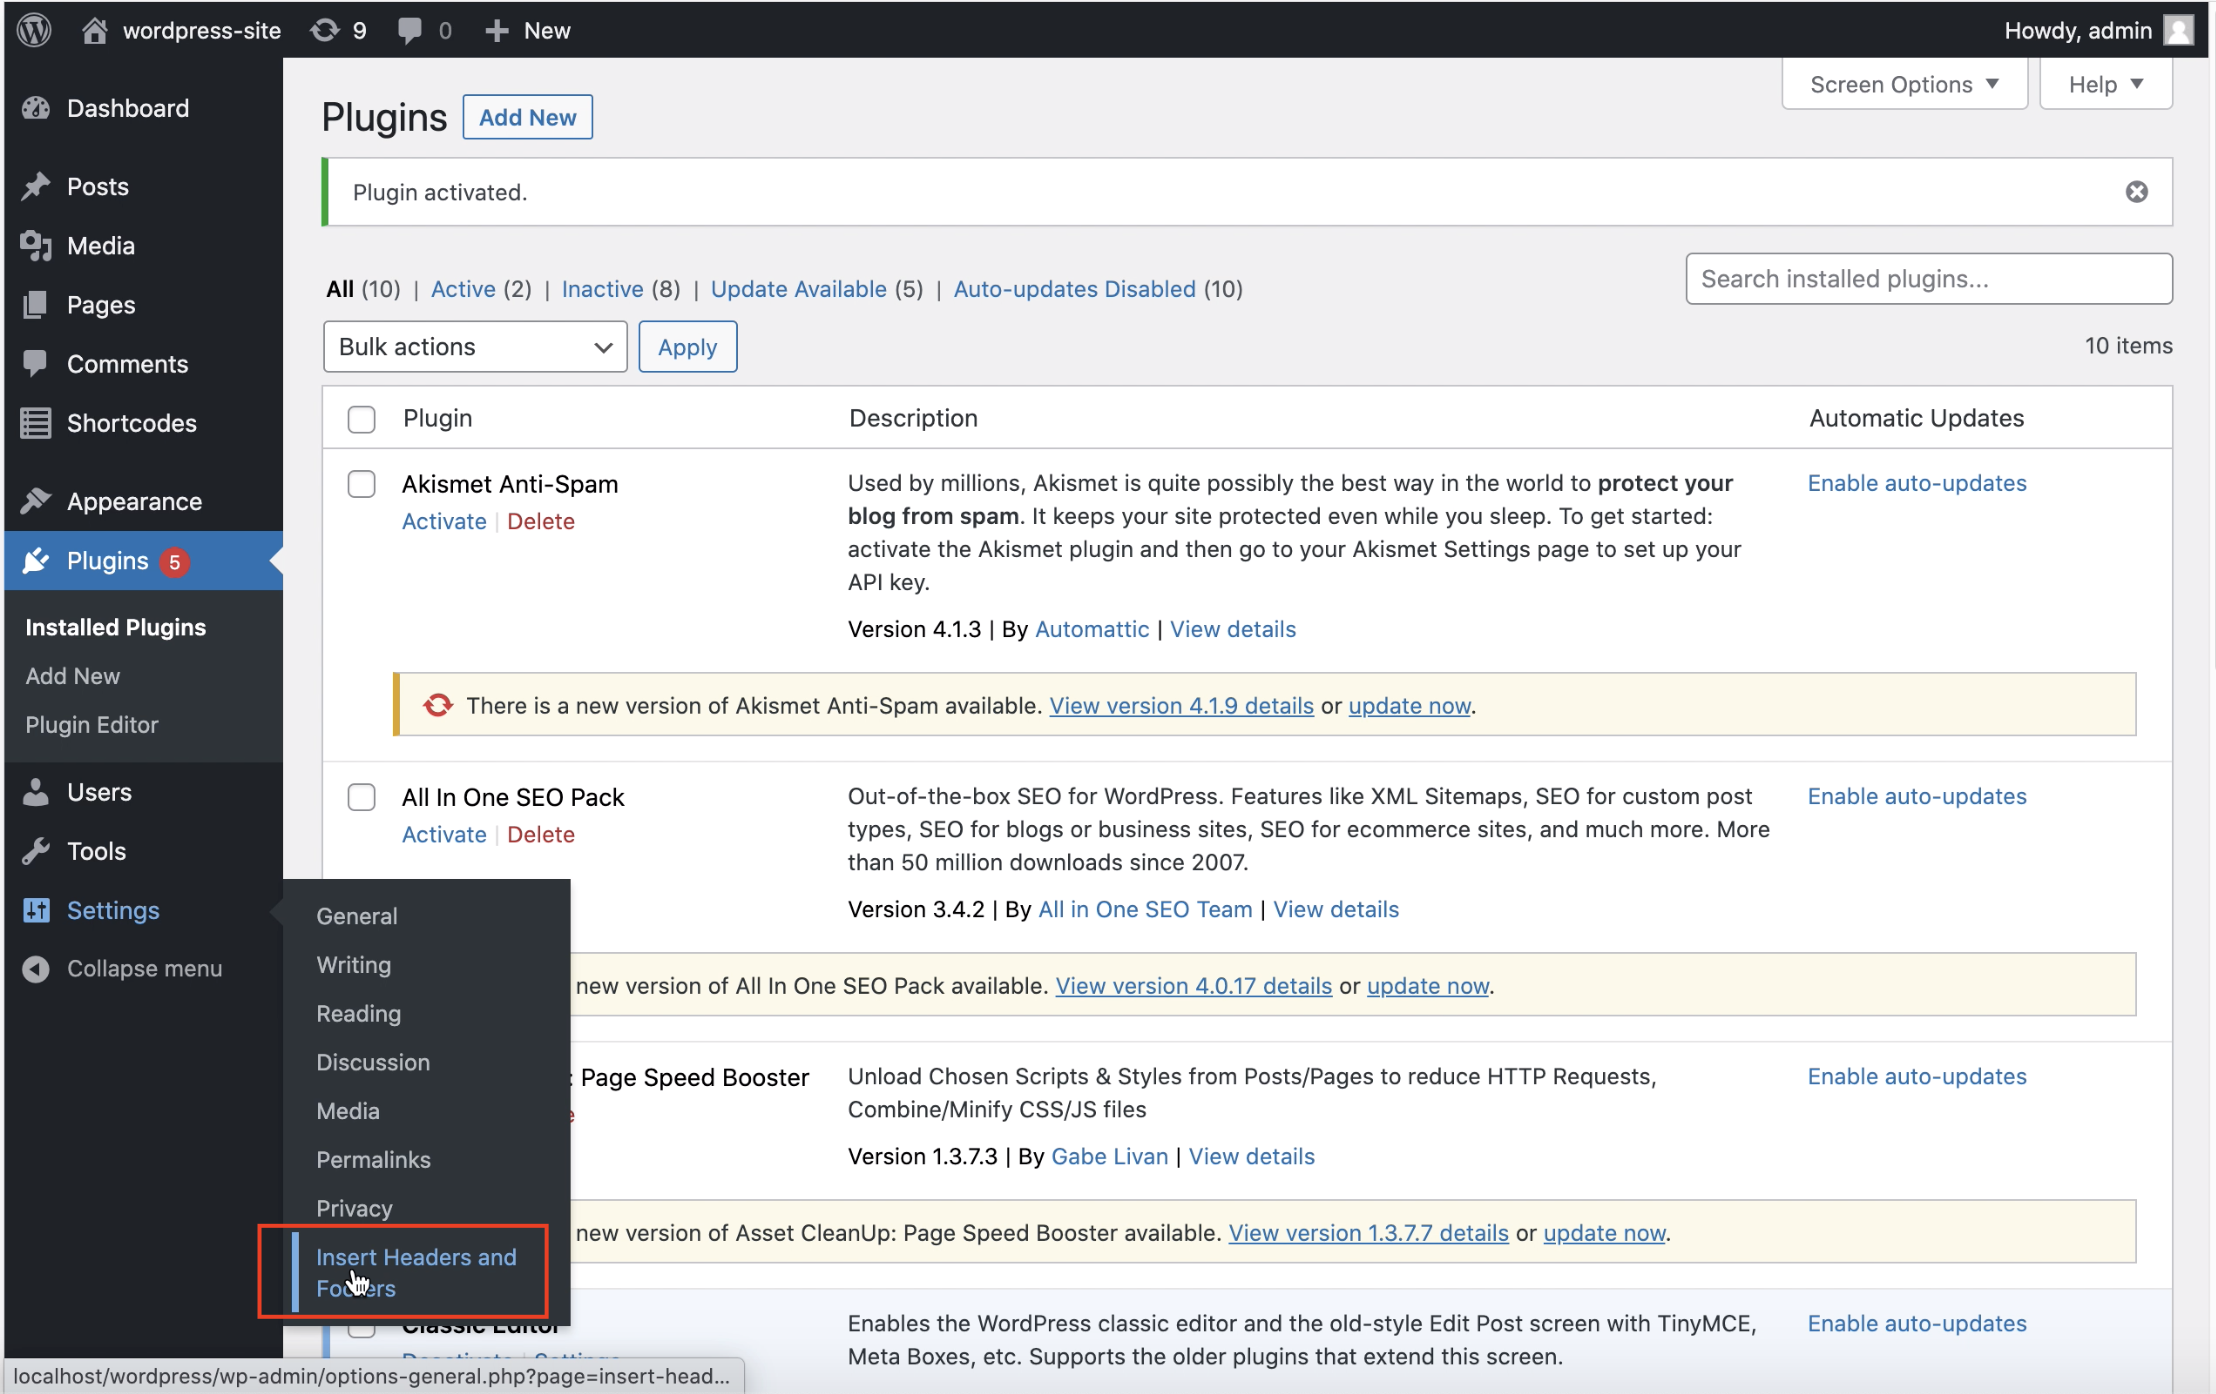
Step 6
Now copy the widget code from the “Setup” section of your livechat account.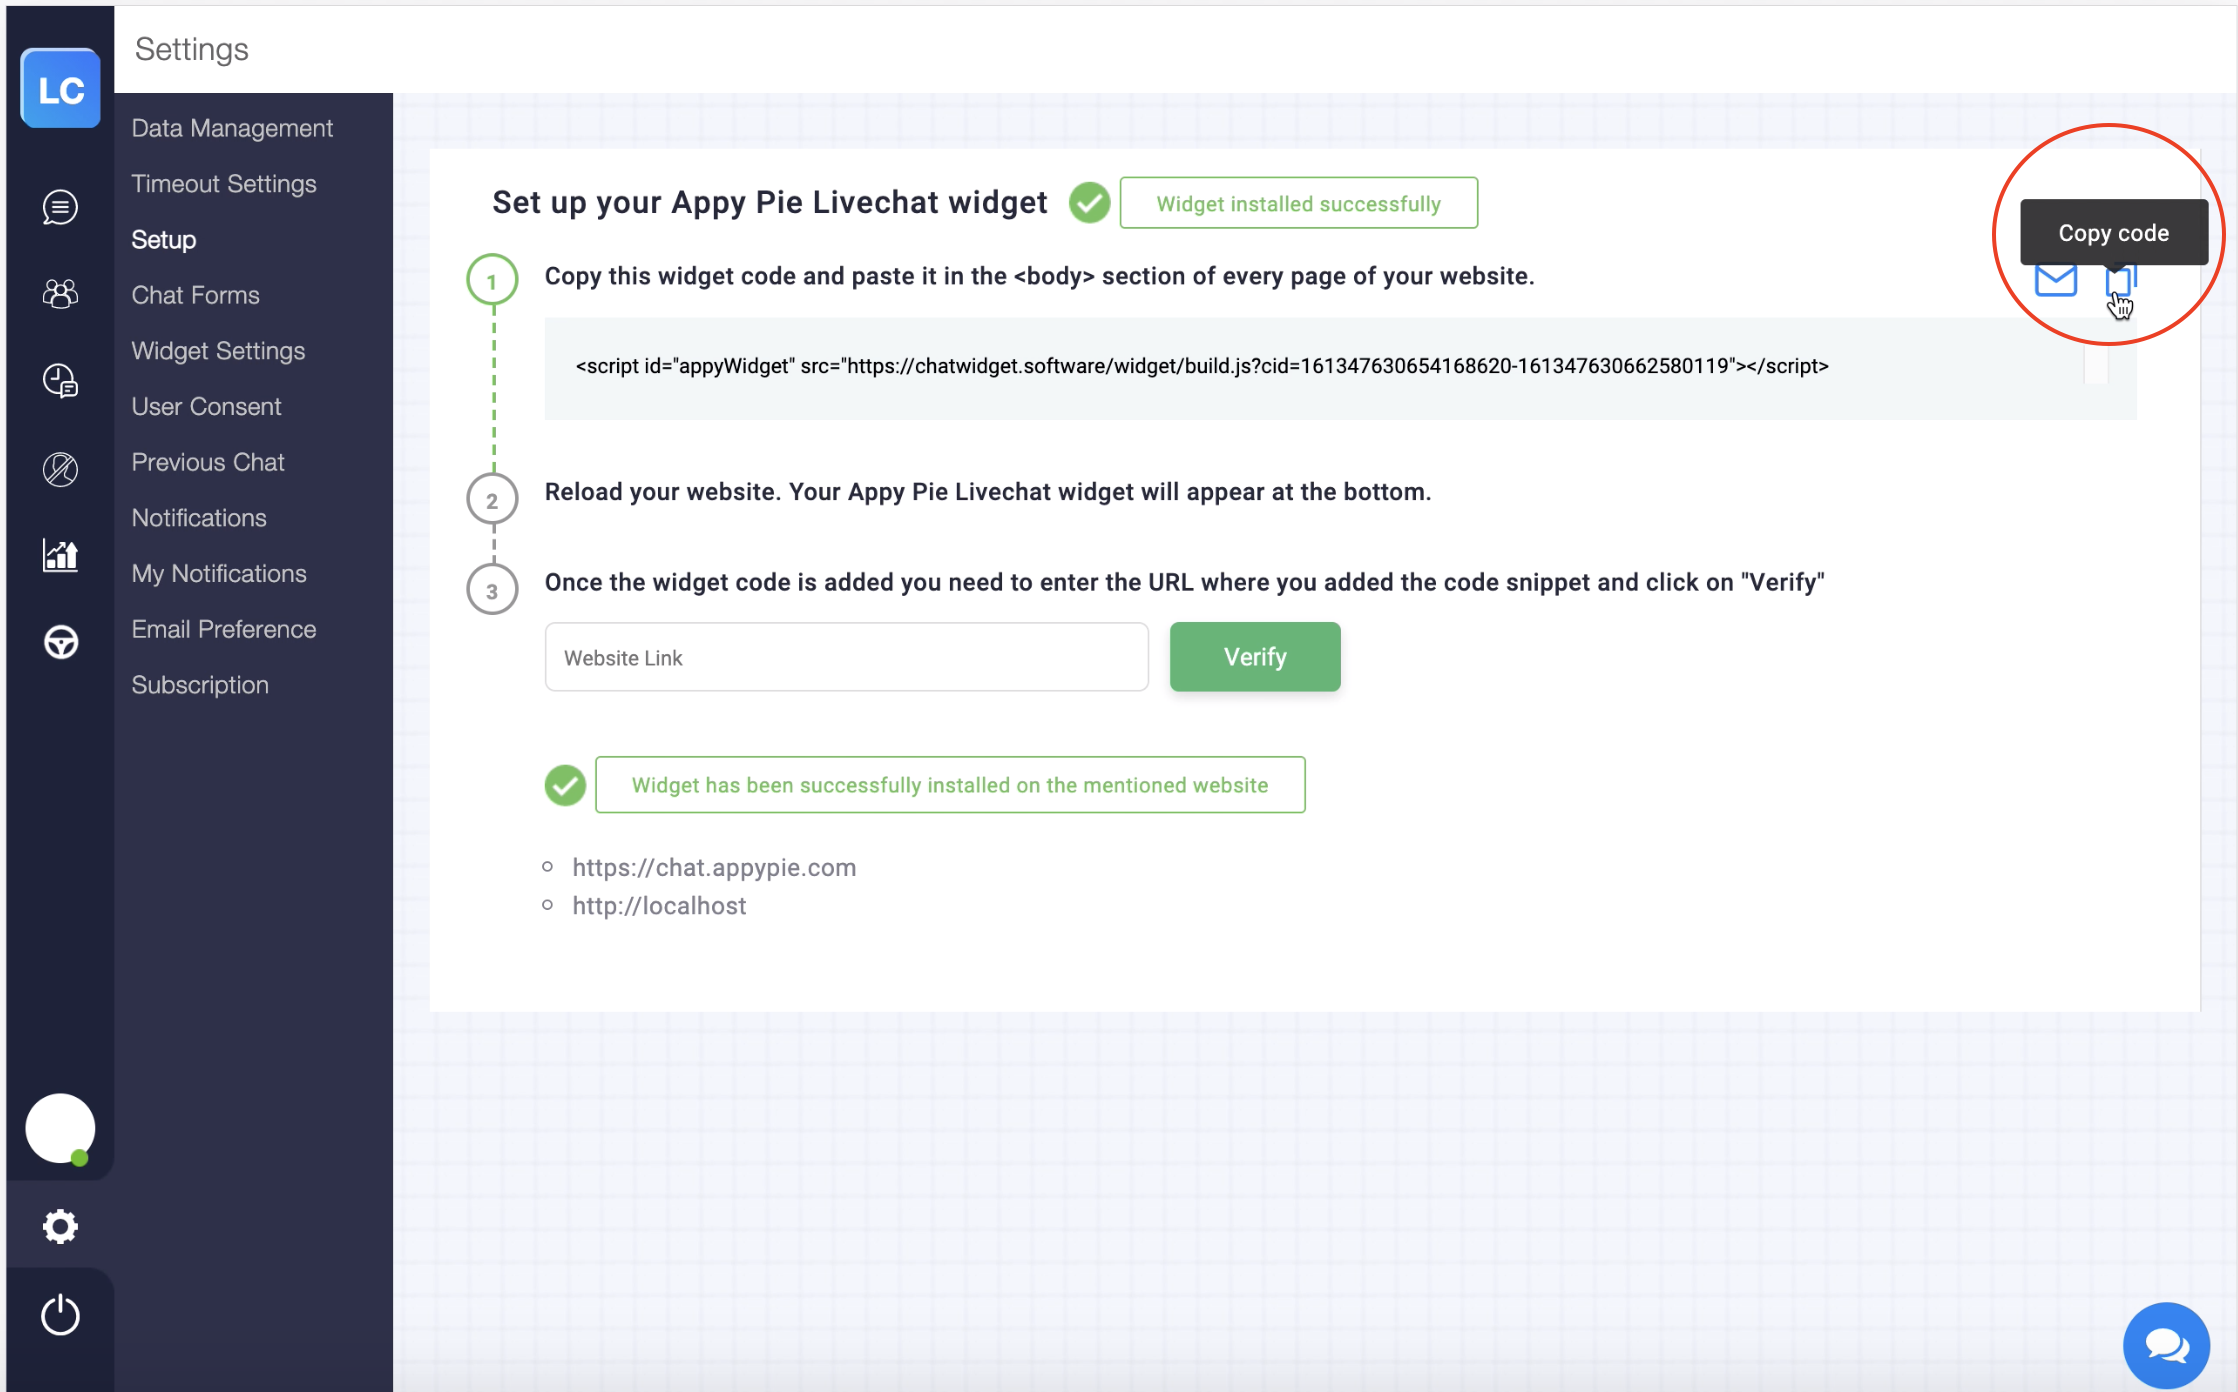
Step 7
Now paste the copied widget code and paste it in the footer of “Insert headers and footers”. Once you’ve done it then click on the “Save” button to save the changes made.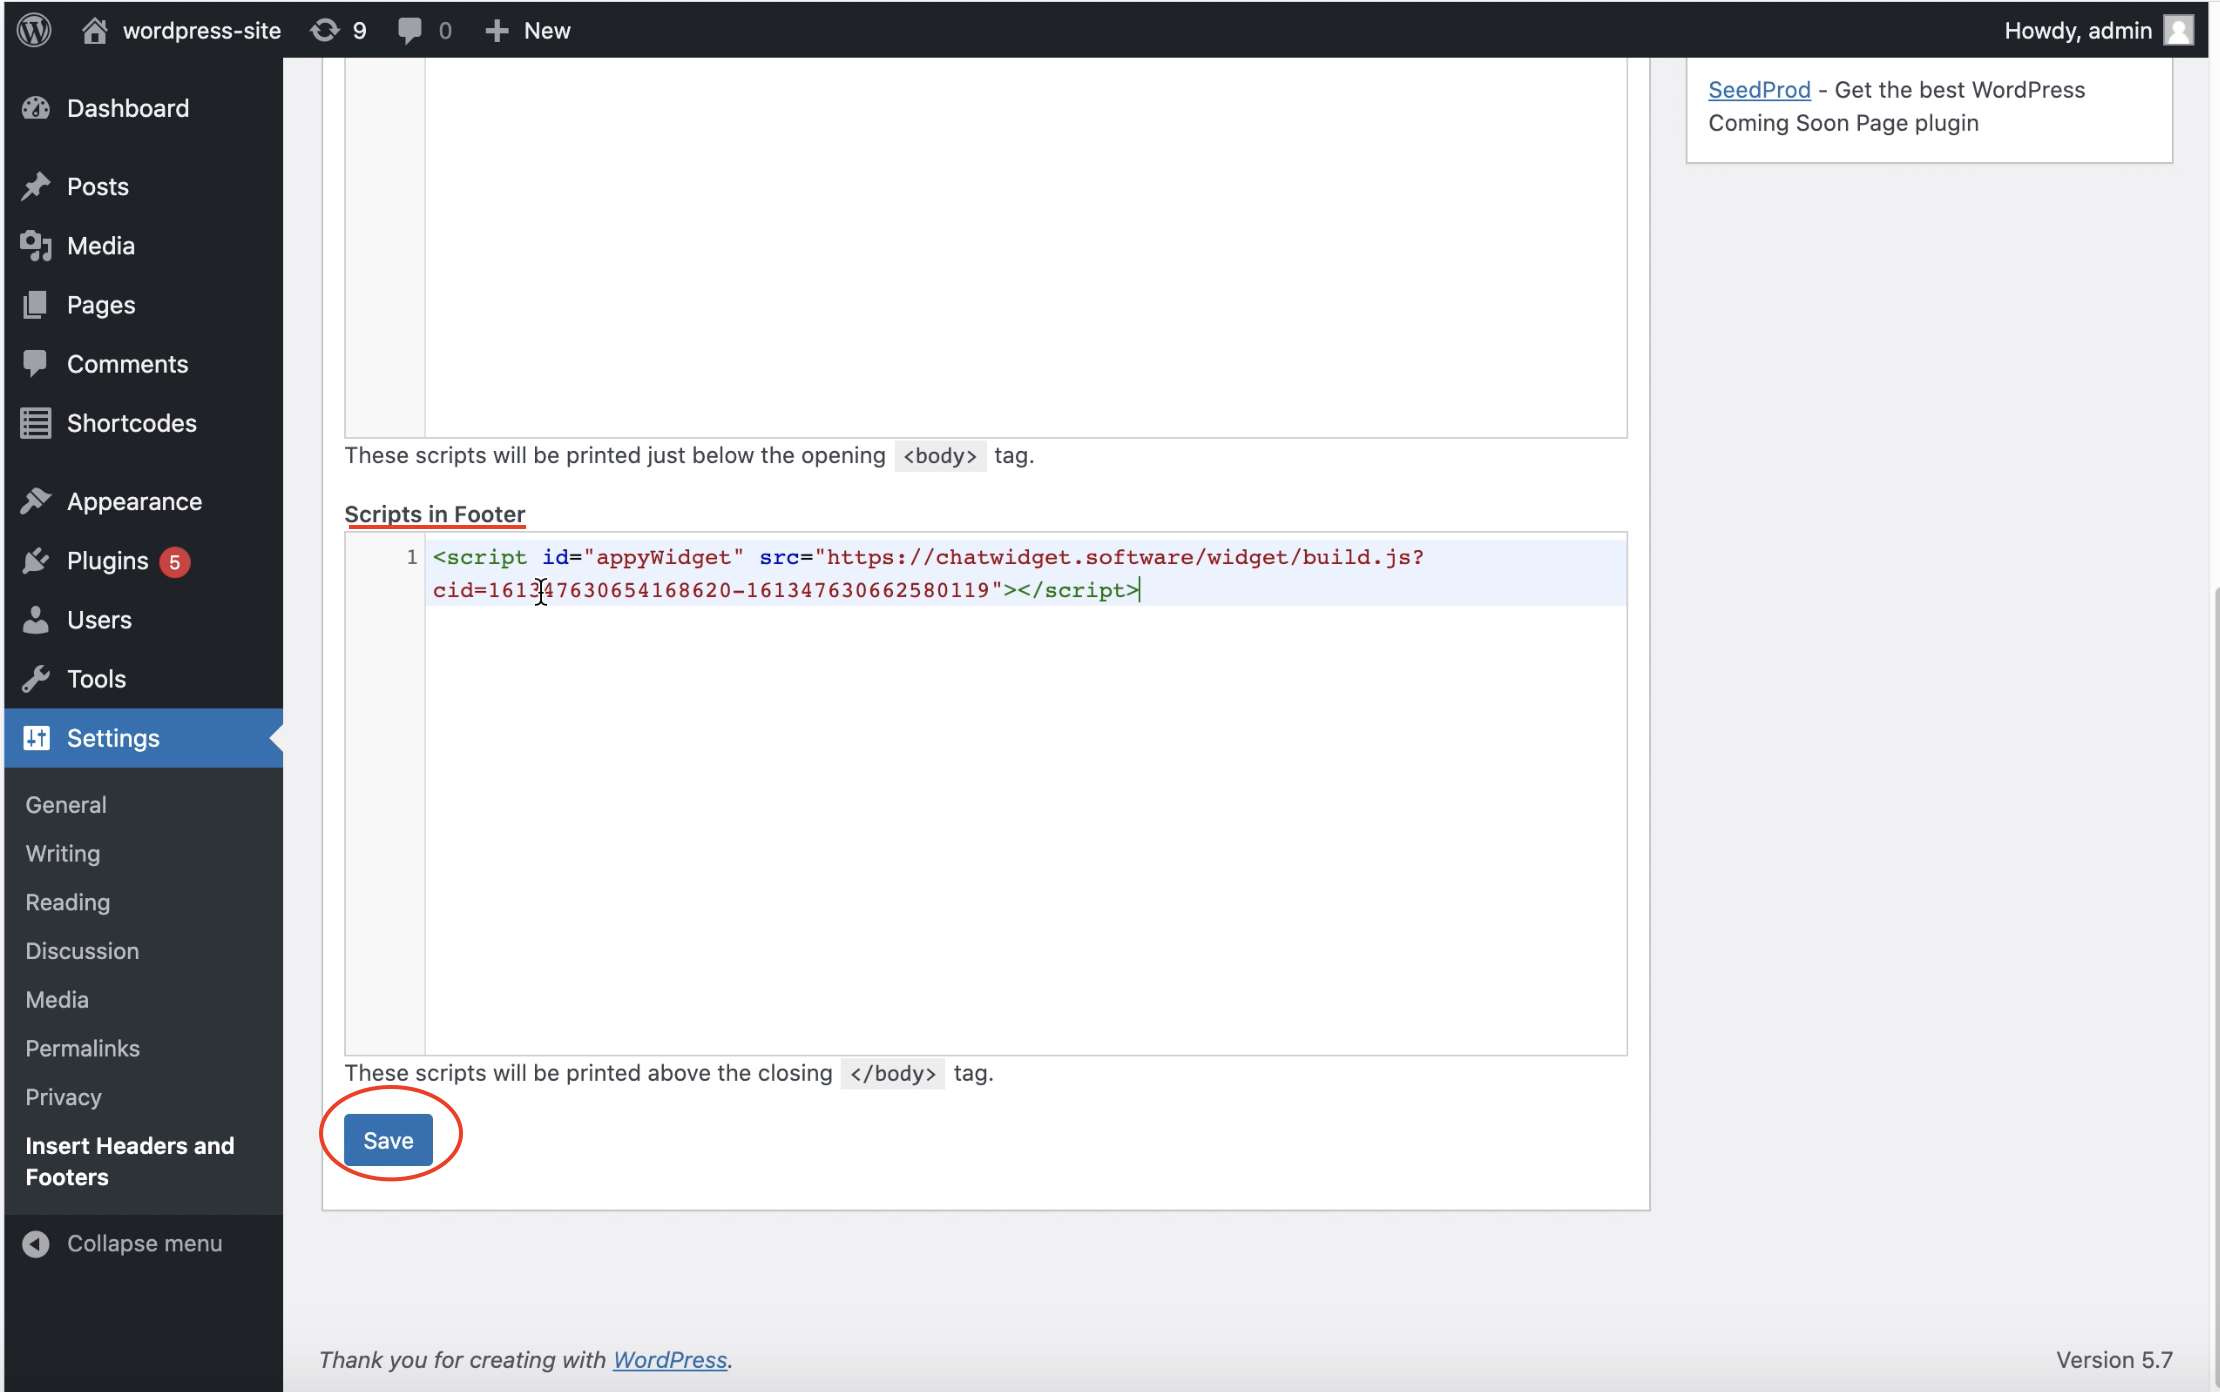
Step 8
Now refresh your website and you’ll notice that your livechat’s widget has been successfully deployed in your wordpress website.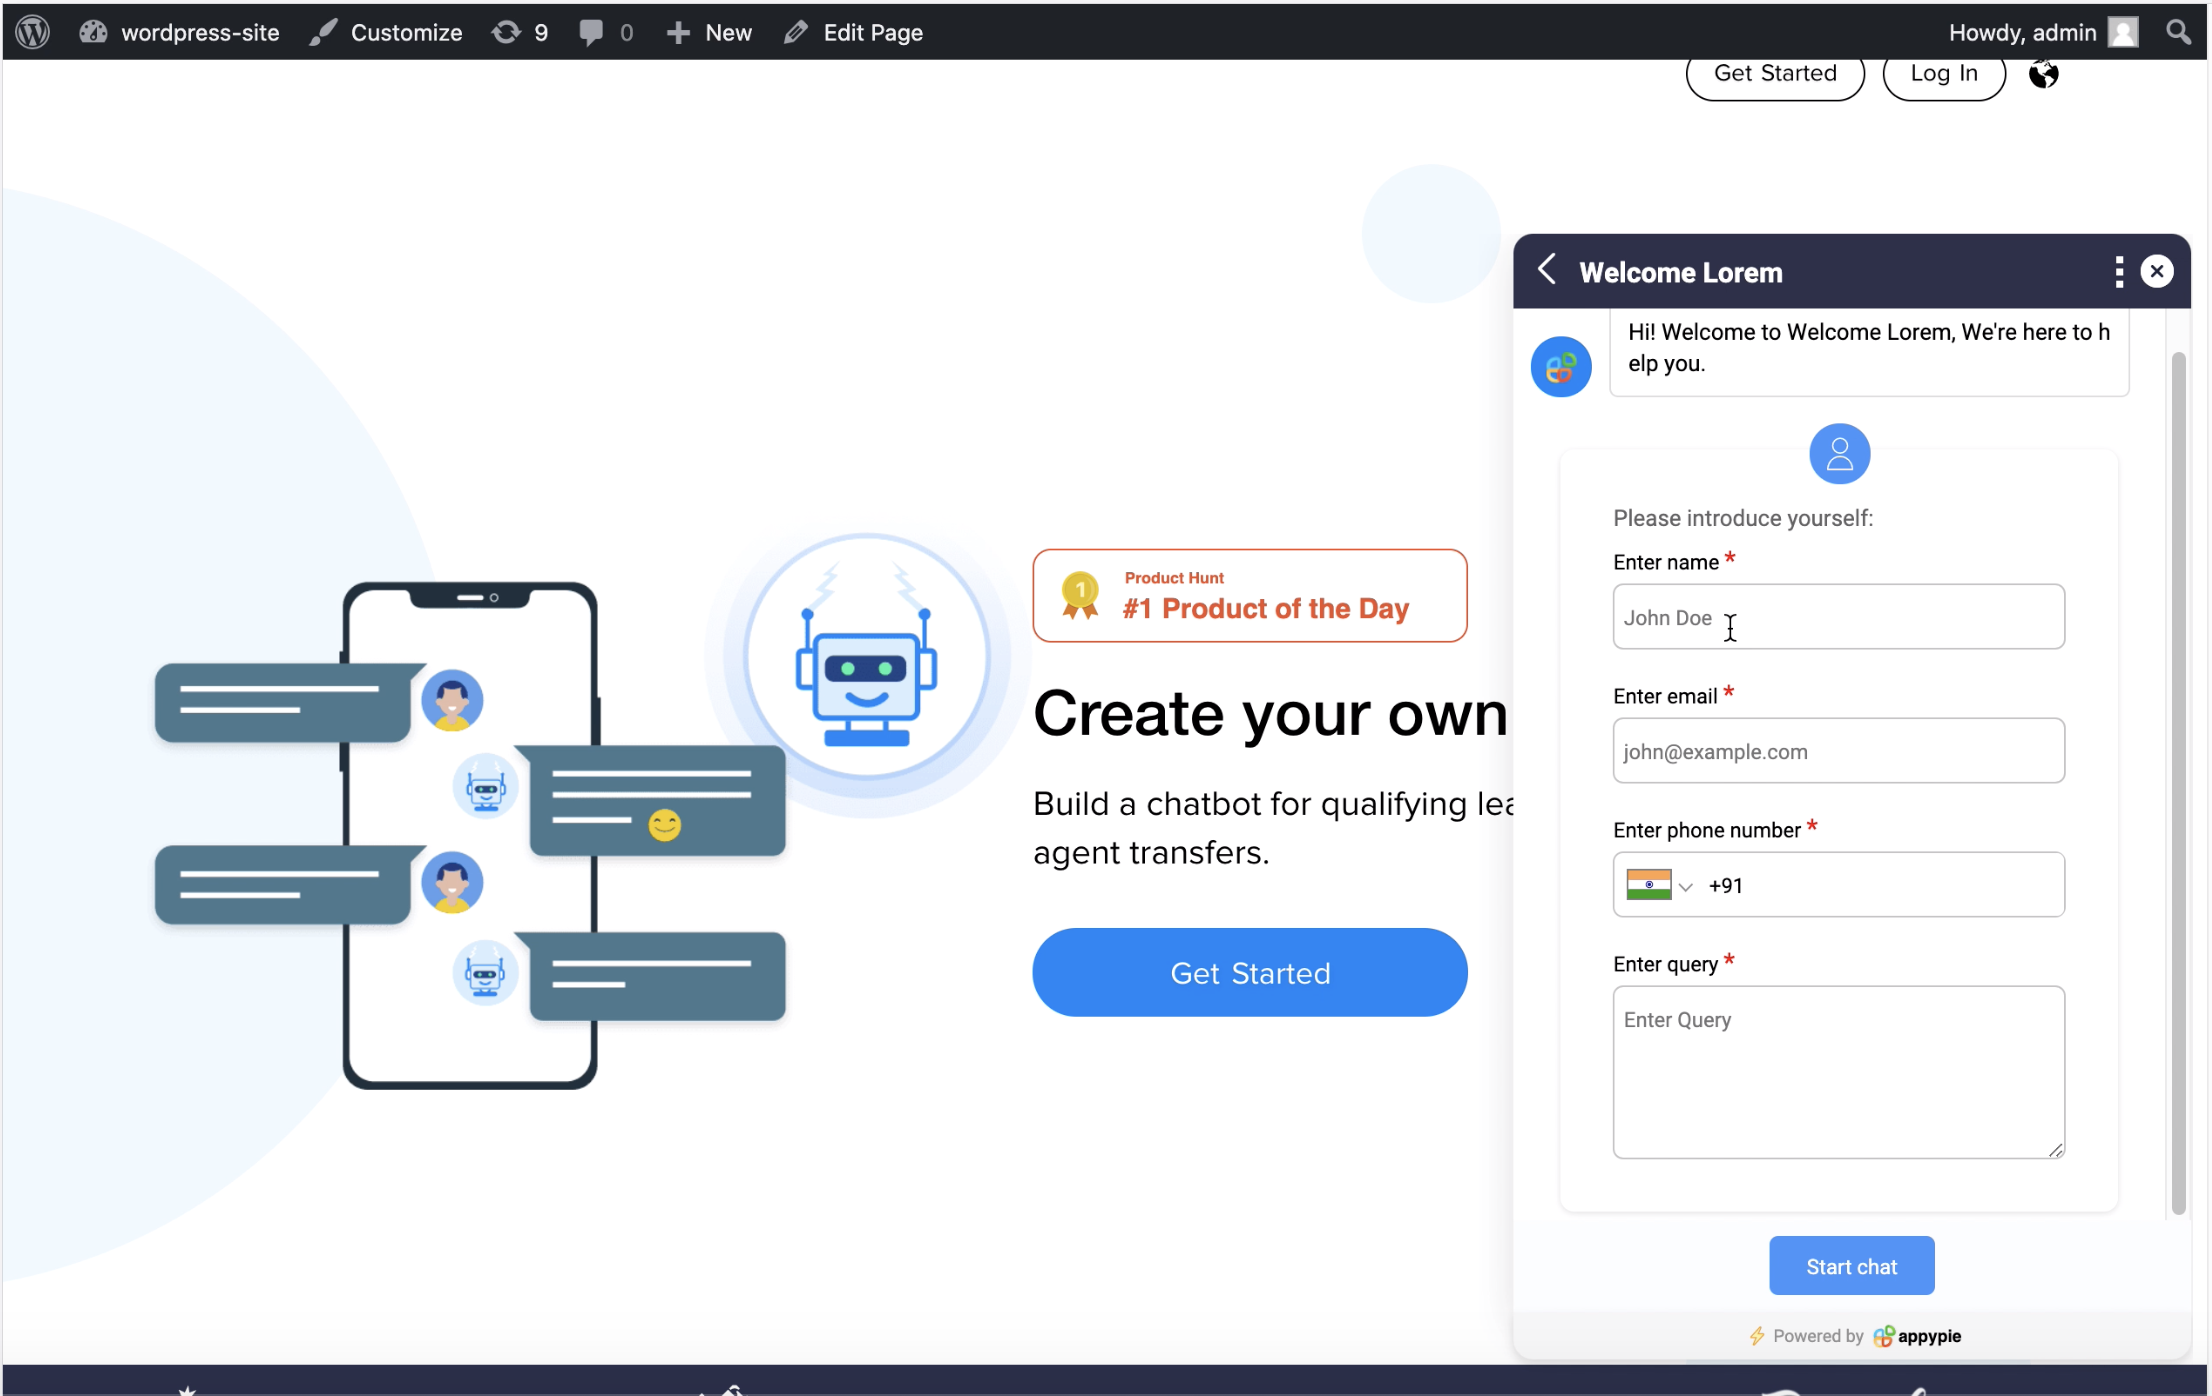
Follow our video tutorial below to know the deploy Appy Pie Livechat's widget in wordpress: