How to customize the design of your bot's widget?
Chatbots are used to simplify the interaction between humans and computers. Businesses create chatbots to remain available for their customers all the time and serve them better. Let’s face the truth, every other customer you have gained is likely to leave you if the service that you offer sucks.
To create a perfect chatbot you not only need the excellent features but also an attractive design. Let us check out how you can customize your bot’s widget as per your preferences.
Step 1
Login to your chatbot account, go to Dashboard and select the bot widget you want to customize.
Step 2
Select “Design Customization” tab in “Editor” section.
Step 3
“Design Customization” section comes with two options - “Basic settings” and “Advance settings”.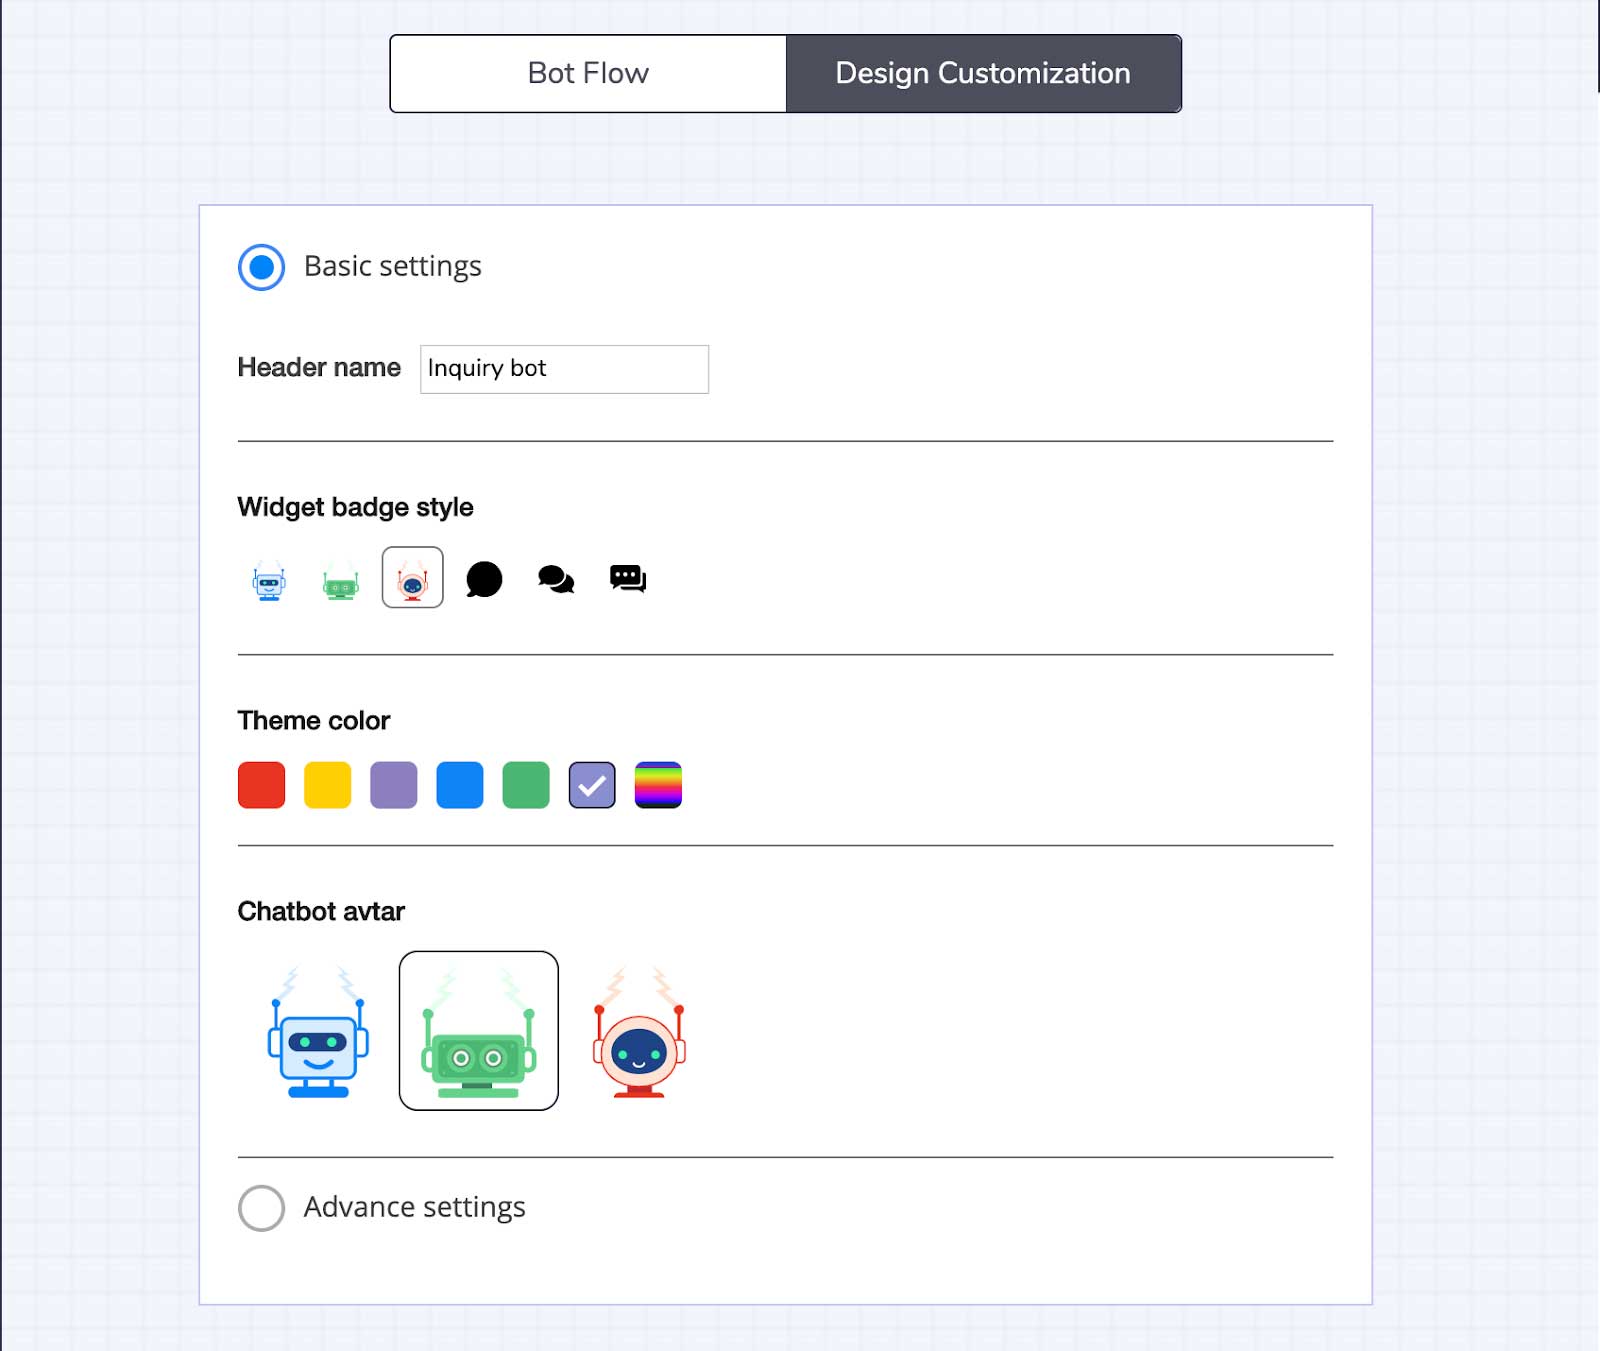
Step 4
In “Basic settings”, you can change the following :
- Heading name: This field will show the bot’s type on the widget header by default. However, it allows you to change the name that you like.
![]()
![]()
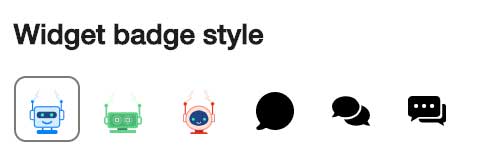
- Widget badge style: You can choose the widget icon from any of the six options available and check how it looks like in the preview panel. This icon appears when the widget gets loaded.


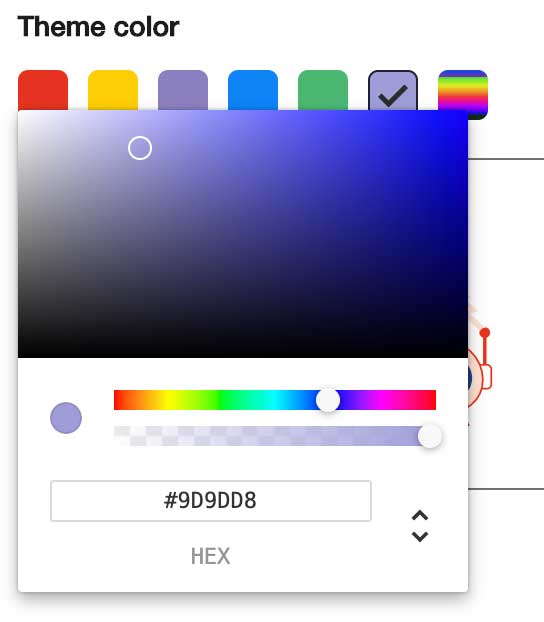
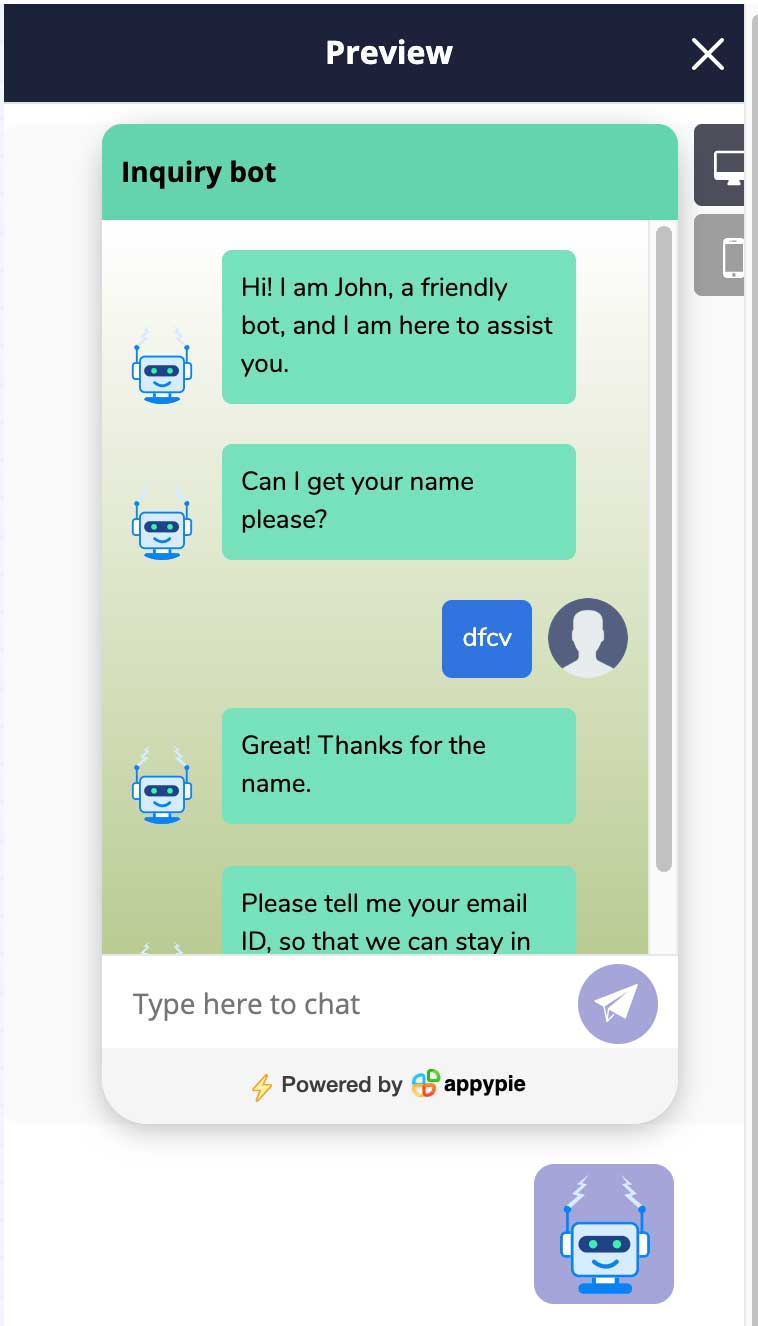
- Theme color: Here, you can choose any of the preset colors or a color from the color picker. This color will reflect on the entire widget.
![]()
![]()
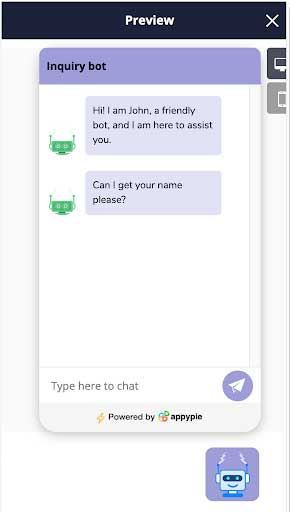
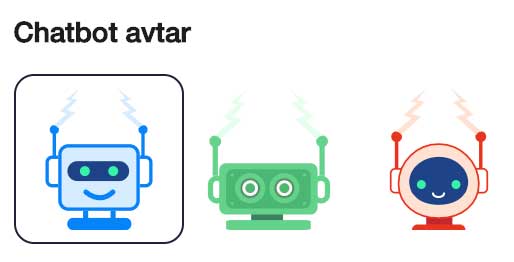
- Chatbot avatar: This section helps you select any image that you wish to show alongside each bot message.
![]()
![]()

Step 5
In “Advance settings” tab, you get these additional options:
- Header background and text color: Here, you can customize the background and text color of the widget’s header.
![]()
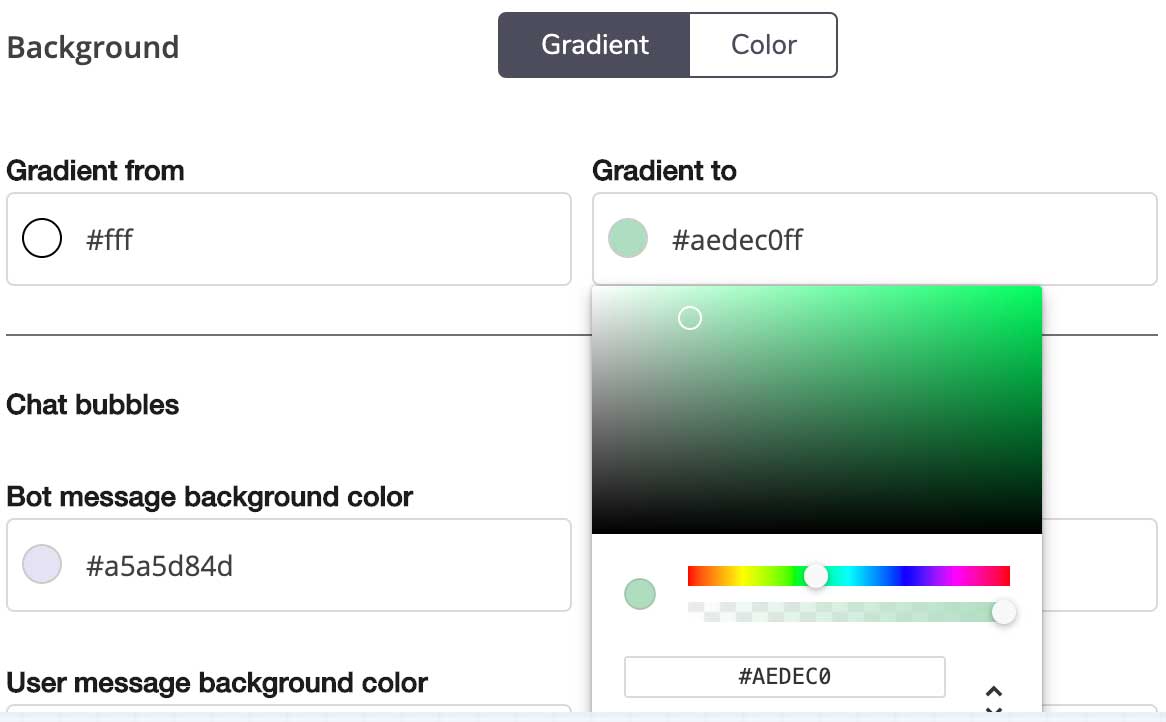
- Background: With this option, you can choose whether you wish to have a gradient or color in widget’s background.If you want to change the background color, you can select your preferred color in the “Color” tab.
![]()


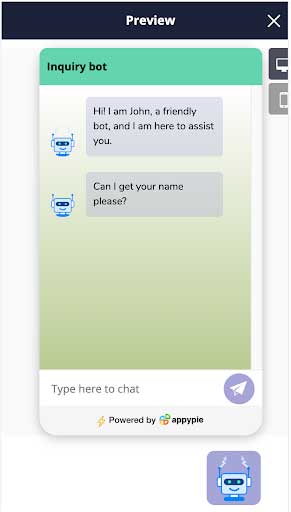
The applied color will be visible in the preview panel.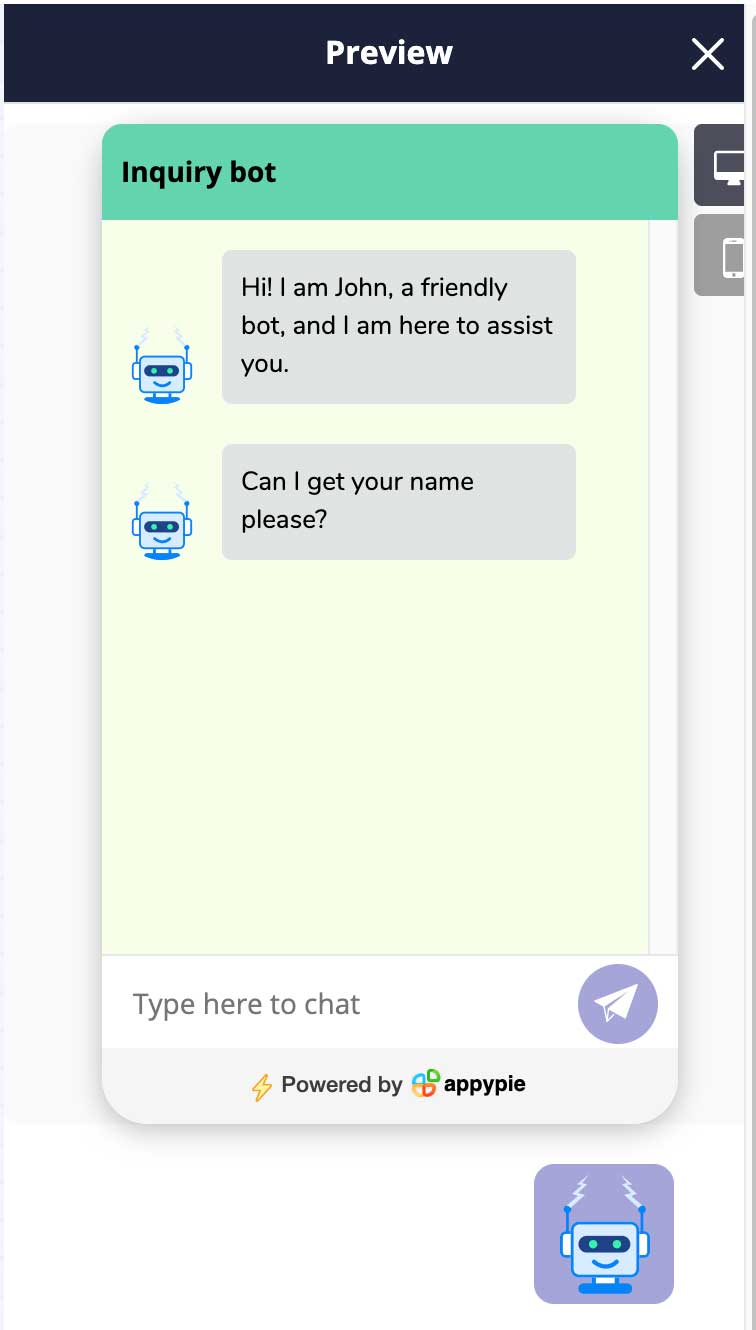
To add gradient to the widget, go to the “Gradient” tab and select the two preferred colors based on which gradient will be created.
- Chat bubbles: In this section you get an option to customize both bot’s and visitor’s message bubble’s color. You can also select the color for the text in the messages here.
![]()

The changes made will be reflected in the preview panel.
- Buttons: This section allows you to customize the color of the send button and other bot buttons that it provides as options.
![]()
- In “Advance settings” you can even upload your own icon for “Widget badge style”. All you need to do is click on the icon upload icon.
- Widget background color: With this option, you can change the color of the widget icon’s background.
![]()


The change will be visible in the preview panel.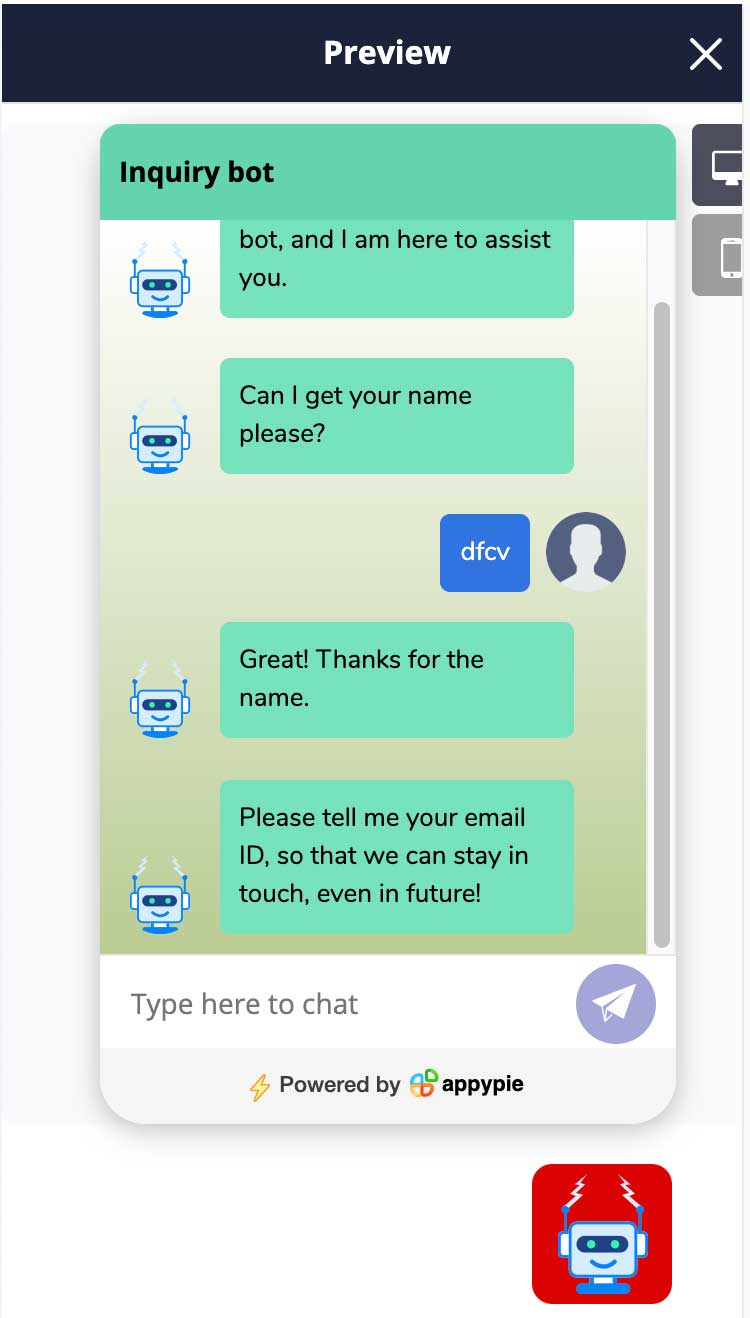
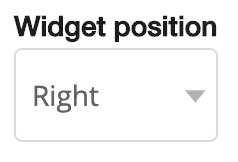
- Widget position: With this option, you can decide the position of the widget, whether to show the widget on the right or left side of the screen.
![]() Along with it, one can set its position using the “Side spacing” and “Bottom spacing” option.
Along with it, one can set its position using the “Side spacing” and “Bottom spacing” option.![]()
- In “Chatbot avatar”, you get the option to select or upload any image from your computer which you wish to show next to the bot’s message. All you need to do is click on the upload icon and add the image.
- Once you are done, click on “Save” button to save the changes
 Along with it, one can set its position using the “Side spacing” and “Bottom spacing” option.
Note: ‘Save’ button in red indicates that you have made some changes in the “Design customization” tab
Now that you know how you can customize your chatbot design, let us understand why it is important that your chatbots look appealing.
Chatbot is one of the most effective tools for businesses to keep their users engaged. Businesses create chatbots for their websites so that their users can get instant responses to their queries.
Whether you are running a large or a small business, you can program the chatbots as per your business requirements and add them to your website for interacting with users like a live person.
Appy Pie’s Chatbot Builder offers various effective features such as chat customization, design customization, transfer chats to the live agent, and many more. Using Appy Pie’s no-code Chatbot Builder you can create your own chatbot without any technical knowledge.