How to enable push notifications on Windows?
By Abhinav Girdhar | Updated on October 5, 2021, 10:46 am
Follow below mentioned step to enable push notifications on Windows:
Step 1: Go to Microsoft
Step 2: If you have a Microsoft account, login, else Signup
Step 3: On the dashboard, click on Products
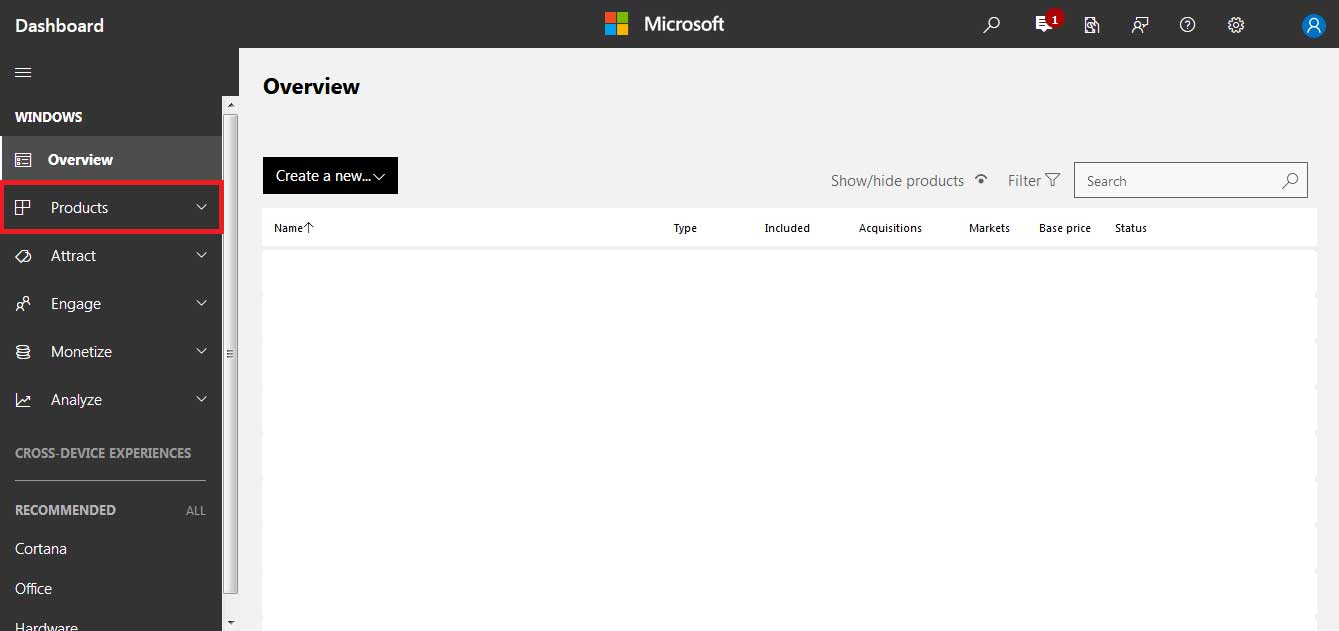
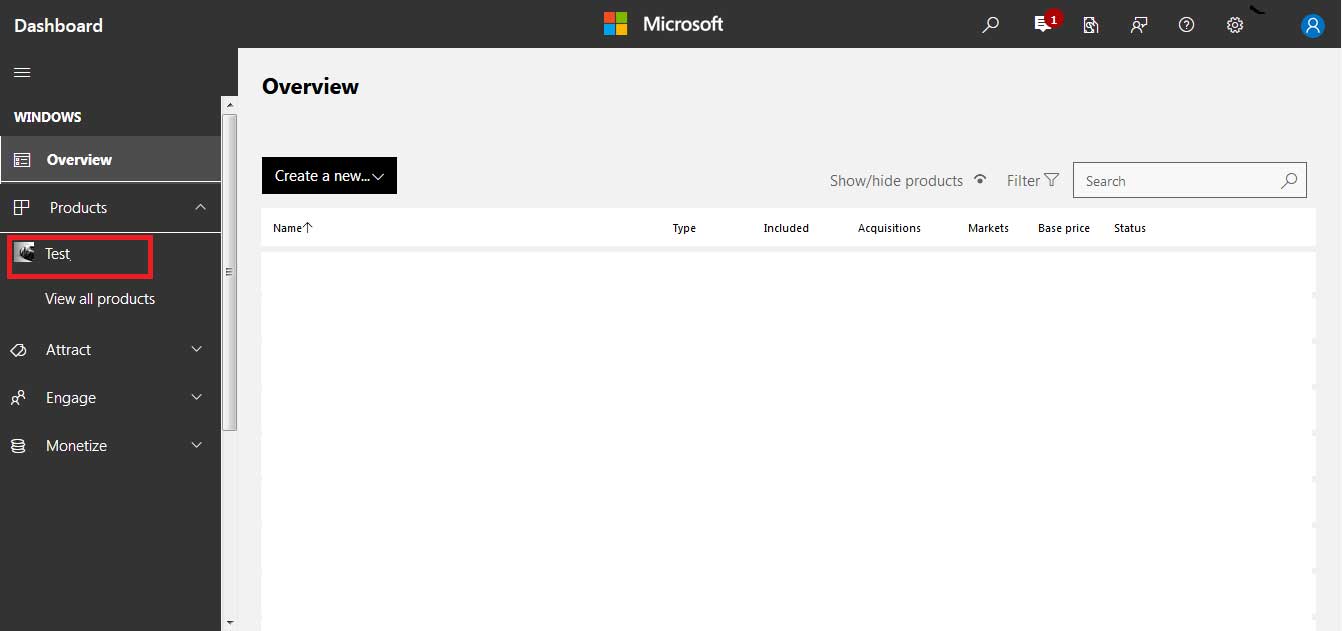
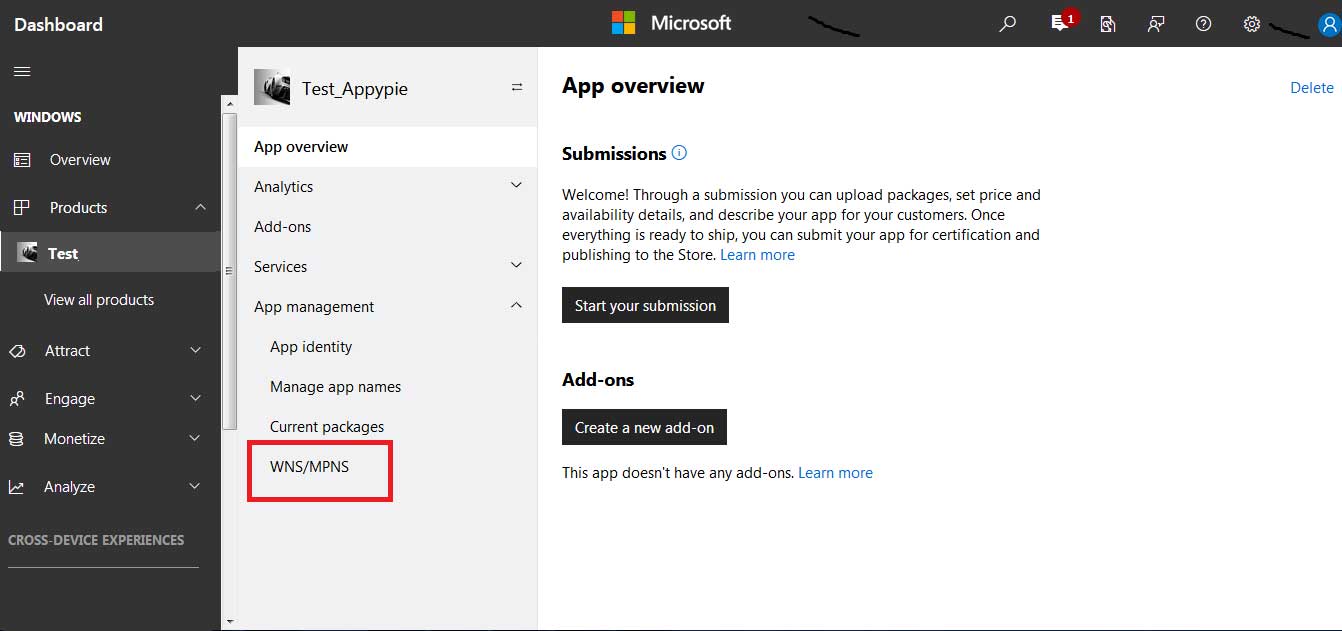
Step 4: You will see your app name. Click on it
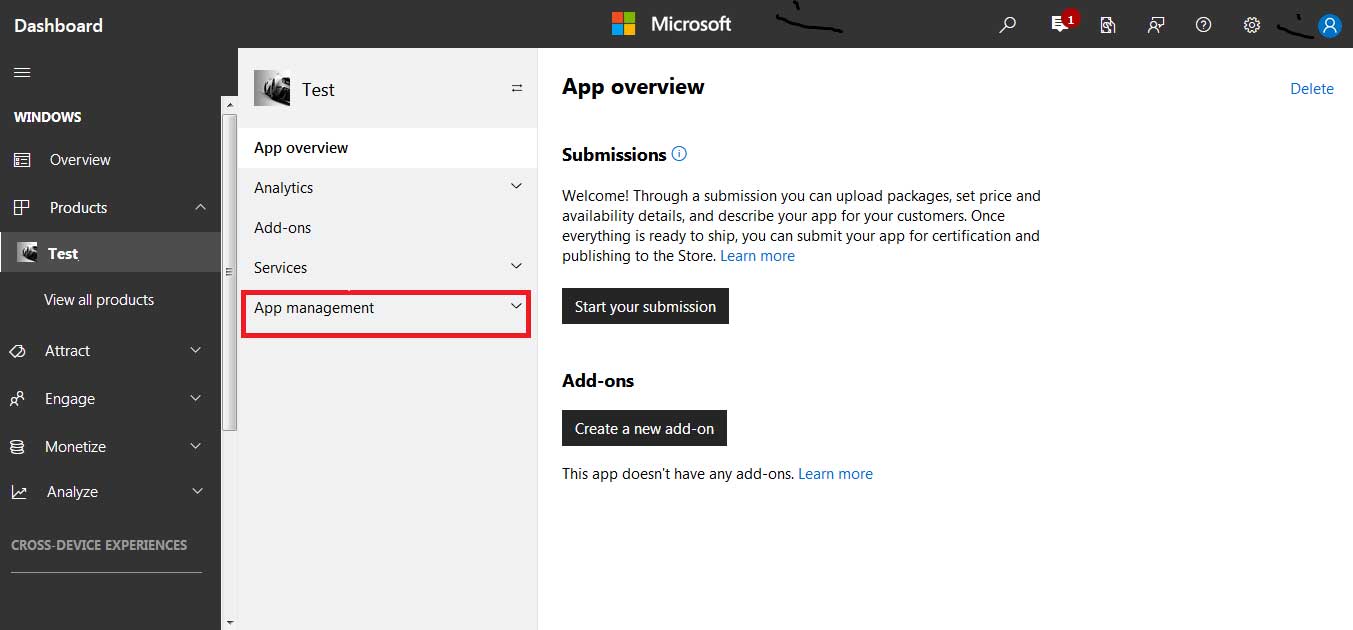
Step 5: In the App's dropdown menu, click on App Management
Step 6: Now click on WNS/MPNS
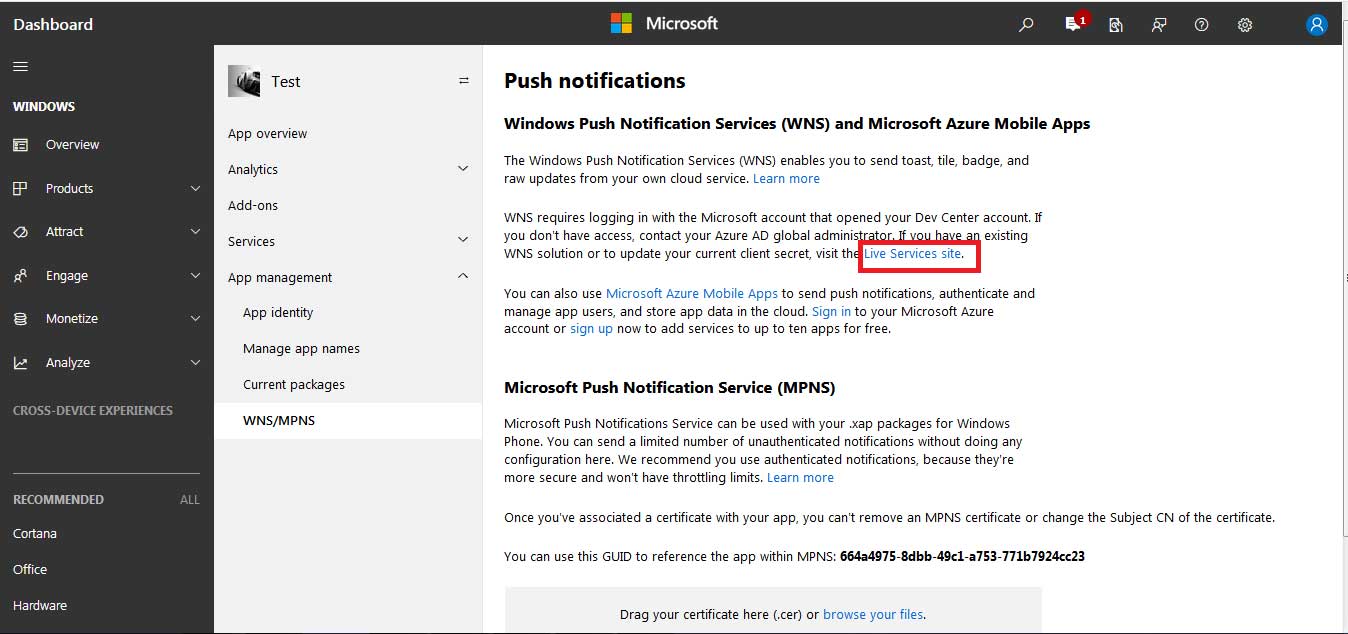
Step 7: Now click on Live Services Site
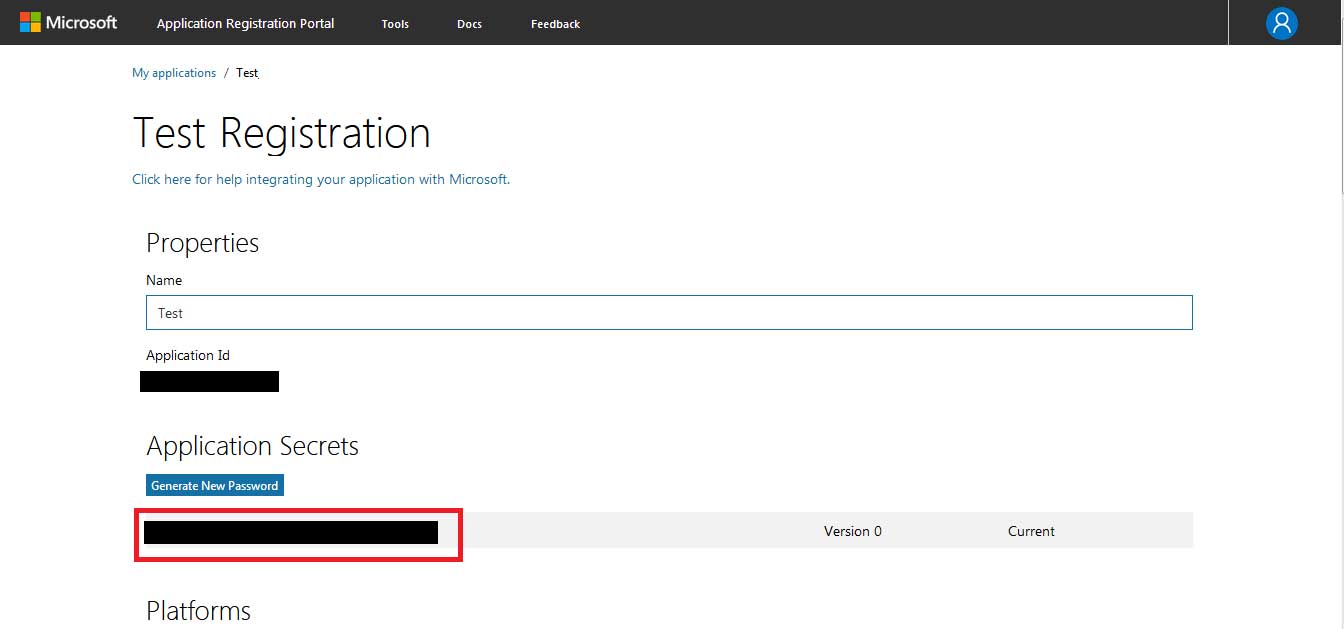
Step 8: This is your Application Registration Portal. Here, you will see your Application Secret key, copy it
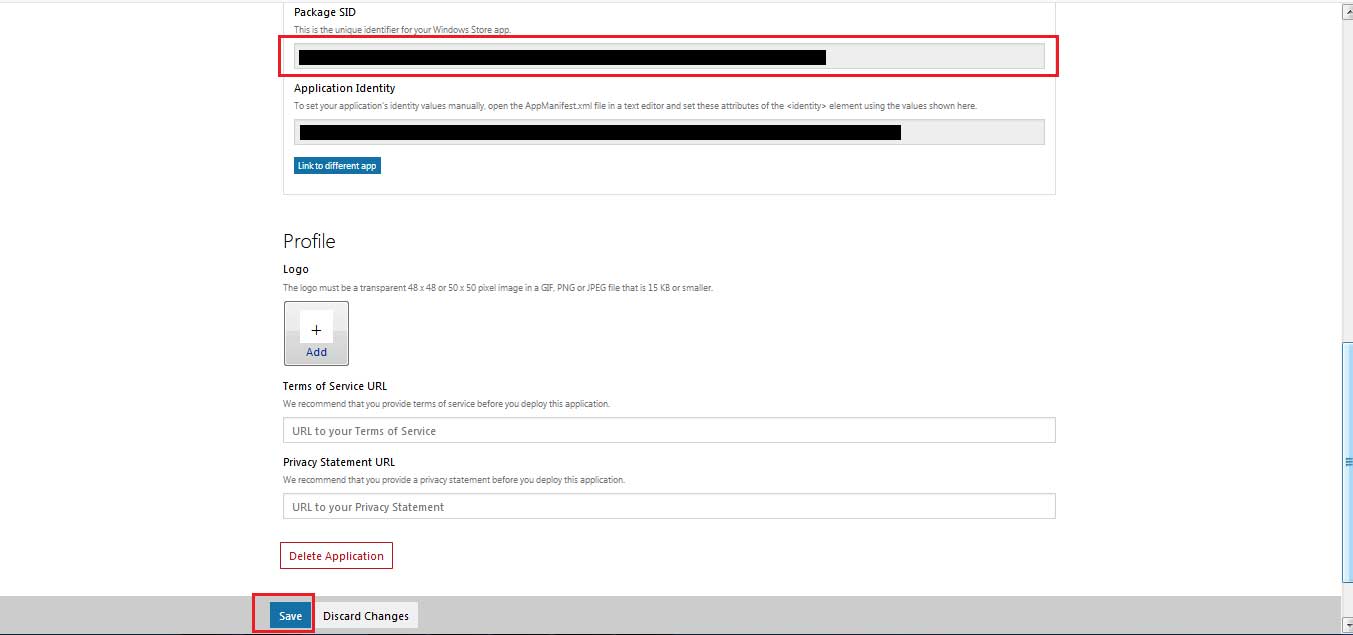
Step 9: Scroll down, you will see Package SID key of your Windows app, copy it, and click on Save
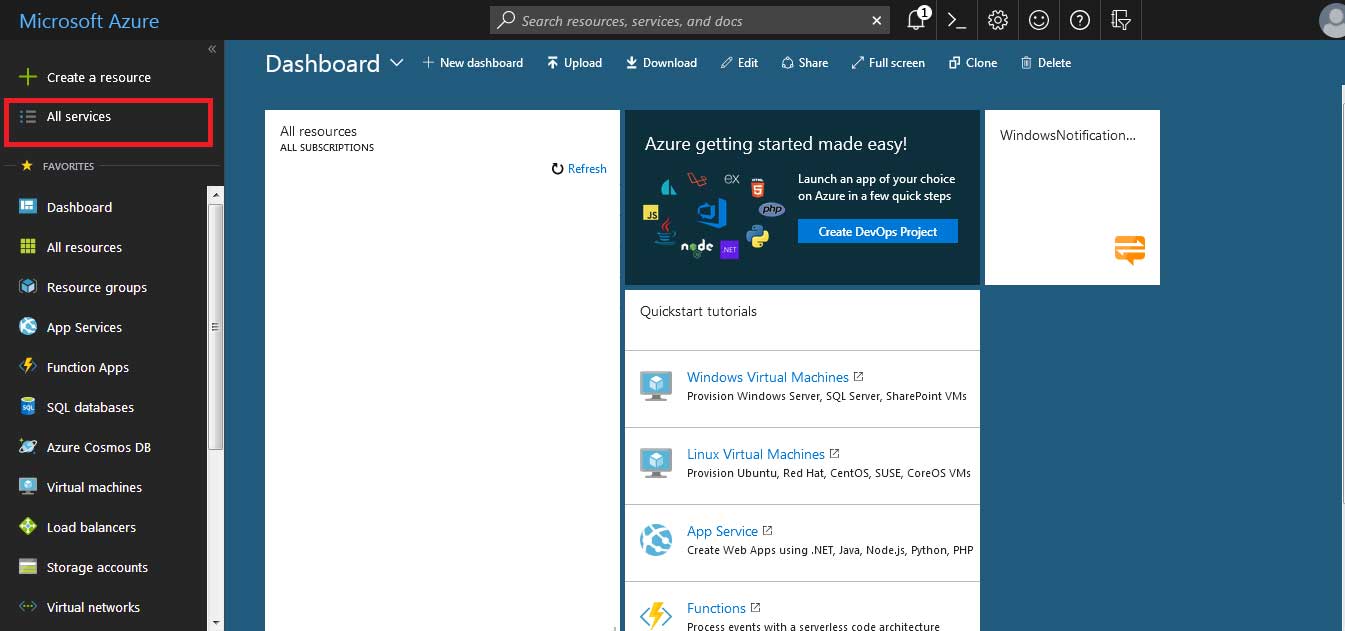
Step 10: Now, Go to Microsoft Azure
Step 11: On your Microsoft Azure dashboard, click on All Services
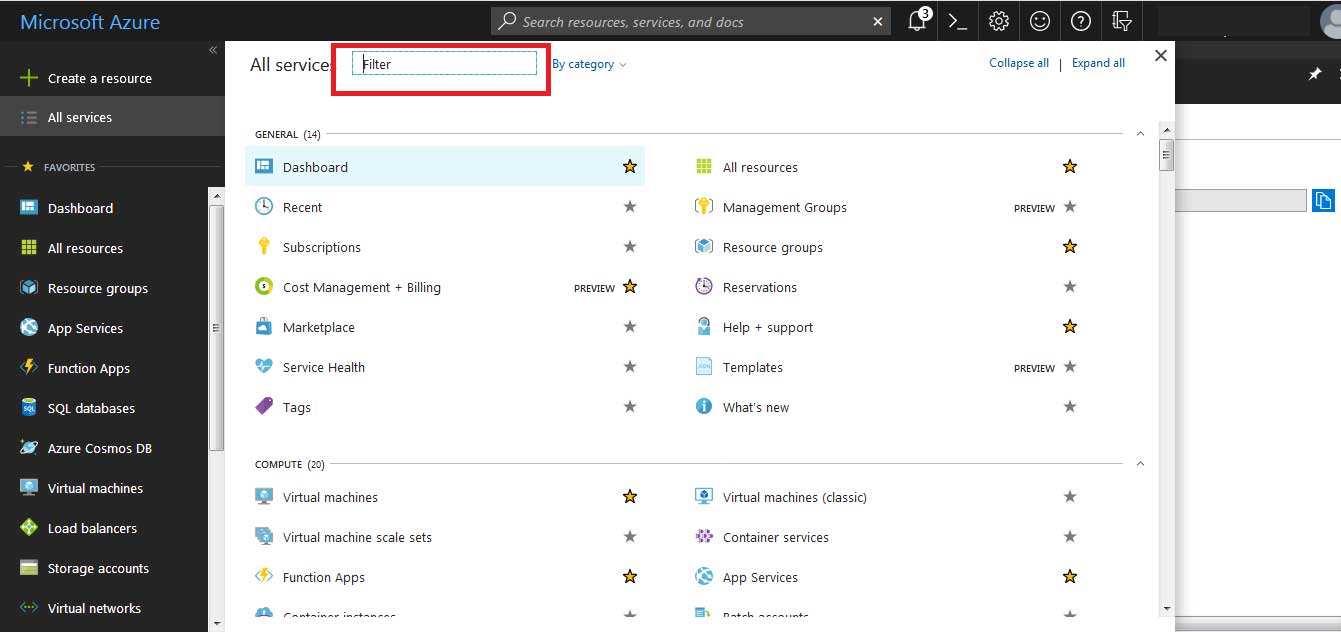
Step 12:Use Filter to search Notification Hubs service
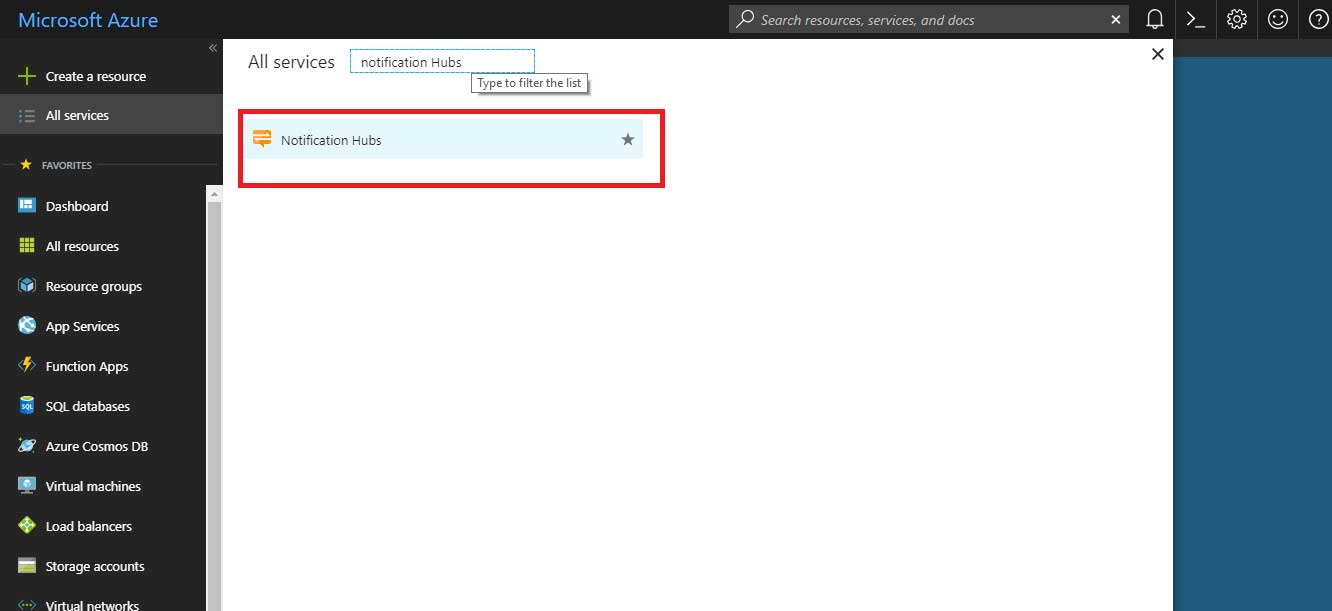
Step 13: Click on Notification Hubs
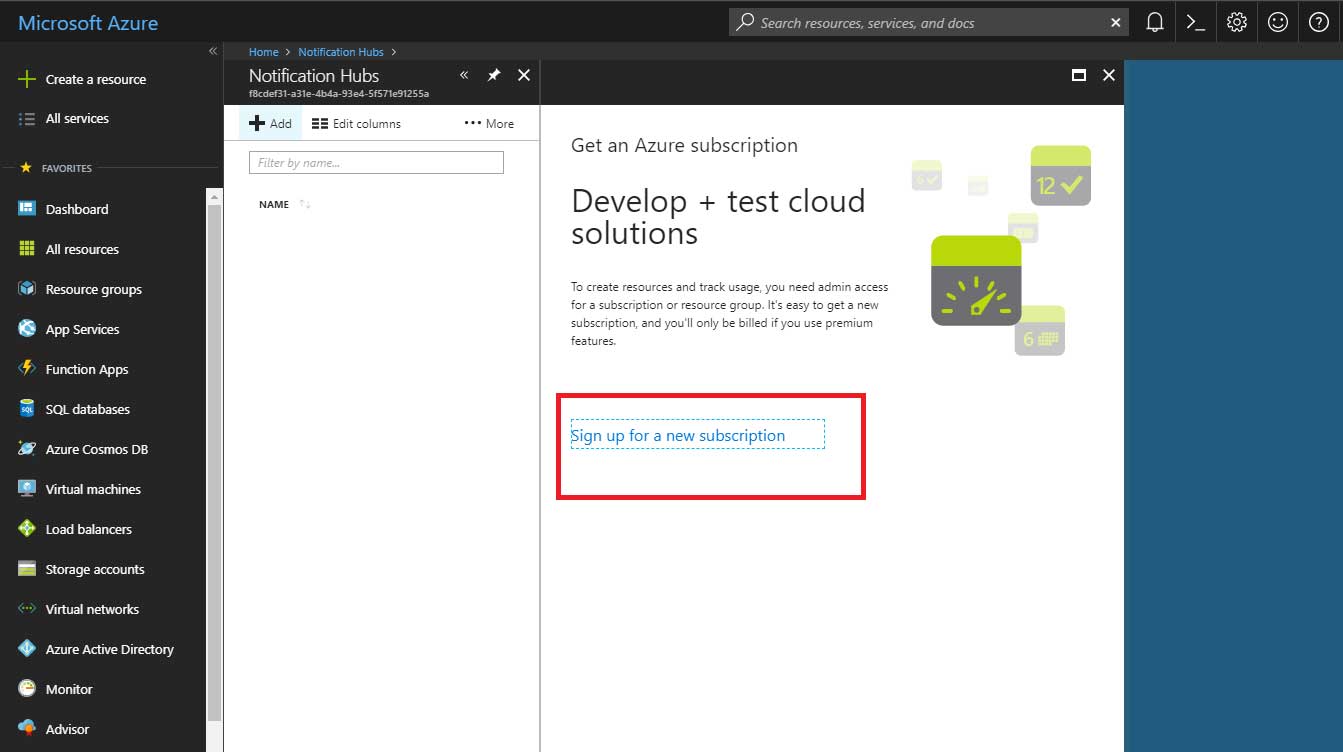
Step 14: Now click on Add

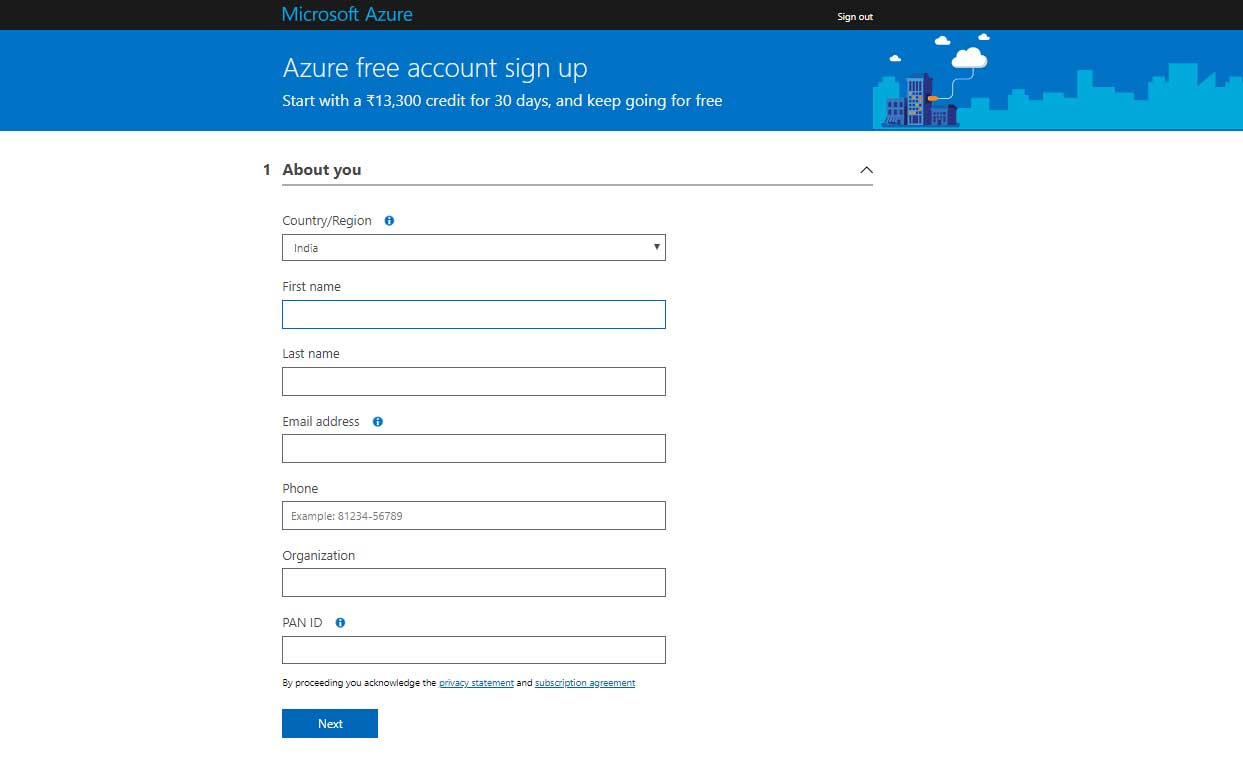
Step 15: If you don’t have Azure subscription, click on Sign up for New Subscription, else, continue the tutorial from step 17
Step 16: Here you need to create an account. Enter specific details and signup.
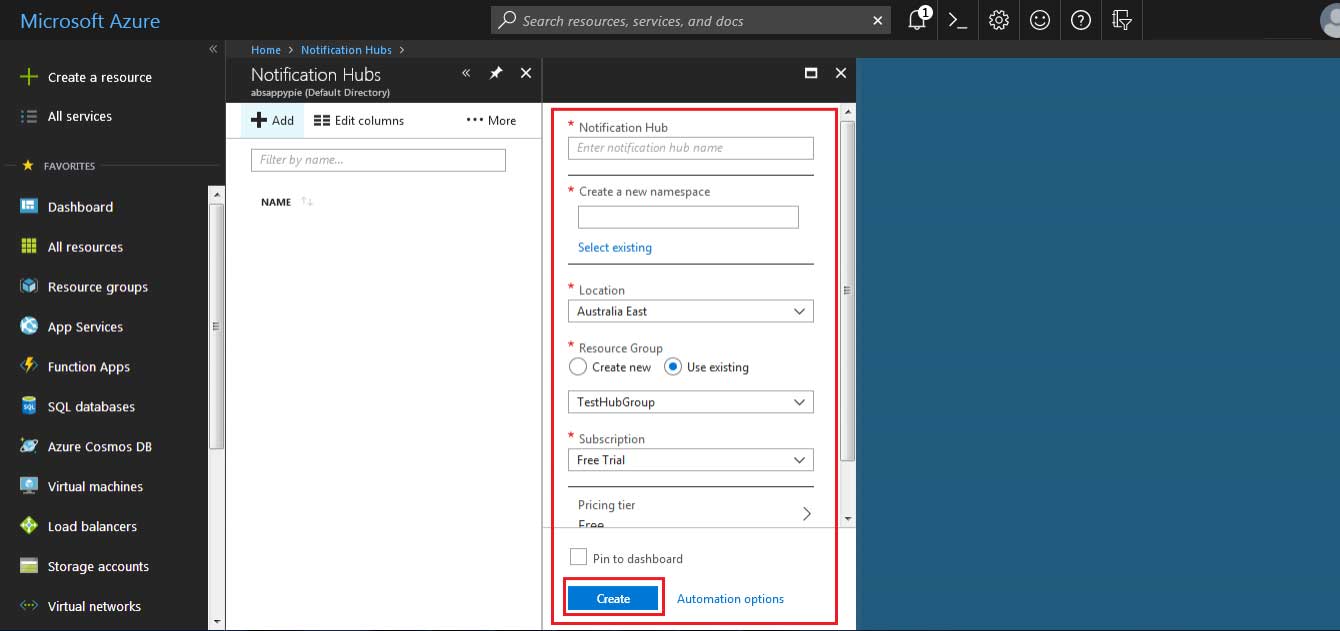
Step 17: Now you need to create Notification Hub. Enter specific details and click on Create
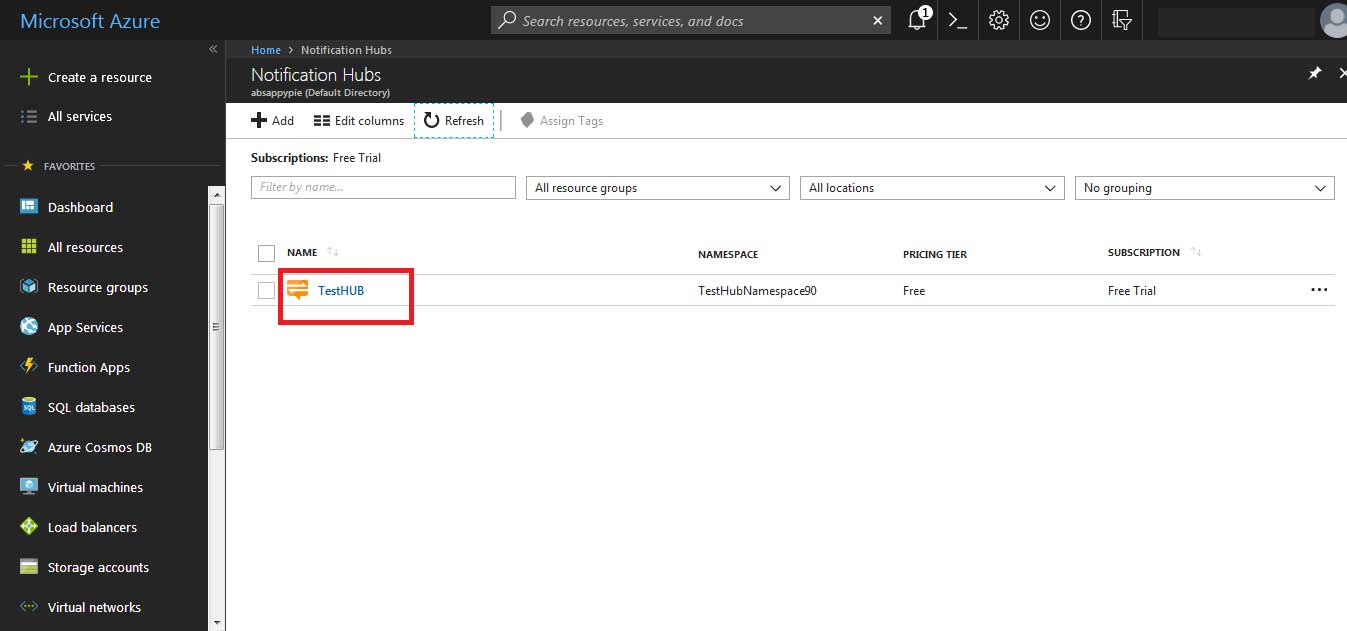
Step 18: On Notification Hubs dashboard, click on Refresh, and then click on your added Notification Hub, as shown in the below screenshot
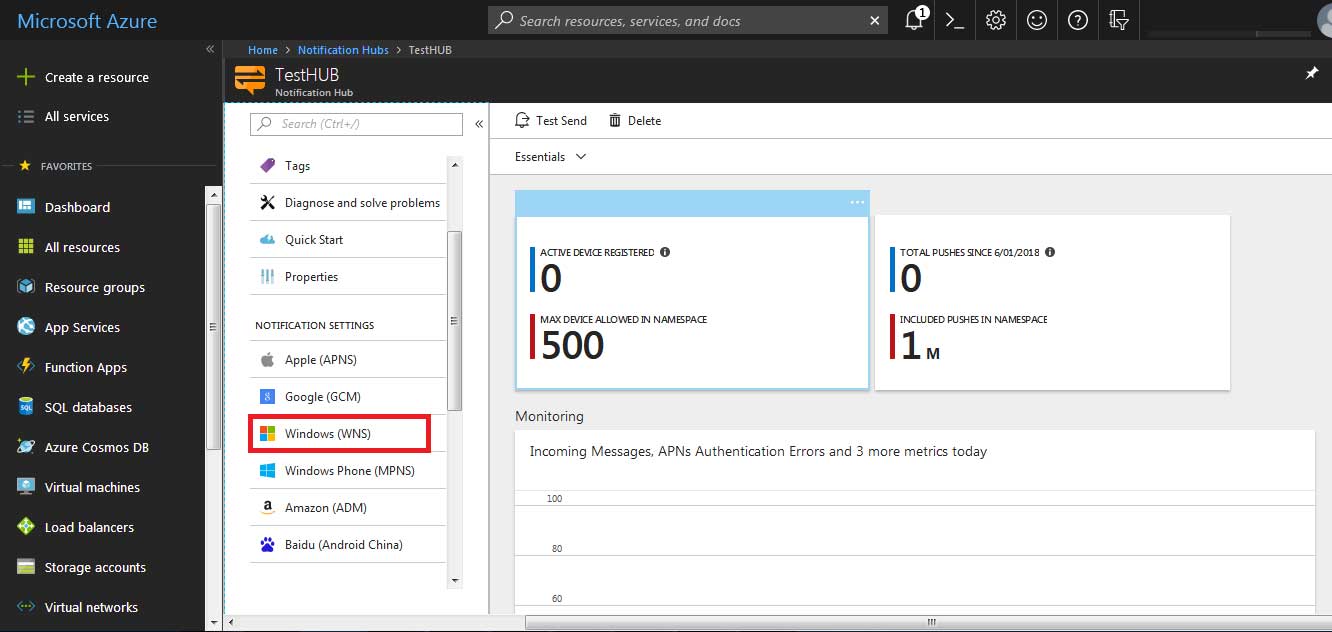
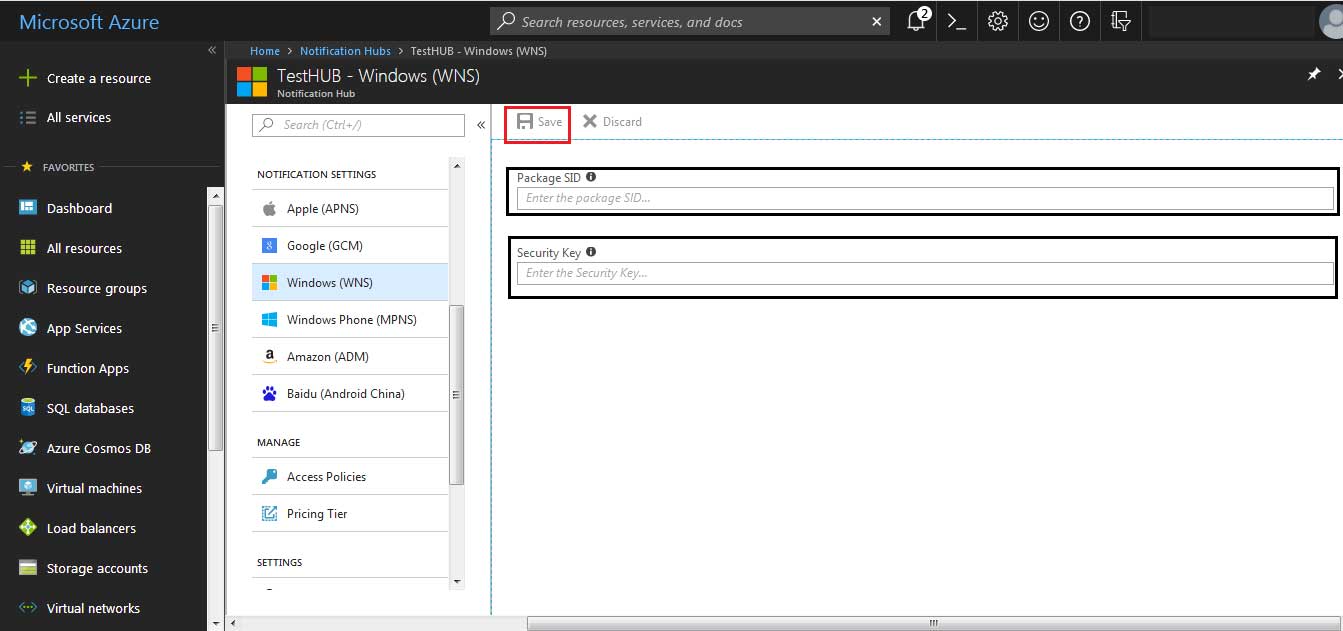
Step 19: Now click on Windows (WNS)
Step 20: Paste the Package SID and Application Secret keys that you have earlier copied in step 8 and 9. Once done, click on Save
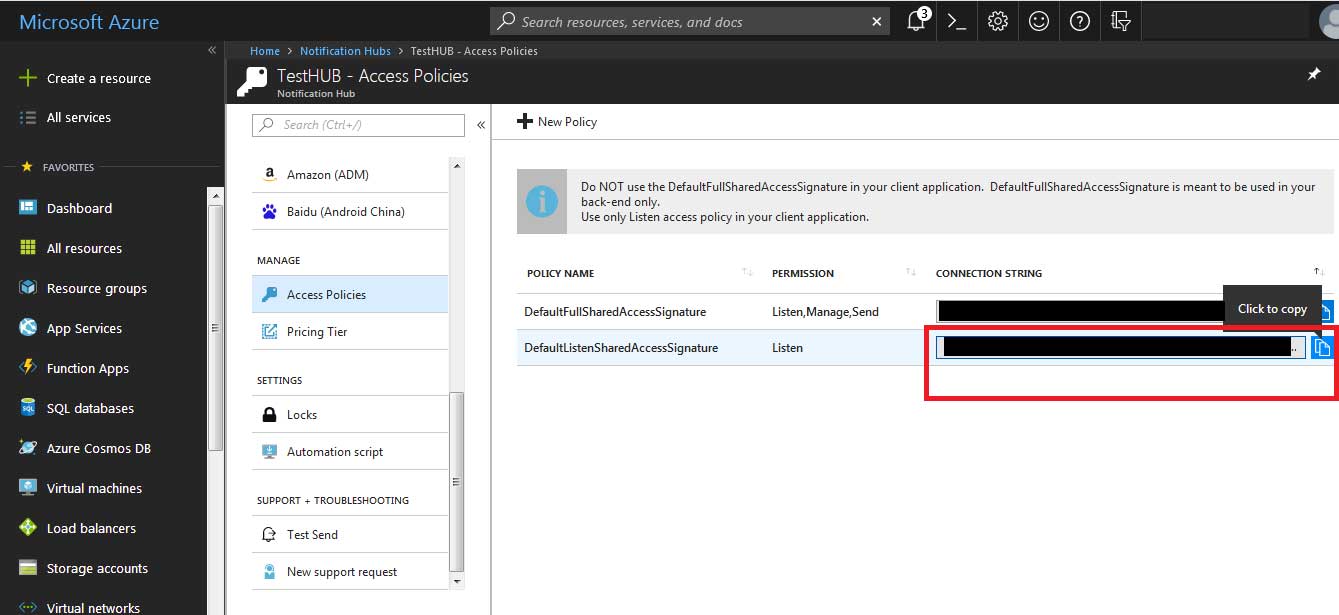
Step 21: Now, click on Access Policies
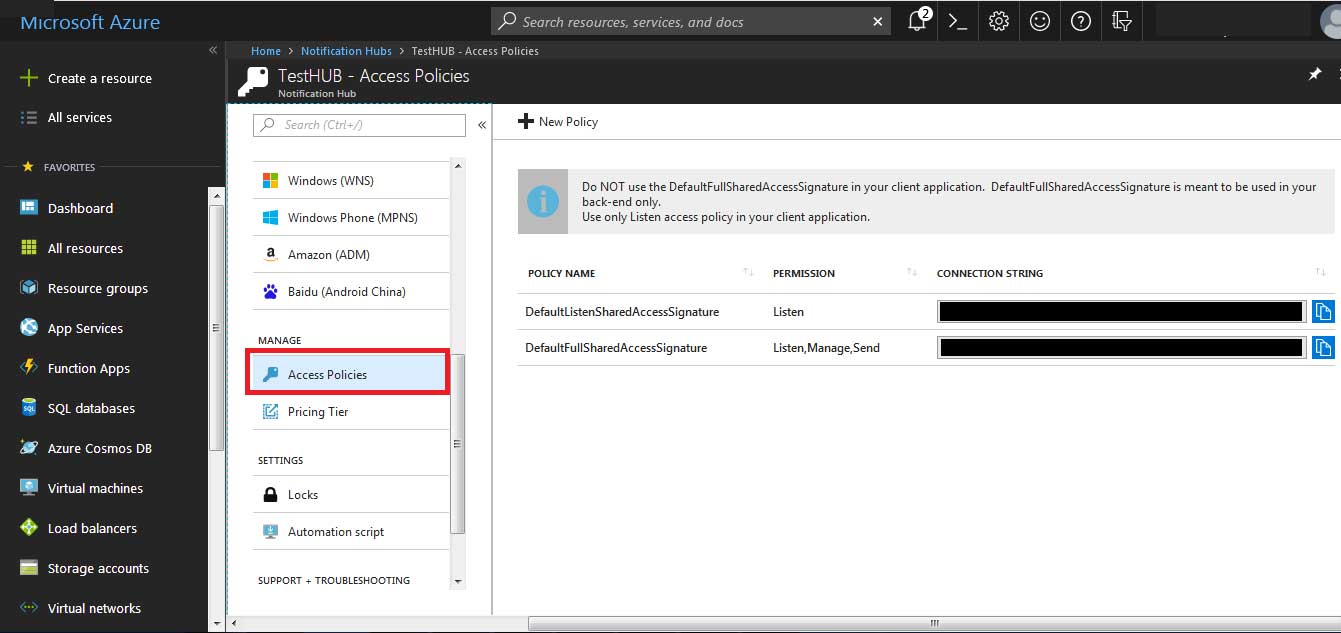
Step 22: This is your Connection String. Copy it
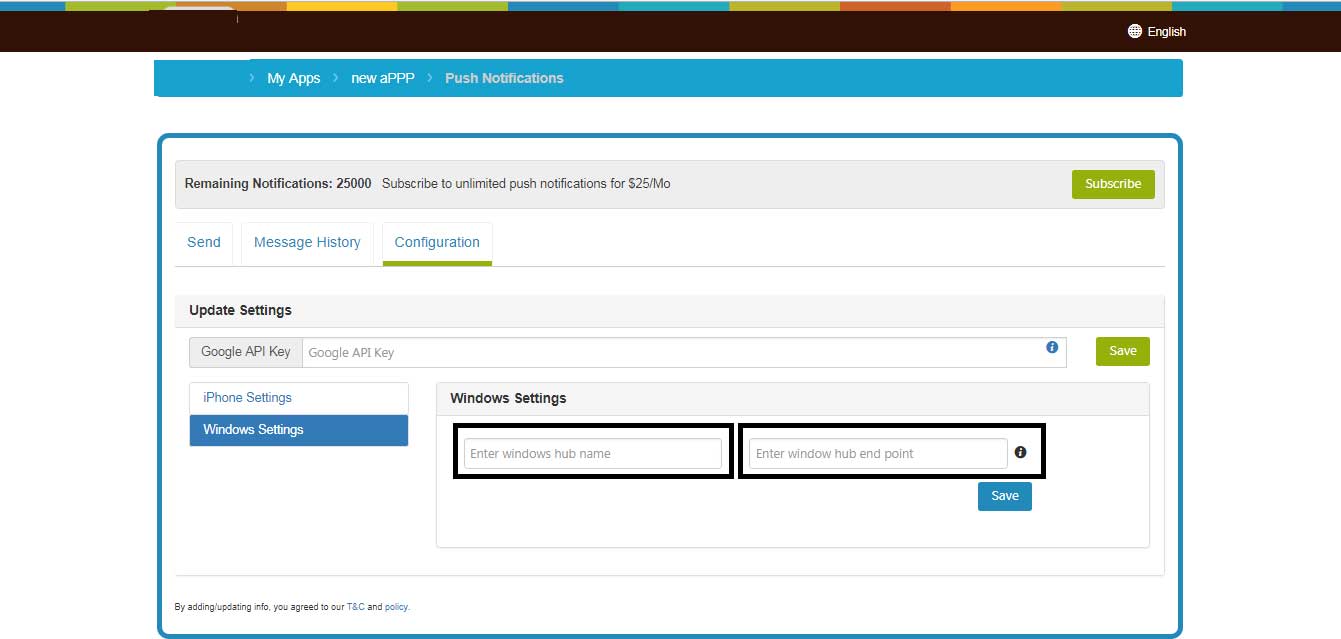
Step 23: Now go to My Apps >> Push Notifications >> Configuration >> Window Settings section. Here you need to enter the Notification Hub name that you have created earlier in Step 17, and paste the Connection String in the Window Hub End Point field.
Share this :
Was this article helpful?
Thanks for your feedback!
Was this article helpful?
Thanks for your feedback!
×